Getting the right JIC fitting size is crucial for a leak-free hydraulic system. Mismatched fittings can lead to costly downtime and safety hazards. This guide will simplify the process, ensuring you can accurately identify and measure JIC fittings every time.
We’ll cover the essential steps and tools needed, from understanding thread types to measuring critical dimensions. With our clear instructions, you’ll gain the confidence to select the correct JIC fittings for your next project, preventing common mistakes.
What are JIC Hydraulic Fittings?
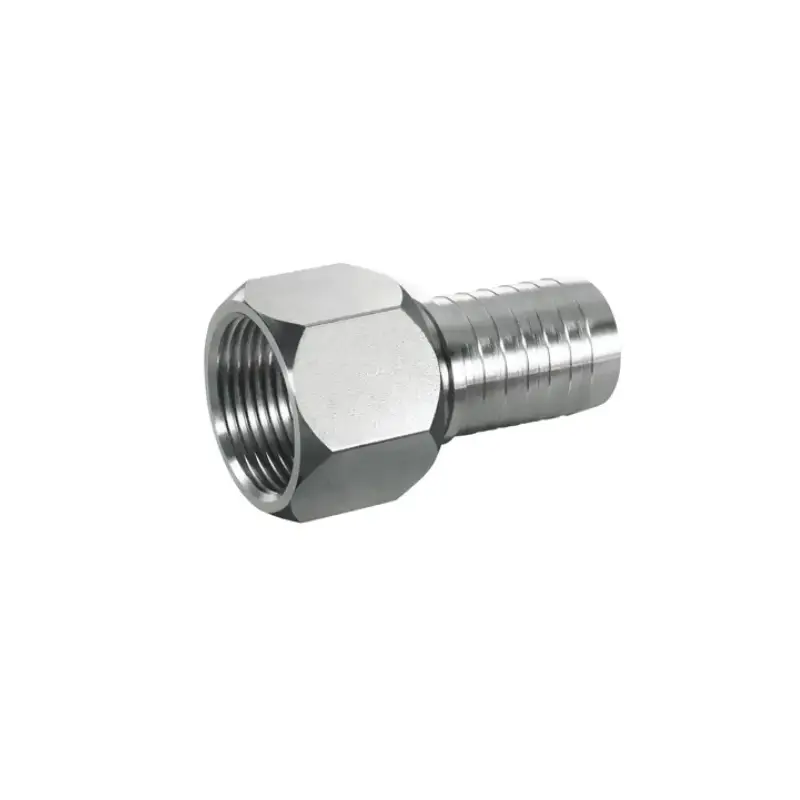
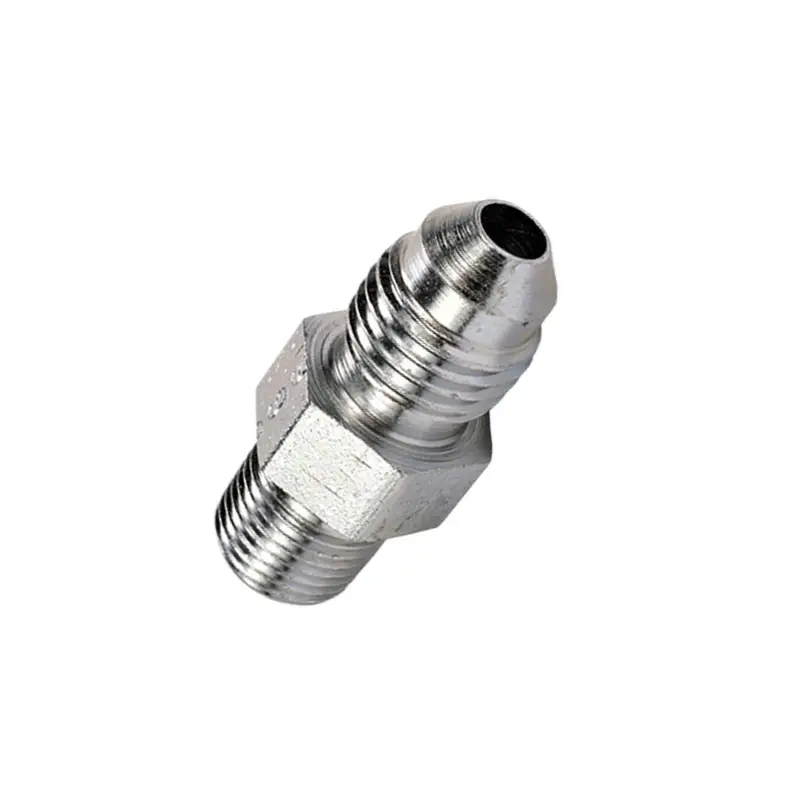
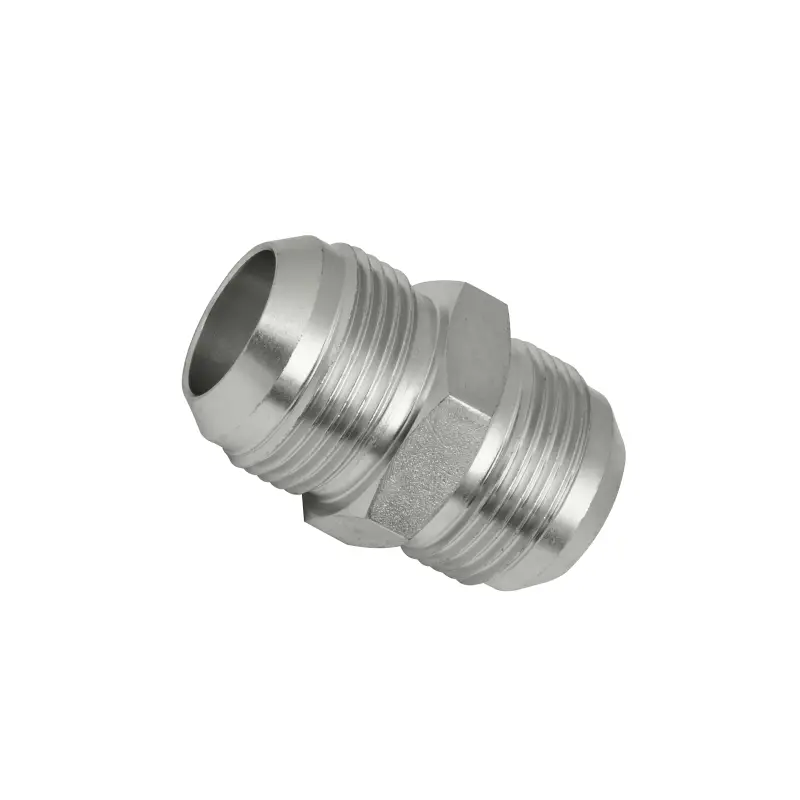
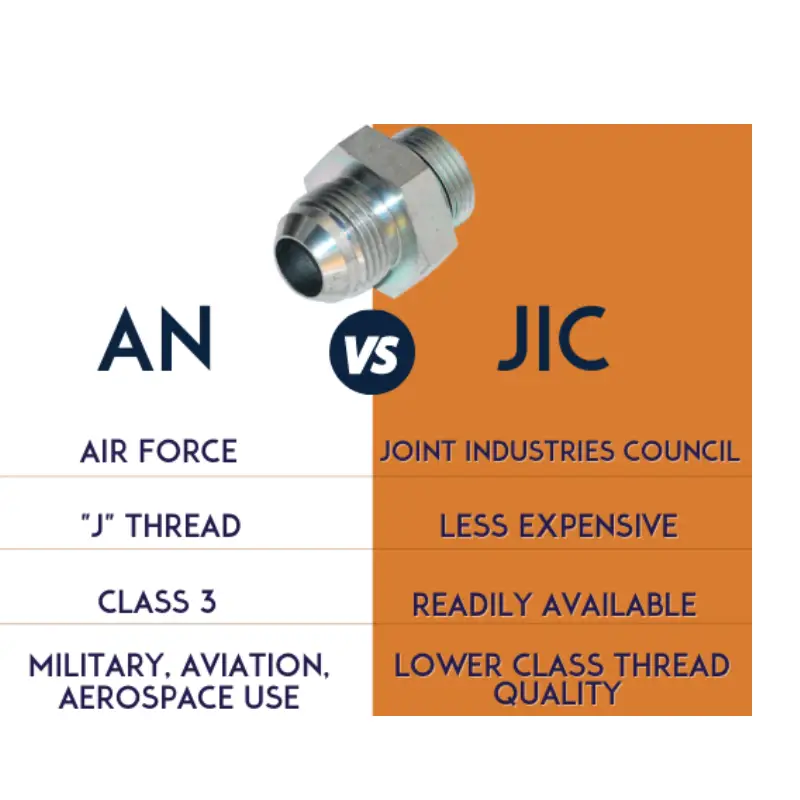
JIC (Joint Industry Council) hydraulic fittings are a widely used type of flare fitting in fluid power systems, defined by SAE J514 and characterized by their distinct 37-degree flare seating surface and parallel threads.
They create a reliable metal-to-metal seal when tightened, making them ideal for high-pressure applications in industries such as automotive, aerospace, and construction. Comprising a body, nut, and sleeve, JIC fittings are valued for their ease of installation, reusability, and versatility, allowing for connections with various hoses and tubes in both imperial and metric sizes.
How to Measure JIC Fittings?
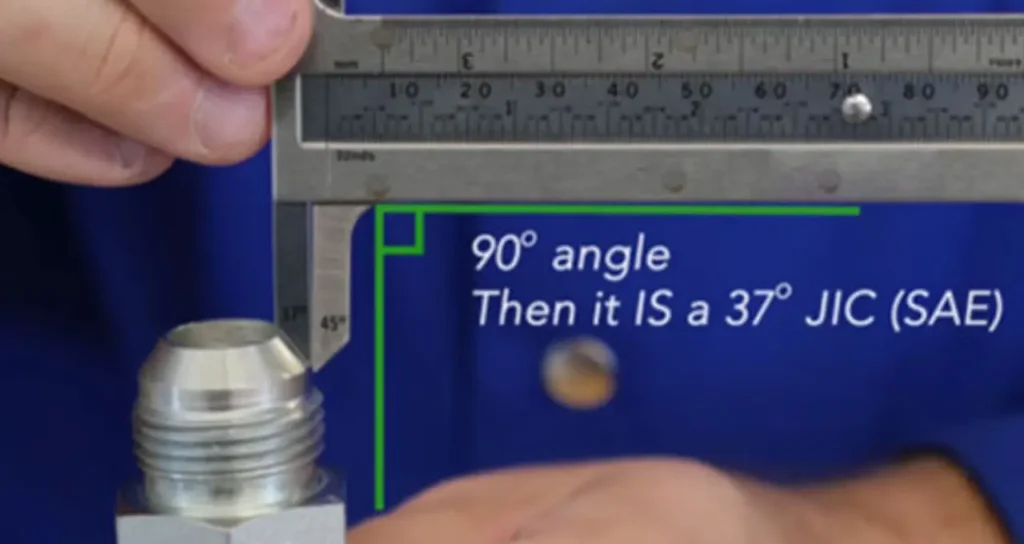
Accurately measuring JIC fittings is crucial for secure, leak-free hydraulic connections. This guide breaks down the process into simple, manageable steps, ensuring you correctly identify and size these common fittings for any application. Precision in measurement prevents costly errors and ensures system reliability.
Step 1: Confirm it’s a JIC Hydraulic Fitting
The first crucial step is to verify you are indeed measuring a JIC fitting. Visually inspect for the characteristic 37-degree flare cone at the end of the fitting. This distinct angled surface is a hallmark of JIC fittings, differentiating them from other types like SAE 45-degree flare or NPT threads.
Confirming the 37-degree flare angle is vital before proceeding with other measurements. Using a flare gauge specifically designed for hydraulic fittings can help you accurately determine this angle. This initial verification prevents misidentification, which could lead to incorrect replacements and system leaks.
Step 2: Measure the Thread Outer Diameter (O.D.)
Once confirmed as JIC, measure the outer diameter of the threads. Use a caliper to precisely measure the thread O.D. at its widest point. This measurement, taken from crest to crest across the threads, is a primary indicator of the fitting’s nominal size.
Accurately measuring the thread O.D. is critical for cross-referencing with standard JIC sizing charts. Ensure the caliper jaws are square to the threads to get a true reading. This dimension helps narrow down the potential fitting size significantly, aiding in correct identification.
Step 3: Determine the Thread Pitch
After measuring the O.D., determine the thread pitch using a thread pitch gauge. Place the various leaves of the gauge against the threads until one perfectly matches the spacing. This identifies the number of threads per inch (TPI), which is essential for proper engagement.
Knowing the thread pitch confirms the specific thread series. Common JIC thread pitches include 18, 16, 14, and 12 threads per inch, corresponding to different nominal sizes. This step, combined with the O.D. measurement, precisely identifies the fitting’s full thread specification.
Step 4: Verify the 37-Degree Flare Angle
Finally, use a 37-degree flare gauge to confirm the internal flare angle of the fitting. Insert the gauge into the flared end; it should sit flush without any gaps or rocking. This ensures compatibility with other JIC components for a proper seal.
This final verification step is paramount for securing a leak-proof metal-to-metal seal, which is the primary function of JIC fittings. A correctly matched flare angle guarantees optimal performance and prevents system failures due to improper connection, ensuring long-term reliability.
How to Identify JIC Fitting Size?
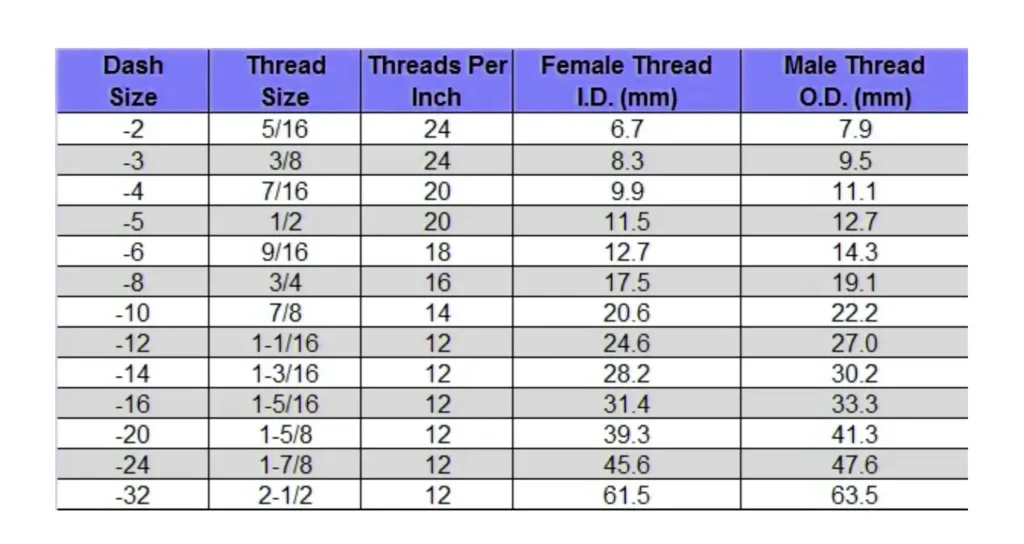
Correctly identifying JIC fitting size is essential for ensuring compatibility and preventing system leaks. This involves a systematic approach, combining accurate physical measurements with cross-referencing against industry standards. Follow these steps to confidently determine the precise size of your JIC fittings.
Step 1: Confirm JIC Identity and Flare Angle
Begin by visually confirming the fitting’s 37-degree flare seat, characteristic of JIC fittings. Use a 37-degree flare gauge to verify this angle. This critical step ensures you are dealing with a true JIC fitting, as other similar-looking fittings have different flare angles that are not interchangeable.
A precise flare angle confirmation is fundamental because JIC fittings seal metal-to-metal at this specific angle. Mismatched flare angles will prevent a proper seal, leading to leaks even if other dimensions appear correct. This initial check prevents errors in subsequent identification steps.
Step 2: Measure Male Thread Outer Diameter (O.D.)
For male JIC fittings, accurately measure the outer diameter (O.D.) of the threads using a caliper. Measure across the crests of the threads at their widest point. This O.D. measurement is a primary indicator that will guide you to the correct nominal size when cross-referencing with charts.
Consistency in your measurement technique ensures reliable results. Take multiple readings if necessary to confirm accuracy. This thread O.D. value will be a key piece of information you need to match with standard JIC sizing specifications in the next steps, narrowing down possibilities.
Step 3: Determine Thread Pitch
Next, determine the thread pitch by using a thread pitch gauge. Place the gauge leaves against the threads until you find the blade that fits perfectly into the thread grooves. This identifies the number of threads per inch (TPI), a crucial component of the fitting’s complete thread specification.
Thread pitch is vital for proper thread engagement and preventing cross-threading. Incorrect pitch can damage both the male and female threads. Combine the O.D. and TPI measurements to form the thread specification, like “7/16-20 UNF,” which is a standard JIC designation.
Step 4: Consult a JIC Sizing Chart
With the thread O.D. and pitch identified, consult a standard JIC sizing chart, often found online or in hydraulic manuals. Locate the thread specification (e.g., 7/16-20 UNF) on the chart. The chart will then provide the corresponding JIC dash size for that fitting.
JIC sizing charts correlate specific thread dimensions to a dash size, which represents the tube’s outer diameter in sixteenths of an inch (e.g., -4 dash size means a 4/16″ or 1/4″ tube). This final step confirms the fitting’s exact size and compatibility.
Considerations about JIC Fitting Measurements
When measuring JIC fittings, precise attention to detail is paramount. Even slight inaccuracies can lead to misidentification, resulting in ill-fitting connections that are prone to leaks and system failures. Always approach measurements systematically, ensuring your environment and tools contribute to the most accurate readings possible.
Understanding the specific characteristics of JIC fittings and the potential pitfalls during measurement will save you time and prevent costly mistakes. It’s not just about taking numbers, but about interpreting them correctly within the context of JIC standards for reliable hydraulic performance.
- Use the Right Tools: Always employ a caliper for thread diameter, a thread pitch gauge for TPI, and crucially, a 37-degree flare gauge. Using specialized tools ensures accuracy, as relying solely on visual inspection or improper tools can lead to significant measurement errors and ultimately, fitting incompatibility.
- Ensure Cleanliness: Before measuring, thoroughly clean the fitting. Dirt, rust, or debris can obscure threads and the flare seating surface, leading to inaccurate readings. A clean fitting allows your measurement tools to sit flush and provide a true dimension, critical for proper identification.
- Distinguish from Similar Fittings: Be cautious not to confuse JIC fittings with similar-looking types, such as SAE 45-degree flare fittings. Although both are flare fittings, their angles differ significantly (37° vs. 45°). Using a specific flare gauge will help avoid this common and critical misidentification error.
- Consult Our Reference Charts: Always cross-reference your measurements with standard JIC sizing charts (e.g., SAE J514 tables). These charts provide the nominal sizes corresponding to your measured thread O.D. and pitch. This step is essential for confirming your findings and ordering the correct part.
- Inspect for Damage: Before measuring, visually inspect the fitting for any damage like deformed threads, burrs, or compromised flare surfaces. Damaged areas will yield incorrect measurements and prevent a proper seal, even if the nominal size is correct. Replace damaged fittings rather than attempting to measure them.
Conclusion
By mastering JIC fitting measurement, you’ve gained a valuable skill for any hydraulic project. Accurate identification is key to system integrity and preventing costly leaks. Always double-check your measurements for a perfect fit.
With these methods, you can confidently select the right JIC fittings, ensuring optimal performance and safety. Precision in every connection makes a real difference in the longevity and efficiency of your hydraulic systems.
For reliable and accurately sized JIC fittings, consider where to get wholesale from reputable suppliers. Investing in quality parts from a trusted source will safeguard your projects and provide lasting peace of mind.

