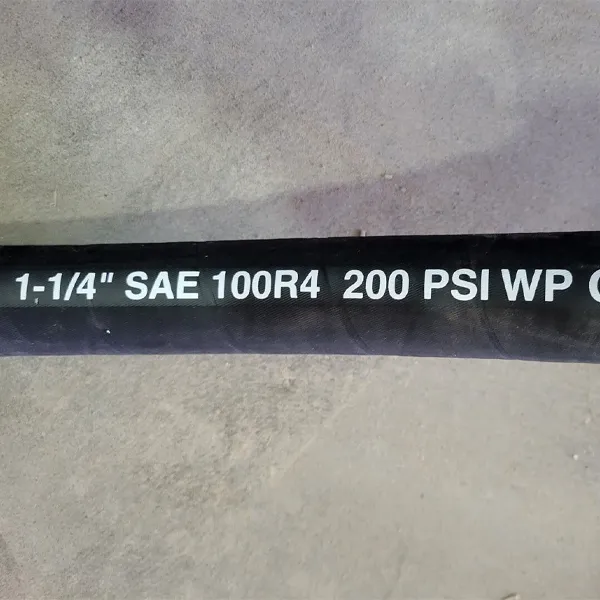
The world of plumbing can be intimidating, especially when it comes to those threaded connections. NPT, or National Pipe Thread, is a common standard in North America for pipes and fittings. But unlike standard bolt threads, NPT throws a curveball – the actual diameter of the threads doesn’t directly correspond to the pipe size.
This guide will walk you through the proper techniques for measuring NPT pipe fittings, keeping your projects leak-free and frustration-free.
What is NPT Fitting
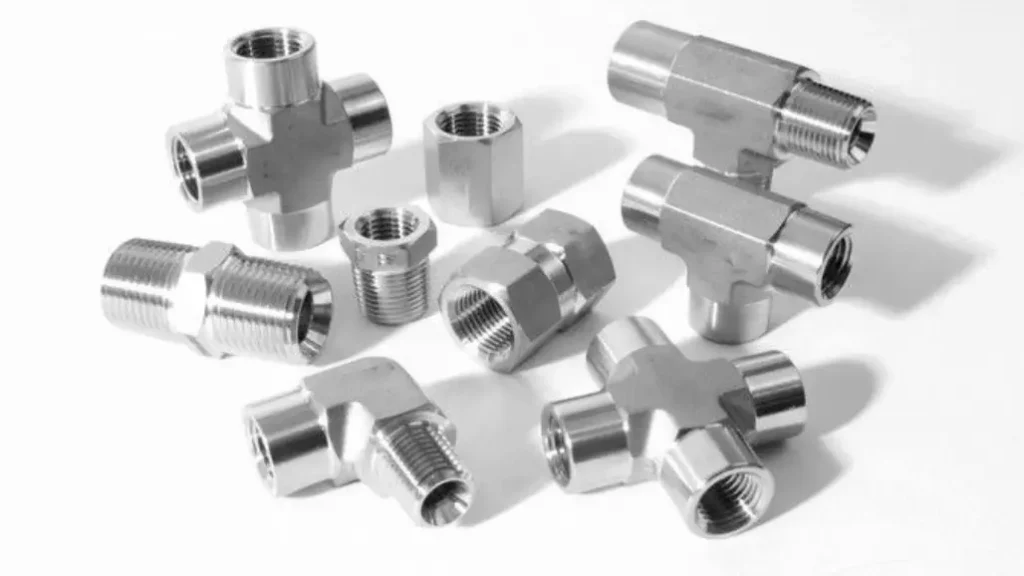
NPT stands for National Pipe Tapered. It’s a standardized system (ANSI B1.20.1) commonly used in North America for threaded connections between pipes and fittings.
NPT fittings can be used with any type of pipe thread. False
NPT (National Pipe Thread) fittings are specifically designed for tapered pipe threads. Using NPT fittings with other thread types, such as straight pipe threads (BSP) or metric threads, can lead to leaks and potential joint failure. These mismatched threads may not create a proper seal, compromising the integrity of the connection. NPT fittings have a specific thread angle and sealant (often pipe dope or thread tape) to ensure a secure and leak-proof connection.
NPT fittings are designed for tapered pipe threads. True
NPT (National Pipe Taper) fittings are specifically designed for use with tapered pipe threads. The taper creates a tight seal when the male and female threads are joined, ensuring a leak-proof connection for fluid or gas lines.
Here are the key characteristics of NPT fittings:
- Tapered Threads: Unlike straight threads, NPT threads get narrower towards the base of the fitting. This taper creates a tighter seal as the fitting is screwed in.
- Nominal Pipe Size (NPS): This refers to the designated size of the pipe, even though it doesn’t directly correspond to the actual diameter. For example, a 1″ NPT fitting won’t have an outside diameter of exactly 1 inch.
- Sealant Required: NPT threads rely on a sealant, like pipe dope or Teflon tape, to ensure a leak-proof connection.
By understanding these aspects, you can effectively measure and use NPT fittings in your plumbing projects.
What Are NPT Threads
NPT threads, or National Pipe Tapered threads, are a specific type of thread used in piping systems throughout North America. They are defined by the American National Standard for Tapered Pipe Threads (ANSI/ASME B1.20.1) and offer several advantages:
- Leak-proof Sealing: The key feature of NPT threads is their tapered design. As the male and female threads are screwed together, the taper creates a tighter seal, helping to prevent leaks, especially when used with appropriate thread sealant like Teflon tape or pipe dope.
- Strong Connections: The tapered threads also provide a strong mechanical connection between pipes and fittings. This is crucial for withstanding pressure in plumbing and other fluid flow applications.
- Standardized Design: NPT threads are a standardized design, ensuring compatibility between pipes and fittings from different manufacturers as long as they adhere to the same size designation. This simplifies assembly and replacement of parts.
How to Measure NPT Fittings
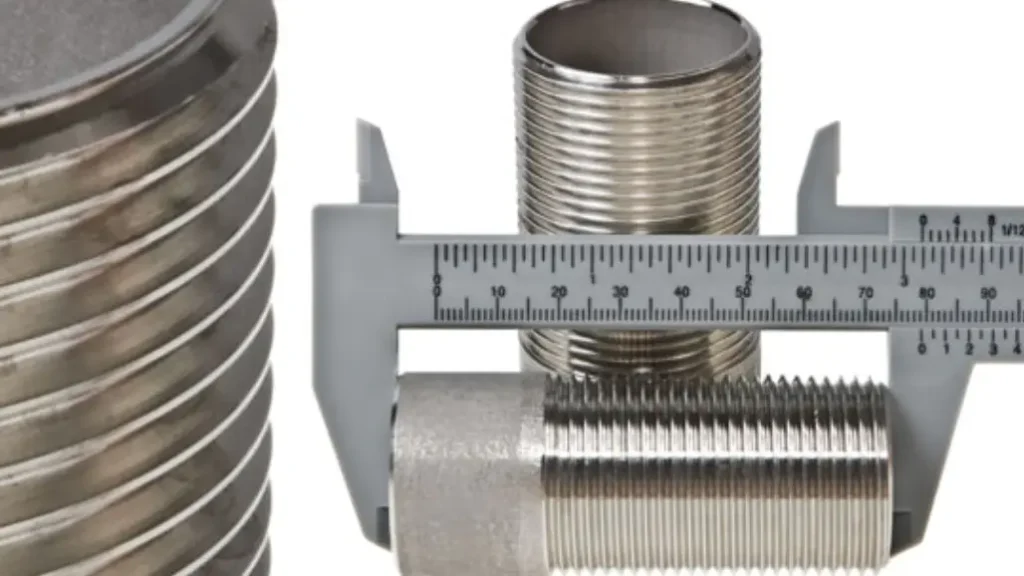
How to measure NPT pipe fittings?
Conquering NPT fittings starts with proper measurement. Here’s a detailed breakdown of the process, ensuring you get the right size fitting for a leak-free connection:
Tools You’ll Need:
- Caliper: A digital caliper provides the most precise measurement, but a good quality vernier caliper works too.
- Thread Gauge (Optional): This tool helps identify the number of threads per inch (TPI) on the fitting, offering an extra layer of verification.
Step 1: Identify the Fitting Type
Before taking measurements, determine if you’re dealing with a:
- Male NPT Fitting: This has a threaded protrusion. Measurements are taken on the threads themselves.
- Female NPT Fitting: This has a threaded hole. Measurements are taken on the major diameter (top diameter) of the threads.
Step 2: Measure the Outside Diameter (OD)
- Male NPT Fitting: Open the caliper jaws and carefully place them on the outside diameter of the threads, near the base. Avoid grabbing the very tip, which can be inaccurate. Squeeze gently for a firm contact with the threads.
- Female NPT Fitting: Insert the caliper jaws into the fitting and measure across the peaks of the threads (major diameter).
Important Note: Due to the taper, the OD won’t directly translate to the NPT size. We’ll use this measurement in the next step.
Step 3: Subtract for the Correct Size
Here’s the key trick! To get the approximate NPT size, subtract ¼ inch from your outside diameter measurement. This accounts for the thickness of the pipe wall on either side of the threads.
For example:
If your OD measurement is ¾ inch, subtracting ¼ inch gives you ½ inch. This would indicate a ½ inch NPT fitting (remember, the actual diameter is slightly less).
Step 4: Verification (Optional)
While the subtraction method is reliable, a thread gauge can add confidence. Match the teeth of the gauge to the threads of the fitting and see which number aligns perfectly. This will tell you the TPI, which you can then cross-reference with an NPT sizing chart for confirmation.
NPT Fitting Size Chart
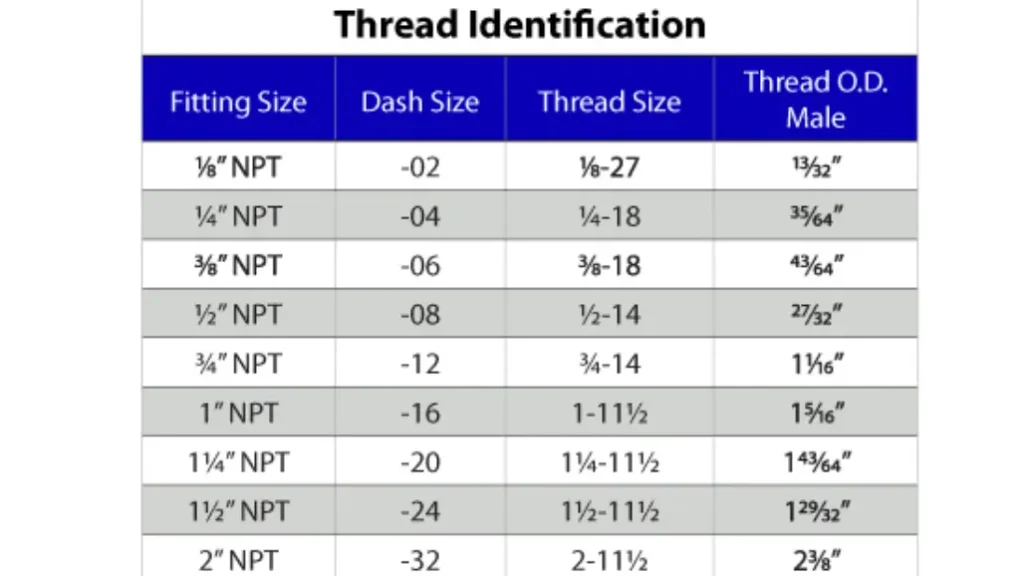
NPT fitting size charts are your secret weapon for navigating the world of National Pipe Thread (NPT) fittings. These charts act as a decoder ring, translating the seemingly cryptic “Nominal Pipe Size” (NPS) designation into actual measurements for a perfect fit. Here’s a breakdown of what you’ll find in these charts and how to use them effectively:
An NPT fitting size chart typically includes several key columns:
- Nominal Pipe Size (NPS): This is the standard designation for the pipe size, often displayed in inches (e.g., 1/2″, 1″, 2″). However, it’s important to remember that NPS doesn’t directly correspond to the actual diameter.
- Outside Diameter (OD): This column shows the approximate outside diameter of the threads, measured at the crest (peaks) for male threads and the major diameter (top diameter) for female threads.
- Number of Threads per Inch (TPI): This indicates how many threads are present in one linear inch along the length of the fitting.
Important Note: Due to the NPT thread’s tapered design, the actual diameter of the pipe is slightly smaller than the listed OD.
NPT Measurement Chart
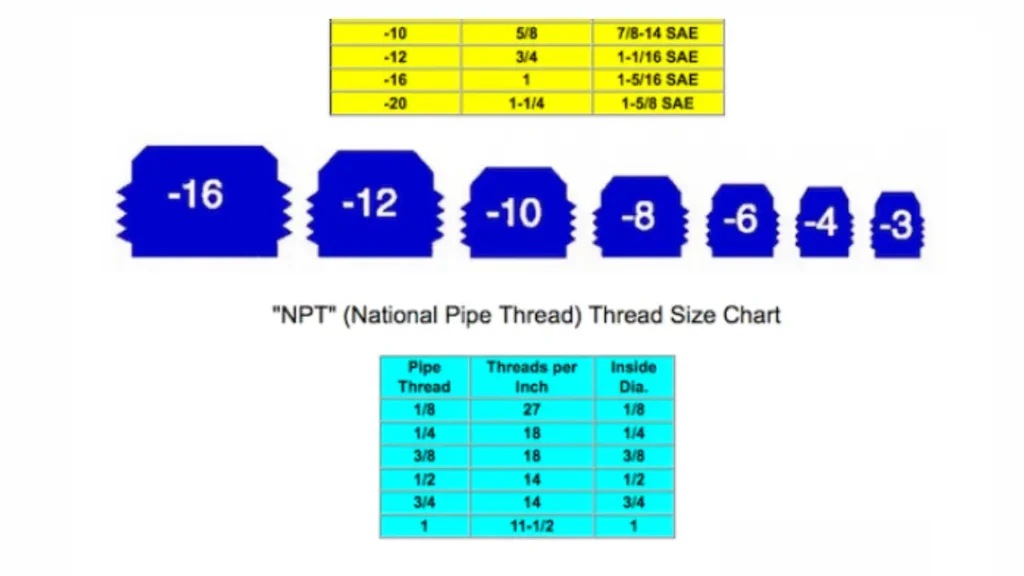
We use NPT measurement charts to understand the dimensions of National Pipe Taper (NPT) threads. These charts provide crucial information like:
- Nominal pipe size: The standard size designation.
- Actual outside diameter: The actual pipe diameter.
- Threads per inch: The number of threads along the pipe’s length.
- Taper: The angle at which the threads are cut.
These charts help us:
- Select the correct fittings: Ensure proper thread matching for a secure seal.
- Manufacture and machine: Provide precise dimensions for creating NPT threads.
- Troubleshoot leaks: Identify potential issues with thread engagement.
By referring to the specific chart, we can locate the desired pipe size and verify its dimensions, ensuring compatibility and proper installation.
Use the NPT Measurement Chart
Here’s how you can leverage an NPT fitting size chart for successful project completion:
- Identify the Fitting Type: Determine if you’re dealing with a male or female NPT fitting. This will guide you to the correct measurement column (OD)
- Measure the Outside Diameter (Optional): While not strictly necessary for using the chart, you can measure the OD of your fitting using a caliper (as described earlier).
- Find Your Match: Locate the NPS that corresponds to your project requirements. Then, cross-reference this with the OD column to get an idea of the expected diameter for that size.
- Verify with Caliper Measurement (Optional): If you measured the OD of your fitting, compare it to the value in the chart for the chosen NPS. This can provide an extra layer of confidence.
- Consider Thread Count (Optional): If you have a thread gauge, you can verify the TPI listed in the chart by matching it with the threads on your fitting.
Remember: NPT sizing charts are valuable, but slight variations might exist depending on the NPT chart manufacturer. Please feel free to contact us at any time if you want the updated how to measure npt thread size.
How to Measure NPT Thread Size
Measuring NPT Thread Size in the following:
NPT (National Pipe Taper) threads are tapered, meaning they get slightly smaller in diameter as they get longer. This taper is crucial for creating a tight seal when the threads are joined. To accurately measure NPT thread size, you’ll need a few tools and follow these steps:
Tools Needed:
- Caliper: A caliper is essential for measuring the outside diameter of the threads.
- Thread pitch gauge: This tool helps determine the number of threads per inch.
- NPT Measurement Chart: This chart provides standard dimensions for NPT threads of various sizes.
Steps:
- Measure the Outside Diameter (OD):
- Use the caliper to measure the outside diameter of the thread at its largest point.
- Note: Due to the taper, this measurement will be slightly larger than the nominal pipe size.
- Determine the Thread Pitch:
- Use the thread pitch gauge to find the number of threads per inch. Match the teeth of the gauge to the threads on the pipe or fitting. The teeth that align perfectly with the threads indicate the thread pitch.
- Consult the NPT Measurement Chart:
- Refer to the NPT measurement chart.
- Find the row corresponding to the nominal pipe size you suspect.
- Compare the measured outside diameter and thread pitch to the values on the chart.
- If the measurements match, you’ve identified the correct NPT thread size.
Important Considerations:
- Taper: Remember that NPT threads have a standard taper of 3/4 inch per foot.
- Accuracy: Ensure accurate measurements using the caliper and thread pitch gauge.
- Reference Charts: Always use a reliable NPT measurement chart for accurate identification.
By following these steps, you can confidently measure NPT thread size and ensure proper fit and function.
Where to Find NPT Sizing Charts
These charts are readily available online through plumbing resource websites or manufacturer websites. Some plumbing reference guides might also include them. Here are some tips for finding reliable charts:
- Look for charts from reputable plumbing organizations or established manufacturers.
- Ensure the chart specifies that it applies to NPT threads (ANSI B1.20.1 standard).
- Double-check the chart for any specific notes or disclaimers regarding size variations.
Beyond the Chart:
While NPT sizing charts are a great starting point, remember these additional points:
- Thread Engagement: For a secure connection, ensure enough threads engage. Most NPT threads require at least 5-6 full threads for optimal sealing.
- Always Use Sealant: Apply an appropriate sealant like Teflon tape or pipe dope on the male threads before screwing in the fitting.
By understanding NPT fitting size charts and using them in conjunction with proper measurement techniques, you’ll be well-equipped to tackle your plumbing projects with confidence. Remember, a perfect fit translates to leak-free connections and a successful project outcome.
Bonus Tips:
- Thread Engagement: Ensure proper thread engagement for a secure connection. Most NPT threads require at least 5-6 full threads for optimal sealing.
- Thread Condition: Inspect the threads for damage or corrosion. Damaged threads can compromise the seal and lead to leaks. Replace the fitting if necessary.
- Always Use Sealant: Apply an appropriate pipe sealant, like Teflon tape or pipe dope, on the male threads before screwing in the fitting.
By following these steps and keeping these tips in mind, you’ll be well on your way to mastering NPT fitting measurements! Remember, proper measurement ensures a secure and leak-free connection, saving you time and frustration in the long run.
Conclusion
This guide has equipped you with the essential steps for measuring NPT fittings, from understanding the concept of Nominal Pipe Size (NPS) to utilizing NPT sizing charts effectively. Remember, proper measurement ensures you get the perfect fit for a leak-free connection, saving you time and frustration in the long run.
Kingdaflex offers a wide selection of high-quality NPT fittings at competitive prices. Get a quote today and experience the confidence of knowing you’re getting the right fittings for a successful and leak-proof project. Visit our website or contact us directly for a quote – we’re here to help you navigate the world of NPT fittings with ease!


