Hydraulic systems are the lifeblood of numerous machines, from towering construction equipment to the workhorses of agriculture. But even the toughest machines have vulnerable points, and hydraulic hose fittings are no exception. These fittings are essential for ensuring proper fluid flow and preventing leaks, but wear and tear, pressure spikes, or even accidental damage can take their toll.
So, whether you’re a seasoned mechanic or a DIY enthusiast tackling a project, this guide will equip you with the knowledge and confidence to replace your hydraulic hose fittings like a pro.
Let’s get started and keep your hydraulic systems running smoothly!
How to Replace Hydraulic Hose Fittings

Replacing hydraulic hose fittings is a common maintenance task, essential for restoring the integrity and performance of hydraulic systems. Whether due to wear, damage, or system modification, a correct replacement process is crucial to prevent leaks, ensure safety, and maintain operational efficiency. This guide will walk you through the necessary steps for a successful and secure fitting replacement.
Tools Needed
Effectively replacing hydraulic hose fittings requires a specific set of tools to ensure precision, safety, and a leak-free connection. Having the right equipment on hand streamlines the process and minimizes the risk of damaging components or compromising the hydraulic system’s integrity.
- Wrenches (Open-end, Adjustable, or Hydraulic Fitting Wrenches): Essential for loosening and tightening fittings. Hydraulic fitting wrenches are preferred as they grip more surfaces, reducing the risk of rounding off hexes.
- Hose Cutters: Specialized cutters designed for hydraulic hoses ensure clean, square cuts, which are crucial for proper fitting engagement and sealing.
- Crimping Machine (for crimp-style fittings): If using crimp-style fittings, a hydraulic crimping machine with the correct dies is indispensable for securing the fitting to the hose according to manufacturer specifications.
- Skiving Tools: Used to precisely remove the outer cover or inner tube of a hose for specific fitting types, exposing the reinforcement layers.
- Torque Wrench: Crucial for tightening fittings to the manufacturer’s specified torque, preventing both overtightening (which can damage threads) and undertightening (which leads to leaks).
- Thread Sealant or PTFE Tape: Applied to male pipe threads to ensure a leak-proof seal between the fitting and the component port.
- Cleaning Supplies (rags, wire brush, compressed air): Used to clean hose ends, fittings, and component ports, removing dirt and debris that could contaminate the system or compromise the seal.
- Drain Pan/Fluid Containment: Essential for catching hydraulic fluid that may leak during fitting removal or installation, preventing spills and environmental contamination.
- Personal Protective Equipment (PPE): Safety glasses, chemical-resistant gloves, and sturdy work boots are vital for protecting against high-pressure fluid, chemicals, and dropped tools.
Step 1: Prioritize Safety and Depressurize the System
Before attempting any work on a hydraulic system, safety must be your absolute priority. Begin by completely shutting down the machinery and ensuring the hydraulic system is fully depressurized. This often involves cycling cylinders or opening bleed valves to relieve any trapped pressure. Confirm that the system is locked out or tagged out to prevent accidental re-energization during the repair process, which could lead to severe injury from high-pressure fluid or unexpected machinery movement.
Always wear appropriate personal protective equipment (PPE), including safety glasses, chemical-resistant gloves, and sturdy footwear. Have spill containment materials readily available, as hydraulic fluid can be under pressure and may spray when connections are broken, potentially causing slips or environmental contamination. A clean work area also minimizes the risk of dirt entering the hydraulic system.
Step 2: Identify and Remove the Damaged Fitting
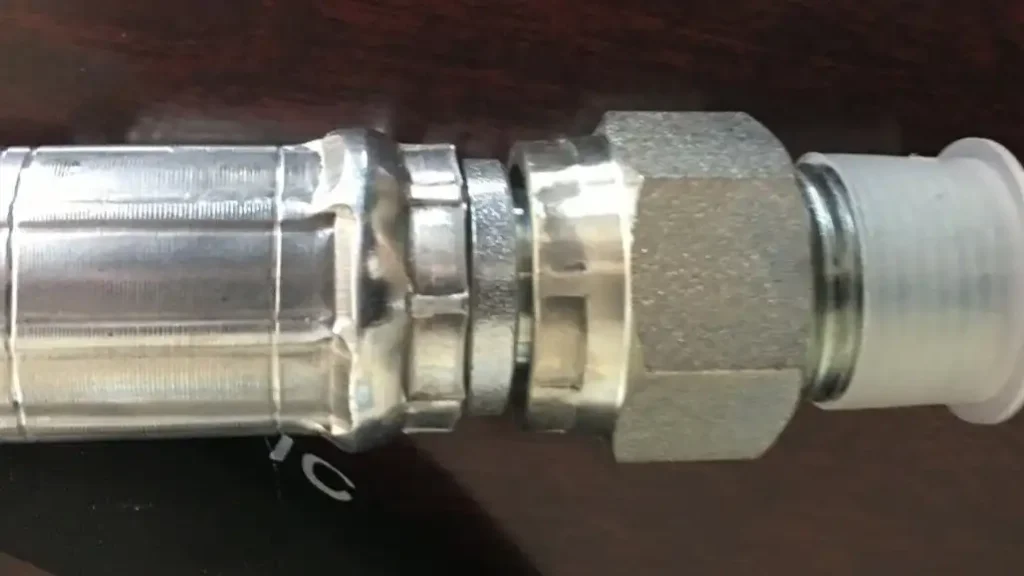
Carefully identify the fitting that needs replacement. Observe its type, size, and thread style to ensure you acquire an exact replacement. If the hose itself is also damaged, you will likely need to replace the entire hose assembly, including new fittings. For fittings that are difficult to access, consider using a mirror or a smartphone camera to get a better view.
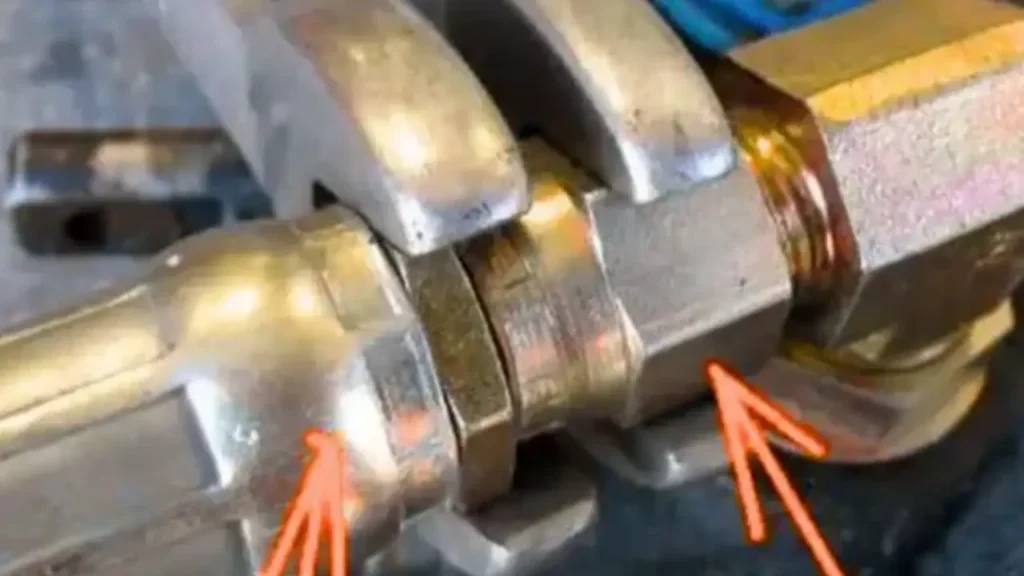
To remove the damaged fitting, use the appropriate wrenches. For two-piece fittings, use one wrench to hold the stationary part (e.g., the component port or the hose collar) and another to loosen the rotating part. Turn counter-clockwise. For crimped fittings, the entire hose assembly will need to be replaced, as crimped fittings are not designed for reusability. Be prepared for some hydraulic fluid to leak during removal; have a drain pan ready to catch it.
Step 3: Prepare the Hose (if applicable)
If you are only replacing the fitting and reusing the hose (applicable only for reusable fittings), carefully inspect the end of the hose for any damage or wear. Trim off any frayed or damaged sections of the hose using a specialized hydraulic hose cutter to ensure a clean, square cut. A precise cut is vital for the new fitting to seal correctly and prevent leaks.
For certain types of reusable fittings, skiving (removing a portion of the hose’s outer cover or inner tube) might be necessary to expose the reinforcement layer. Always consult the fitting manufacturer’s instructions for the exact skiving dimensions and technique. Incorrect skiving can compromise the integrity of the hose-to-fitting connection, leading to premature failure.
Step 4: Install the New Fitting onto the Hose
Before installing the new fitting, ensure both the fitting and the hose end are thoroughly clean and free from any contaminants. For reusable fittings, apply a compatible hydraulic fluid or assembly lubricant to the threads of the fitting and the inside of the hose to ease installation and prevent damage to the hose’s inner tube. Carefully thread the fitting onto the hose, ensuring it goes on straight to avoid cross-threading.
For crimp-style fittings (when installing a new hose assembly), this step involves using a crimping machine. It is crucial to follow the fitting manufacturer’s crimping specifications precisely, including the correct crimping die size and crimp diameter. An improper crimp can result in a weak connection that is prone to leaks or a fitting that damages the hose, leading to early failure. Always perform a visual inspection of the crimped fitting to confirm a symmetrical and secure attachment.
Step 5: Connect the Hose Assembly to the Component
Before making the final connection, meticulously clean the threads on both the new fitting and the component port, removing any old thread sealant or debris. If required, apply a suitable thread sealant (e.g., PTFE tape or liquid pipe sealant) to the male threads of the fitting. Apply just enough sealant to cover the threads; excessive amounts can break off and contaminate the hydraulic system.
Carefully hand-thread the hose assembly onto the component port to ensure proper alignment and prevent cross-threading. Once finger-tight, use the appropriate wrenches to tighten the connection to the manufacturer’s recommended torque specifications. Using a torque wrench is highly recommended to avoid overtightening (which can damage threads and fittings) or undertightening (which can cause leaks).
Step 6: Final Inspection and System Testing
After the new fitting is installed, conduct a thorough visual inspection of all connections. Check for proper seating, alignment, and any signs of damage. Ensure the hose routing is correct, avoiding sharp bends, abrasive surfaces, or proximity to heat sources. Incorrect routing can lead to premature hose wear and failure.
Slowly and carefully pressurize the hydraulic system, monitoring all newly installed connections for any signs of leaks. Small leaks can often be addressed by slightly tightening the fitting, but persistent leaks may indicate an improperly installed fitting or damaged threads, requiring disassembly and re-installation. A leak-free system is essential for safety, efficiency, and the longevity of all hydraulic components.
How to Remove Hydraulic Fittings?

Removing hydraulic fittings, while seemingly straightforward, requires careful attention to safety and proper technique to prevent injury and damage to components. Whether for replacement, repair, or system modification, understanding the correct procedure ensures a smooth and effective process. This guide outlines the essential steps to safely and efficiently remove hydraulic fittings.
Step 1: Prioritize Safety and Depressurize the System
Before attempting to remove any hydraulic fitting, the absolute top priority is safety. Always begin by completely shutting down the hydraulic system and ensuring it is fully depressurized. This involves relieving any stored pressure in accumulators, cylinders, and lines, often by cycling control valves or opening bleed points.
Verify that the machinery is locked out or tagged out to prevent accidental activation during the removal process, as unexpected pressure or movement can cause severe injury. Wear appropriate personal protective equipment (PPE), including safety glasses, chemical-resistant gloves, and sturdy footwear, and have spill containment materials ready for any escaping hydraulic fluid.
Step 2: Prepare the Work Area
Once the system is safely depressurized, prepare the immediate work area around the fitting to be removed. Use a wire brush or rag to clean any dirt, grease, or debris from the fitting and surrounding threads.
This not only provides a better grip for your wrenches but also prevents contaminants from entering the hydraulic system once the connection is broken. Position a drain pan or absorbent pads directly underneath the fitting to catch any residual hydraulic fluid that will inevitably leak out when the connection is loosened.
Step 3: Select the Correct Tools
Having the right tools is crucial for successful and damage-free removal. You will typically need a set of open-end wrenches, adjustable wrenches, or specialized hydraulic fitting wrenches designed to grip multiple sides of the fitting to prevent rounding.
For two-piece fittings, you’ll generally need two wrenches: one to hold the stationary part (like a port or manifold) and another to turn the fitting itself. Ensure your wrenches are the correct size and in good condition to provide maximum grip and leverage.
Step 4: Loosen the Fitting
With the wrenches properly positioned, apply steady, firm pressure in the counter-clockwise direction to loosen the fitting. For connections where a fitting threads into a component port, use one wrench to hold the component stationary (to prevent damage or twisting) and the other to turn the fitting nut.
Avoid sudden jerking motions, as this can round the fitting or cause you to slip. If the fitting is extremely tight or seized due to corrosion, consider applying penetrating oil and allowing it to soak for some time before attempting to loosen it again. In very stubborn cases, carefully applied localized heat might be considered, but with extreme caution due to the flammability of hydraulic fluid and potential damage to seals.
Step 5: Disconnect and Inspect
Once the fitting has been loosened sufficiently, continue turning it by hand until it separates completely from the port or hose. As it disconnects, be prepared for additional hydraulic fluid to drain out, catching it in your pre-positioned drain pan.
After removal, immediately cap or plug any open ports on the component and the hose end to prevent contamination from entering the hydraulic system. Inspect the removed fitting, the hose end, and the component port for any signs of damage, wear, or corrosion, which will help determine if the fitting needs replacement or if there’s an underlying issue with the component.
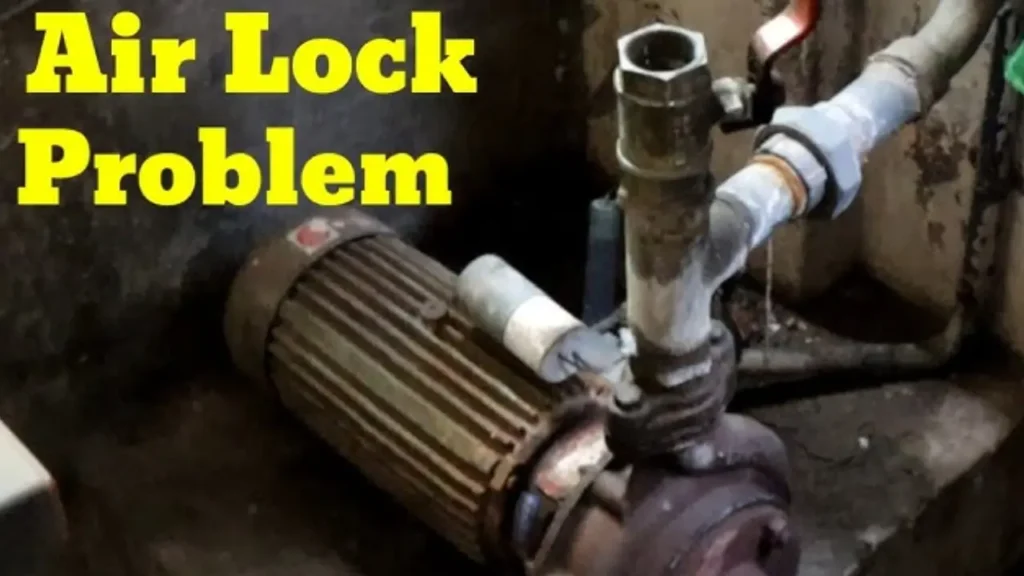
What Causes Air Lock in Hydraulic System?

Air lock in a hydraulic system occurs when air or gas becomes trapped within the fluid lines, preventing the smooth and efficient flow of hydraulic fluid. This trapped air is highly compressible, leading to spongy operation, erratic movement, reduced power, and in severe cases, complete loss of function as the hydraulic force cannot be effectively transmitted. Addressing air lock is crucial for maintaining system performance and preventing damage to components.
- Leaks in the System: Even small leaks in hoses, fittings, or seals can allow air to be drawn into the system, particularly on the suction side of the pump where negative pressure can pull air inward. This is a common culprit for persistent air lock issues.
- Low Fluid Level in the Reservoir: If the hydraulic fluid level in the reservoir drops too low, the pump’s suction line can become exposed, allowing the pump to draw in air instead of fluid. Regularly checking and maintaining the correct fluid level is essential.
- Improper Bleeding After Maintenance: After disassembling or replacing components (like cylinders, pumps, or hoses), air can become trapped in the lines. If the system isn’t properly bled (purged of air) before operation, this trapped air will cause air lock.
- Poorly Sealed Filter or Reservoir Cap: A loose or damaged seal on the hydraulic filter housing or the reservoir cap can allow air to be drawn into the system, especially during pump operation or when the fluid level fluctuates.
- Malfunctioning Pressure Relief Valve: While less common, a pressure relief valve that is stuck open or malfunctioning can sometimes allow air to enter the return line or create conditions that contribute to air entrapment within the system.
- Contaminated Hydraulic Fluid: Hydraulic fluid contaminated with water or other volatile contaminants can lead to air lock. When the system heats up, these contaminants can vaporize, forming gas bubbles that contribute to the air lock phenomenon.
Conclusion
Replacing a hydraulic hose fitting might seem daunting at first, but with the right preparation and approach, it’s a task you can conquer yourself. This guide has equipped you with the knowledge and steps involved, from safety precautions to the replacement process itself.
Remember these key takeaways:
- Safety First: Always depressurize the system and wear proper protection.
- Identify the Problem: Locate the faulty fitting and gather the necessary tools.
- Preparation is Key: Have the replacement hose, appropriate tools, and any required materials like crimp dies or thread sealant on hand.
- Follow the Steps: Disconnect the old hose, prepare the new one, and assemble the connection based on the fitting type (crimp-on or threaded).
- Tighten to Spec: Use wrenches or a torque wrench to tighten connections to the manufacturer‘s recommended specifications. Avoid overtightening.
- Leak Check and Record: Pressurize the system gradually and check for leaks. Maintain a logbook for future reference.
By replacing worn or damaged hydraulic hose fittings promptly, you can prevent leaks, safeguard your equipment from potential damage, and ensure your hydraulic system continues to operate at peak performance. So, the next time you encounter a fitting issue, don’t hesitate to tackle the replacement yourself with the confidence gained from this guide. And if you ever have doubts, remember there’s no shame in seeking help from a qualified hydraulics technician. After all, keeping your hydraulic system flowing smoothly is essential for your operation’s success.


