As the chilly winds of winter approach, it’s essential to prepare your outdoor equipment for the cold months ahead. One often overlooked item that requires attention is the garden hose. Neglecting to winterize your garden hose can lead to freezing, cracking, and unnecessary damage.
In this guide, we’ll take you through the step-by-step process of winterizing your garden hose to ensure its longevity and optimal performance year after year.
Why Should You Winterize Your Garden Hose?
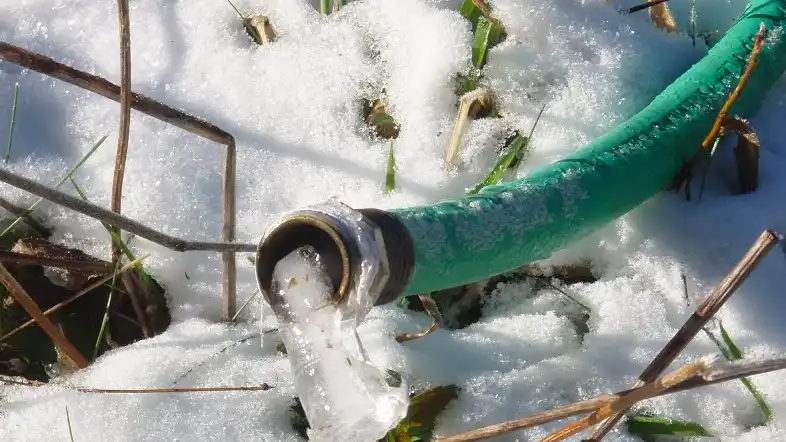
As the winter season approaches and the temperature begins to drop, it’s important to consider the maintenance of your outdoor tools and equipment, including your garden hose. Winterizing your garden hose might not be at the top of your to-do list, but it’s a crucial step to ensure the longevity and functionality of your hose. Let’s explore the reasons why you should winterize your garden hose and the potential consequences of neglecting this important task.
Prevent Freezing and Cracking
One of the primary reasons to winterize your garden hose is to prevent freezing and cracking. When water is left inside the hose during freezing temperatures, it can expand as it turns into ice. This expansion can lead to the hose material cracking or even bursting in severe cases. A cracked hose becomes ineffective and might need to be replaced, resulting in unnecessary expenses. By taking the time to winterize your hose, you can avoid the risk of damage caused by freezing and ensure that it remains intact for the next gardening season.
Extend the Lifespan of Your Hose
Winterizing your garden hose can significantly extend its lifespan. Exposure to freezing temperatures and the resulting damage can lead to premature wear and tear. By properly draining and storing your hose during the winter months, you’re essentially providing it with the care it needs to last longer. This means you won’t have to replace your hose as frequently, saving you money and reducing your environmental footprint.
Save Time and Effort in Spring
Neglecting to winterize your garden hose can lead to a frustrating scenario come springtime. If your hose has been damaged due to freezing, you’ll need to deal with repairs or replacements before you can start using it again. This can delay your gardening plans and add an extra task to your already busy schedule. By winterizing your hose, you’re effectively ensuring that it’s ready for use as soon as the gardening season begins, saving you time and effort.
Maintain Optimal Hose Performance
A garden hose that has been damaged by freezing and cracking might not perform as efficiently as it should. Leaks, cracks, and weakened areas can lead to reduced water pressure and uneven distribution. This can affect your gardening tasks, such as watering plants and cleaning outdoor spaces. Winterizing your hose helps maintain its optimal performance, ensuring that water flows smoothly and consistently when you need it.
Prevent Mold and Bacteria Growth
Water left inside a garden hose during the winter months can become a breeding ground for mold and bacteria. When the weather warms up, these microorganisms can find their way into your plants and garden soil, potentially harming your garden’s health. By winterizing your hose and thoroughly draining any residual water, you’re eliminating the moist environment that encourages mold and bacteria growth.
Tools and Materials You’ll Need
Before you start the winterization process, gather the following items:
- A flat surface
- A pair of pliers
- Insulating covers or old towels
- A bungee cord or rope
- A dry, indoor storage area
Step-by-Step Guide to Winterize Your Garden Hose
Draining the Garden Hose for Winter
Draining the hose is a crucial step in the process of winterizing your garden hose. During colder months, any water left trapped inside the hose can freeze, expand, and cause damage to the hose material. To avoid this, it’s important to ensure that the hose is completely emptied of water.
Here’s how to drain garden hose for winter:
- Choose a Flat Surface: Find a flat and even surface where you can lay out the garden hose. This could be a driveway, patio, or any other area where water can easily drain away.
- Straighten the Hose: Uncoil the hose and straighten it out on the flat surface. This will help the water flow out more easily and prevent any kinks that could hinder the drainage process.
- Elevate One End: Lift one end of the hose higher than the other. This elevation creates a downward slope, allowing gravity to help in draining the water from the hose.
- Release Water Pressure: If there’s still water pressure in the hose, release it by turning off the outdoor faucet. This will prevent any residual water from being forced out during the draining process.
- Allow Gravity to Work: Water naturally flows downhill due to gravity. By elevating one end of the hose, you’re creating a path for the water to follow. As a result, the water will start to flow out of the lower end of the hose.
- Gently Shake or Tap: To encourage the water to move out more efficiently, you can gently shake or tap the hose. This helps dislodge any water that might be trapped in the curves or bends of the hose.
- Check for Complete Draining: Keep an eye on the lower end of the hose as water flows out. Once the water stops and you no longer see any droplets, the hose is likely empty.
- Repeat if Necessary: Depending on the length of the hose and the amount of water in it, you might need to repeat this process a couple of times to ensure thorough draining.
By properly draining your garden hose, you’re preventing water from freezing and expanding within the hose, which can lead to cracks, leaks, and other damage. This simple yet important step goes a long way in extending the lifespan of your hose and ensuring it’s ready for use when warmer weather returns.
Disconnecting Attachments
When it comes to preparing your garden hose for winter, it’s important to take a few specific steps to ensure its longevity and prevent potential damage. One of these steps involves removing any additional accessories that might be attached to your hose, such as nozzles, sprayers, or other attachments.
These attachments are commonly used to control the flow of water, create different spray patterns, or enhance the functionality of your hose. However, during the winter months, it’s a good idea to detach them from the hose and store them indoors. Here’s why:
- Preventing Freezing and Damage: Nozzles, sprayers, and other attachments often have small crevices and moving parts. When water freezes inside these components, it can expand and cause them to crack or break. By removing and storing them indoors, you prevent water from freezing within these attachments, thereby protecting them from potential damage.
- Ease of Cleaning: Over time, these attachments can accumulate dirt, debris, and mineral deposits from the water. Before storing them for the winter, it’s a good practice to clean them thoroughly. Cleaning the attachments ensures that they are free from any residues that could potentially affect their performance when you use them again in the spring.
- Prolonging Lifespan: Storing your attachments indoors away from the harsh winter conditions can help extend their lifespan. Exposure to freezing temperatures, moisture, and ice can degrade the materials and decrease their overall durability. Storing them in a dry, controlled environment preserves their quality for years to come.
Here’s how you can effectively remove, clean, and store your attachments:
- Detach Attachments: Unscrew or unclip any attachments from the hose. Pay attention to any locking mechanisms they might have. Gently twist or release them to separate the attachments from the hose.
- Thorough Cleaning: Depending on the type of attachment, you might need to disassemble it slightly for a thorough cleaning. Use warm water and a mild soap to wash away dirt and residues. For attachments with small nozzles or openings, you can use a small brush or toothbrush to clean hard-to-reach areas.
- Rinsing and Drying: After cleaning, rinse the attachments thoroughly with clean water to remove any soap residues. Shake or pat them dry with a clean towel.
- Indoor Storage: Find a dry and cool indoor area to store your attachments. A garage, shed, or even a storage box can work well. Make sure the area is not prone to extreme temperature changes or moisture buildup.
By taking these steps to remove, clean, and store your hose attachments, you’re safeguarding them against the potential harms of winter weather. When spring arrives, you’ll have attachments that are ready to be reattached to your garden hose, ensuring a seamless gardening experience.
Using Insulating Covers
Using insulating covers is a crucial step in the process of winterizing your garden hose. These covers, also known as hose bib covers or faucet covers, are designed to provide an additional layer of protection to your hose and outdoor faucets during the cold winter months. Let’s delve deeper into why using insulating covers is important and how to effectively use them.
Why Use Insulating Covers?
- Preventing Freezing: The primary purpose of insulating covers is to prevent freezing. When water freezes inside the hose or around the outdoor faucet, it can expand and cause damage. Insulating covers act as a barrier, shielding the hose and faucet from extreme temperatures and preventing water from freezing.
- Preserving Material Integrity: Cold temperatures can be harsh on the materials your hose and faucet are made of. Insulating covers help maintain the integrity of these materials by minimizing their exposure to freezing temperatures. This prolongs the lifespan of your garden hose and outdoor faucets.
- Easy Installation: Insulating covers are designed for easy installation. They are often equipped with secure fasteners, such as drawstrings or straps, that keep the cover in place. This means you can quickly and effectively protect your equipment without much effort.
How to Use Insulating Covers:
- Select the Right Size: Insulating covers come in various sizes to accommodate different hose lengths and faucet designs. Ensure you choose covers that fit snugly over your hose and faucet without any gaps.
- Remove Attachments: Before placing the cover, make sure you’ve removed any attachments from the hose, such as nozzles or sprayers. This ensures a smooth fit and complete coverage.
- Position the Cover: Slide the insulating cover over the end of the hose that connects to the faucet. If the cover has a drawstring or strap, tighten it to secure the cover in place. The cover should fully encase the faucet and extend a bit onto the hose.
- Secure in Place: Some covers have additional fasteners to secure them around the faucet or hose. Use these to ensure the cover doesn’t come off during windy conditions.
- Inspect Regularly: Periodically check the insulating covers throughout the winter season. If you notice any damage or displacement, adjust or replace the cover as needed.
Types of Insulating Covers:
- Foam Covers: These covers are made from thick foam material that provides excellent insulation. They slip over the faucet and hose, creating a barrier against the cold.
- Fabric Covers: Fabric covers are often made from water-resistant materials that offer protection from moisture as well as cold temperatures. They are easy to install and come in various designs.
- Hard Shell Covers: These covers feature a hard outer shell that provides robust protection. They are especially useful for extreme cold conditions.
In a word, using insulating covers is a practical and effective way to safeguard your garden hose and outdoor faucets during winter. By preventing freezing and minimizing exposure to harsh temperatures, you ensure that your equipment remains in good condition, ready for use when warmer weather returns.
Storing in a Dry Place
Storing your garden hose in a dry place is a critical step in the winterization process that ensures the longevity and proper functioning of the hose during the colder months. Let’s delve into the details of what this entails and why it’s so important.
When we talk about “storing in a dry place,” we mean finding a location where the garden hose will not be exposed to moisture, rain, snow, or freezing temperatures. This area could be a garage, a shed, a basement, or any other covered space that shields the hose from the elements.
Why Is Storing in a Dry Place Important?
- Preventing Freezing: Water left in the hose can freeze and expand, causing the hose to crack, split, or even burst. Storing the hose in a dry place helps prevent water from accumulating inside, reducing the risk of freezing-related damage.
- Preserving Material Quality: Garden hoses are often made of rubber or plastic materials that can deteriorate when exposed to extreme cold and moisture. Storing the hose indoors protects it from becoming brittle or losing its flexibility.
- Avoiding Mold and Mildew: Moist environments can promote the growth of mold and mildew, which can damage the hose’s material and cause unpleasant odors. Storing the hose in a dry space prevents these issues.
- Minimizing Sun Damage: If exposed to direct sunlight, garden hoses can also suffer from sun damage over time. Storing the hose indoors shields it from UV rays, helping to prolong its lifespan.
Tips for Proper Storage:
- Coil Loosely: When storing the hose, coil it loosely to avoid creating kinks or bends that could weaken the hose over time.
- Hang It: Hanging the hose on hooks or a hose reel can prevent tangling and keep it off the ground, reducing the risk of damage.
- Keep it Elevated: If the storage area has a concrete floor, consider placing a wooden pallet or some boards under the hose to keep it elevated and away from potential dampness.
- Avoid Sharp Objects: Ensure that the hose is not stored near sharp tools or objects that could puncture or damage it.
- Inspect Before Storing: Before putting the hose away for the winter, give it a quick inspection. Look for any signs of damage, such as cracks or leaks, and address them if needed.
Storing your garden hose in a dry place is a crucial step in the winterization process. By protecting the hose from freezing temperatures, moisture, and other environmental factors, you’re ensuring that it remains in excellent condition and ready for use when spring arrives. Remember that proper storage can significantly extend the life of your garden hose, saving you both time and money in the long run.
How to Winterize Your Garden Hose Faucet
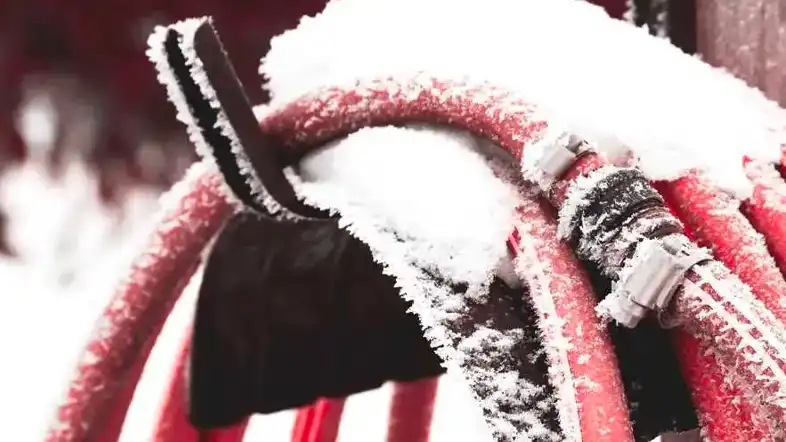
When winter’s chill starts to settle in, it’s not just your plants that need protection – your outdoor faucets and garden hose require attention as well. Failing to properly winterize your garden hose faucet can result in frozen pipes, leaks, and costly repairs.
We’ll walk you through the process of winterizing your garden hose faucet step by step, ensuring that your outdoor water source stays intact and ready for the upcoming spring.
Why Winterizing Your Garden Hose Faucet Matters
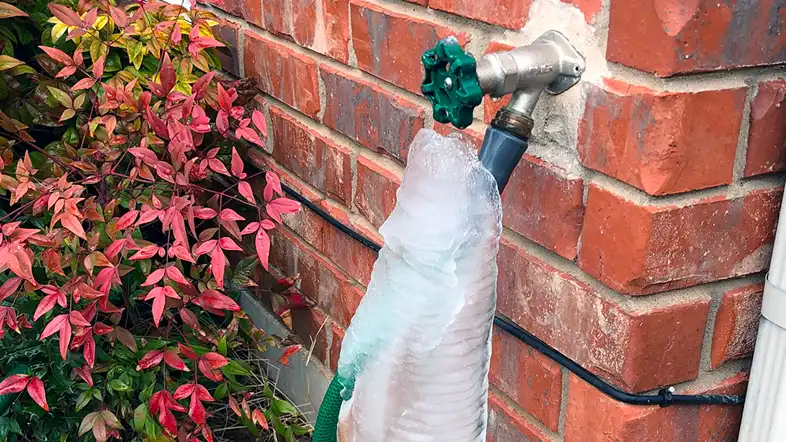
Before we delve into the specifics of how to winterize, let’s understand why it’s so crucial. When water freezes, it expands, and this expansion can lead to cracked pipes and damaged fixtures. Your garden hose faucet is particularly susceptible to freezing because it’s directly exposed to the elements. By taking the time to winterize it, you’re safeguarding against potential damage and saving yourself the headache of dealing with repairs in the warmer months.
Tools and Materials You’ll Need
Gathering the right tools and materials is the first step in this process:
- A hose nozzle or faucet cover
- Insulating materials (foam or insulating tape)
- A wrench or pliers
- Teflon tape (plumber’s tape)
- A bucket or container
Step-by-Step Guide to Winterize Your Garden Hose Faucet
1. Shut Off the Water Supply
Locate the shut-off valve for the outdoor faucet and turn it off. This will prevent water from flowing into the faucet and freezing.
2. Disconnect the Hose
Detach the garden hose from the faucet. Make sure to drain any remaining water by holding the hose vertically and walking its length.
3. Drain the Faucet
To prevent any trapped water from freezing, open the faucet and let any remaining water drain out completely. Leave the faucet open throughout the winter to allow for expansion if any residual water freezes.
4. Apply Insulation
Wrap the faucet with insulating materials, such as foam covers or insulating tape. Secure it in place with duct tape or a bungee cord. This layer of insulation will help keep the faucet and pipes from freezing.
5. Use a Faucet Cover or Nozzle
Attach a hose nozzle or faucet cover to the outdoor faucet. These accessories provide an extra layer of protection against the cold.
6. Seal Any Gaps
Inspect the area around the faucet and seal any gaps or openings with caulk or foam. This prevents cold air from seeping in and affecting the faucet.
7. Turn Off the Indoor Valve
If your faucet has an indoor shut-off valve, turn it off to prevent water from reaching the outdoor faucet.
8. Store Garden Accessories
Store your garden hose, nozzle, and other accessories in a dry, indoor location. This helps prolong their lifespan and prevents any potential damage.
Winterizing your garden hose faucet is a straightforward yet essential task to ensure the longevity of your outdoor water source. By following these steps, you’re protecting your faucet from freezing temperatures and potential damage. When spring arrives, you’ll be able to connect your hose and resume gardening without any complications.
Additional Tips for Winter Garden Care
- Trim back any overhanging branches that could potentially fall and damage your garden hose during winter storms.
- Empty and store other garden equipment, such as watering cans and sprinklers, in a dry place.
- Consider applying a layer of mulch around garden beds to provide insulation to plant roots.
Common Mistakes to Avoid
- Not fully draining the hose: Even a small amount of trapped water can cause damage.
- Leaving attachments outside: Store them indoors to prolong their lifespan.
- Using plastic covers: Opt for insulating materials that provide better protection.
Conclusion
Winterizing your garden hose is a simple yet crucial task that can save you time, money, and frustration in the long run. By following these steps, you’ll ensure that your garden hose remains in excellent condition, ready to help you maintain a vibrant garden come spring.


