Air compressor hoses, despite their durability, can suffer damage from wear, abrasion, or punctures, leading to leaks and reduced efficiency. Understanding how to repair these hoses is essential for maintaining optimal performance and preventing costly replacements. This blog post will guide you through the necessary steps to fix an air compressor hose effectively.
We’ll cover common types of damage, the tools and materials required for repairs, and detailed instructions for patching or splicing your hose. By following these guidelines, you can restore your air compressor hose to its original functionality, ensuring consistent airflow and pressure for your pneumatic tools.
What Are Compressor Hoses

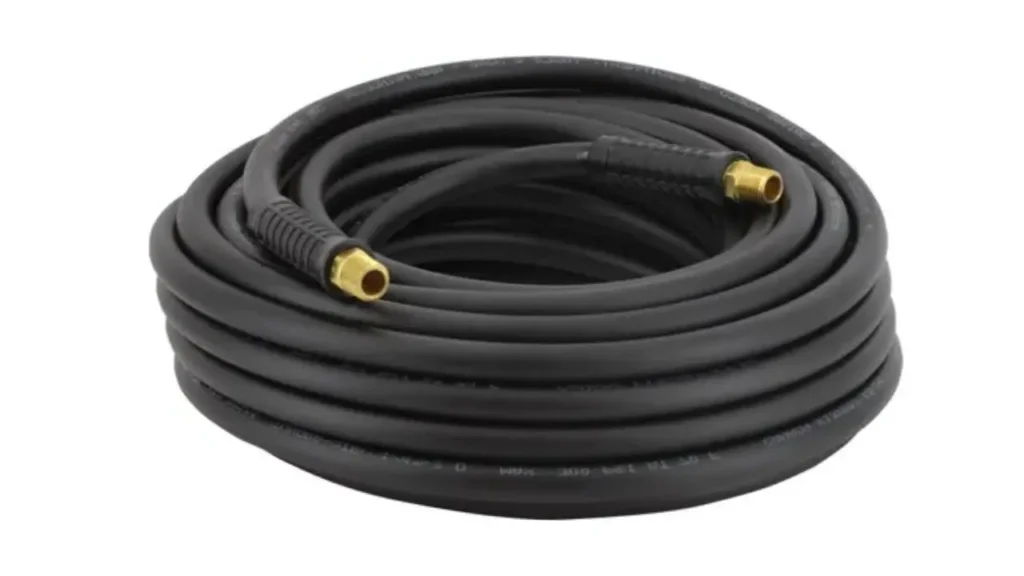
Compressor hoses are flexible tubes designed to transport compressed air from an air compressor to various pneumatic tools and equipment. These air compressor hoses are essential for powering a wide range of tools, including air wrenches, nail guns, spray guns, and tire inflators. They are engineered to withstand the pressures generated by air compressors and deliver a consistent airflow to the connected tools, enabling efficient operation in industrial, automotive, and domestic settings.
These hoses are typically made from materials like rubber, PVC, polyurethane, or hybrid blends, each offering distinct advantages in terms of flexibility, durability, and resistance to abrasion, chemicals, and temperature variations. The selection of the appropriate hose material and size is crucial for ensuring efficient and safe operation, preventing pressure drops, and maximizing the performance of pneumatic tools. They are designed to be durable and safe in pressurized environments.
How to Fix a Air Compressor Hose

Performing an air compressor hose repair is a valuable skill for maintaining your pneumatic tools and equipment. Over time, air hoses can develop leaks, cuts, or punctures, leading to pressure loss and reduced tool performance. Here’s a step-by-step guide on how to fix an air compressor hose.
Step 1: Identifying the Damage
Before attempting any air compressor hose repair, carefully inspect the hose to identify the location and extent of the damage. Look for visible cuts, punctures, abrasions, or leaks. A common method to find leaks is to apply a soapy water solution to the hose while it’s under pressure; bubbles will form where air is escaping. Note the size and type of damage to determine the appropriate repair method.
Identifying the damage accurately is crucial for a successful repair. A good inspection will determine the best course of action.
For small punctures or cuts, a simple patch or sealant may suffice. Larger tears or damaged fittings may require more extensive repairs or replacement. Inspect the hose’s overall condition, including the fittings, to ensure there are no other potential issues. If the hose is severely damaged or showing signs of significant wear, replacement may be the most cost-effective and safe option.
A thorough inspection prevents further issues, and ensures a safe repair.
Step 2: Repairing Small Punctures or Cuts
For small punctures or cuts, a rubber patch or sealant can provide a quick and effective air compressor hose repair. Begin by cleaning the damaged area with a clean cloth and rubbing alcohol to remove any dirt or debris. Cut a patch slightly larger than the puncture or cut from a suitable rubber material, such as an old inner tube or a dedicated patch kit. Apply a rubber cement or adhesive to both the patch and the damaged area, following the manufacturer’s instructions.
Small punctures are easily fixed with a patch. Ensure the area is clean before applying the patch.
Press the patch firmly onto the damaged area, ensuring it covers the puncture or cut completely. Apply pressure for the recommended time to allow the adhesive to bond. For sealant repairs, apply a generous amount of sealant to the damaged area, ensuring it covers the puncture or cut completely. Allow the sealant to cure for the recommended time before using the hose.
Proper application of the patch, or sealant, ensures a good repair. Follow the instructions on the product being used.
Step 3: Repairing Larger Tears or Damaged Fittings
For larger tears or damaged fittings, a more robust repair method is necessary. Begin by cutting away the damaged section of the hose with a sharp utility knife or hose cutter. Ensure the cut is clean and square to allow for a proper connection. If the fitting is damaged, remove it from the hose using a wrench or pliers. Clean the hose ends and the fitting, if reusable, with a clean cloth and rubbing alcohol.
Larger tears, and damaged fittings, require a more robust repair. Ensure the cuts are clean, and the area is clean.
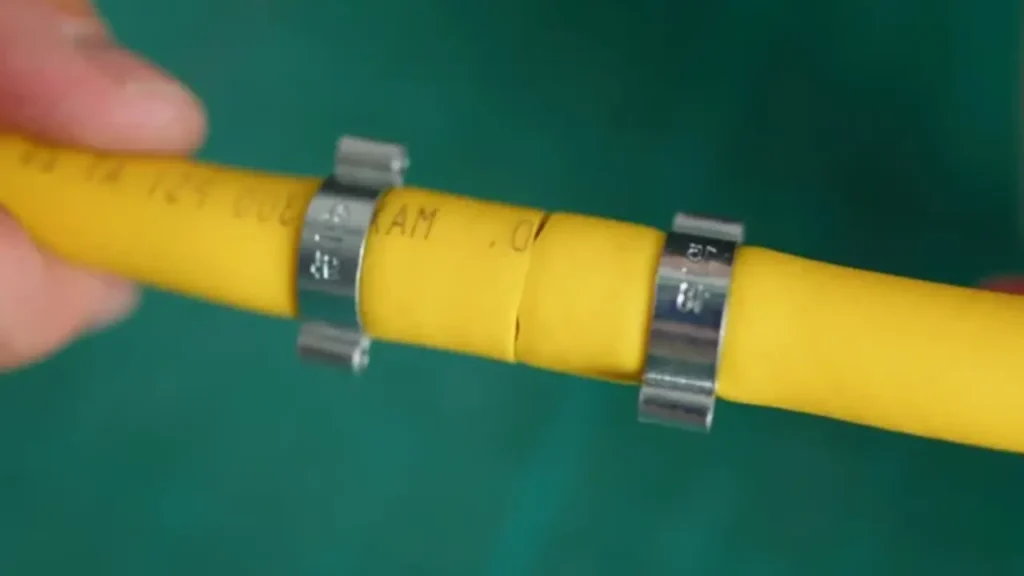
If the fitting is reusable, inspect it for any damage or wear, and replace it if necessary. For new fittings, ensure they are compatible with the hose size and type. Slide a hose clamp onto each hose end. Insert the fitting into the hose ends, ensuring it’s fully seated. Position the clamps over the hose ends and tighten them securely with a screwdriver or wrench.
Proper fitting installation is key to a good repair. Ensure the fittings are compatible, and the clamps are tight.
Step 4: Testing the Repair
After completing the air compressor hose repair, test the hose to ensure it’s leak-free and functioning correctly. Connect the hose to the air compressor and pressurize it to the maximum operating pressure. Listen for any hissing sounds or feel for air leaks around the repaired area. Apply a soapy water solution to the repaired area to check for leaks; bubbles will form if there’s a leak.
Testing the repair ensures a leak free connection. Any leaks will require a re-repair.
If there are no leaks, test the airflow by attaching a pneumatic tool to the hose and operating it. Ensure the tool receives adequate pressure and airflow for proper operation. If there are any issues with airflow or pressure, re-inspect the repair and connections.
Testing with a tool, ensures that the repaired hose will work correctly. Any issues, indicate a problem with the repair.
How to Fix a Hole in an Air Compressor Hose
Repairing a punctured air compressor hose can be a quick fix, extending its lifespan and saving you from immediate replacements. The key is to address the damage with precision and the right materials, ensuring a durable seal. Here’s a method to mend a hole in an air compressor hose, focusing on a unique approach.
Step 1: Identifying the Breach and Preparing the Area
Begin by inflating the hose to a low pressure and submerging it in water. This will allow you to pinpoint the exact location of the leak by observing air bubbles escaping from the hole. Mark the area with a permanent marker. Thoroughly dry the hose, ensuring no moisture remains, as this can interfere with the adhesive. Sand the area around the hole with fine-grit sandpaper to create a rough surface, enhancing the patch’s adhesion.
This method of locating the leak is highly accurate. Ensuring a dry, and roughed up surface, will ensure a good patch.
Prepare a custom patch from a piece of high-quality, flexible rubber or silicone sheet, slightly larger than the hole. Cut the patch into a circular or oval shape to minimize stress points. Clean the patch and the sanded area with a solvent like isopropyl alcohol to remove any remaining debris or oils. This ensures a clean surface for the adhesive to bond effectively.
A custom patch can be more effective than a pre-made patch. Cleanliness is paramount for a good bond.
Step 2: Applying a Heat-Activated Seal
Instead of relying solely on adhesive, consider using a heat-activated sealant for a more robust repair. This method involves applying a thin layer of heat-activated polyurethane sealant to both the hose and the patch. Place the patch over the hole, aligning it precisely with the marked area. Use a heat gun on a low setting to gently heat the patch and the surrounding hose, activating the sealant. Apply even pressure to the patch while heating, ensuring a strong bond.
Heat activated sealants can provide a much stronger bond than standard adhesives. Even pressure, and moderate heat, are needed.
Continue heating the patch and surrounding area for a few minutes, allowing the sealant to fully cure. Avoid overheating, as this can damage the hose material. Once cooled, the sealant will form a durable, airtight seal. Test the patch by inflating the hose to its maximum operating pressure and checking for leaks.
A heat gun, used carefully, can create a very strong seal. Allow the sealant to cool fully before testing.
Step 3: Reinforcing the Repair
For added durability, consider reinforcing the patch with a layer of self-fusing silicone tape. This tape bonds to itself when stretched and wrapped around the repair, creating a seamless, airtight seal. Wrap the silicone tape tightly around the patched area, overlapping the edges to ensure complete coverage. This reinforcement provides additional protection against abrasion and stress, extending the lifespan of the repair.
Reinforcement is key for a long lasting repair. Silicone tape is ideal for this purpose.
Test the reinforced repair by flexing and bending the hose, checking for any signs of leaks or weakness. If the repair holds, you can confidently use the hose for your air compressor applications. Regularly inspect the repair for any signs of wear or damage, and consider replacing the hose if the repair fails or the damage is extensive.
Testing the repair under stress ensures it will hold up under normal use. Regular inspections are still needed.
Why Air Compressor Hoses Broken

Air compressor hoses, despite their robust construction, are susceptible to damage and breakage over time. Understanding the common causes of these failures can help prevent them and extend the lifespan of your hoses.
Here’s a look at the primary damage reasons air compressor hoses break.
Abrasion and Physical Damage
Air compressor hoses are often dragged across rough surfaces, exposed to sharp edges, and subjected to impact from tools and equipment. This constant physical stress leads to abrasion, cuts, and tears in the hose’s outer layer, weakening its structural integrity. Over time, these damages can penetrate the inner layers, causing leaks and eventual hose failure.
Regularly inspecting hoses for signs of wear and tear is crucial to identify and address potential issues before they escalate. Proper storage and handling practices, such as avoiding dragging hoses across abrasive surfaces and protecting them from sharp objects, can significantly reduce the risk of physical damage. Additionally, using hose reels or hangers can help keep hoses organized and prevent unnecessary wear.
Chemical Exposure and Degradation
Air compressor hoses are frequently exposed to various chemicals, including oils, solvents, and cleaning agents. These substances can degrade the hose material, causing it to become brittle, cracked, or swollen. Over time, this chemical degradation weakens the hose, leading to leaks and eventual failure. The type of hose material determines its resistance to specific chemicals.
Selecting hoses made from materials compatible with the chemicals present in the working environment is crucial. Regular cleaning and maintenance can also help remove chemical residues and prevent degradation. It is important to know the chemical resistance of the hose material before use.
Temperature Extremes
Air compressor hoses are often subjected to extreme temperature variations, from freezing conditions to intense heat. These temperature fluctuations can cause the hose material to become brittle or lose its flexibility, leading to cracks, leaks, and eventual failure. Repeated exposure to extreme temperatures accelerates the degradation process.
Choosing hoses rated for the operating temperature range is essential for preventing temperature-related damage. Proper storage practices, such as avoiding direct sunlight and extreme cold, can also help extend the hose’s lifespan. Insulating hoses in extreme environments can help prevent temperature related damage.
Internal Pressure and Pulsations
Air compressor hoses are designed to withstand high pressures, but repeated exposure to these pressures, especially in pulsating applications, can weaken the hose material. Pulsations create stress on the hose walls, leading to fatigue and eventual failure. The hose’s pressure rating is critical, and exceeding it can cause immediate and catastrophic failure.
Selecting hoses with appropriate pressure ratings and reinforcement layers is crucial for preventing pressure-related failures. Regularly inspecting hoses for signs of bulging, cracks, or leaks is essential for identifying potential issues before they escalate. Using pressure regulators and pulsation dampeners can help reduce stress on the hose and extend its lifespan.
Improper Storage and Handling
Improper storage and handling practices, such as kinking, twisting, and coiling hoses tightly, can cause damage and weaken the hose material. Kinks and twists create stress points, leading to cracks and leaks. Coiling hoses tightly can deform the hose and reduce its flexibility.
Using hose reels or hangers to store hoses properly can prevent kinking and twisting. Avoiding storing hoses under heavy objects or in direct sunlight can also help prevent damage. Regularly inspecting hoses for signs of damage and following proper handling practices can significantly extend their lifespan.
Conclusion
In conclusion, repairing an air compressor hose is a practical skill that can save time and money. Identifying the type of damage, gathering the right tools, and following proper repair techniques are essential for a successful fix. Whether it’s a simple patch or a more involved fitting replacement, a well-executed repair restores hose functionality and prevents air leaks.
Regularly inspecting your air compressor hoses for wear and damage is crucial for maintaining a safe and efficient system. Timely repairs extend the hose’s lifespan and prevent unexpected failures, ensuring consistent airflow and pressure for your pneumatic tools. Understanding the limitations of repairs and knowing when to replace a hose entirely is equally important for optimal performance.
For a comprehensive selection of high-quality air compressor hoses and fittings, choose Kingdaflex. We offer wholesale options with diverse sizes and materials to meet your specific needs. Contact us today to explore our product offerings and ensure your air compressor systems operate at peak performance.


