Properly hooking up an air compressor hose is essential for efficient and safe operation of pneumatic tools. A secure connection ensures consistent airflow and pressure, maximizing tool performance and preventing potential hazards. Understanding the correct steps and using appropriate fittings is crucial for any air compressor user.
This blog post will guide you through the process of hooking up an air compressor hose, covering essential tips and techniques. We’ll explore the different types of fittings, how to ensure a leak-free connection, and troubleshooting common issues. Following these guidelines will help you maintain a reliable and efficient air compressor system.
What Are Air Compressor Hoses
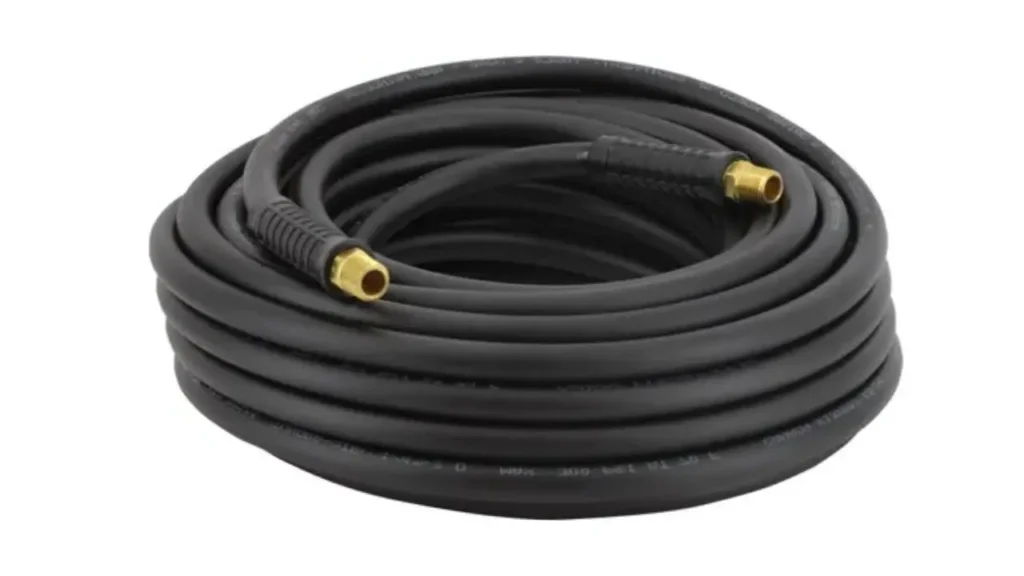
Air compressor hoses are flexible conduits designed to transport compressed air from an air compressor to various pneumatic tools and equipment. They are crucial for powering a wide array of tools, including air wrenches, nail guns, spray guns, and tire inflators, facilitating efficient operation across industrial, automotive, and domestic applications. These compressor air hoses are engineered to withstand the pressures generated by air compressors and deliver a consistent airflow to the connected tools, ensuring optimal performance.
How to Hook Up Air Compressor Hose?
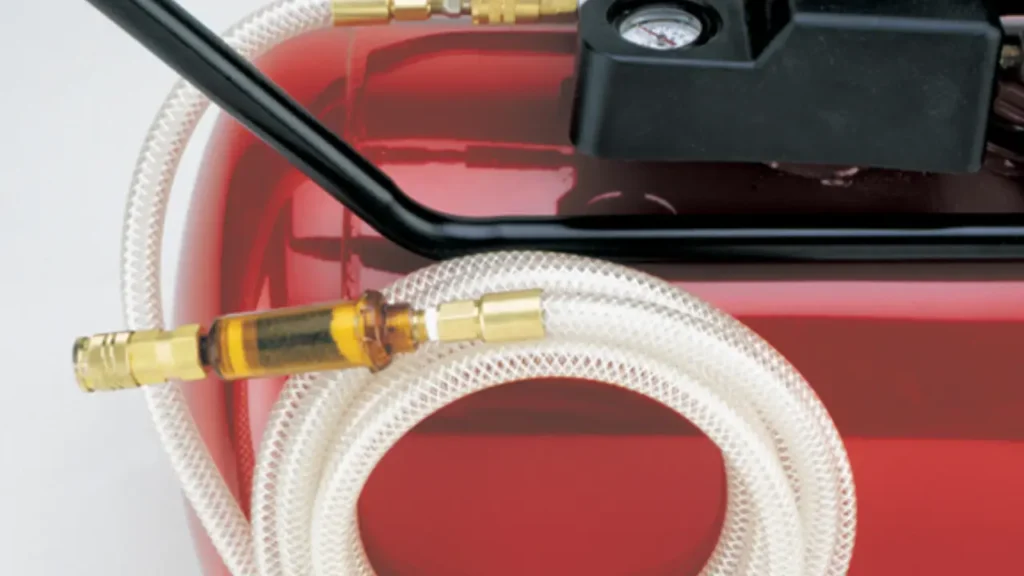
Connecting an air compressor hose correctly is fundamental for ensuring safe and efficient operation of your pneumatic tools. Proper hookup prevents air leaks, maintains consistent pressure, and maximizes tool performance.
Here’s a step-by-step guide on how to hook up an air compressor hose.
Step 1: Preparing the Compressor and Hose
Before you begin, ensure the air compressor is turned off and unplugged from its power source. This safety precaution prevents accidental activation during the connection process. Inspect the compressor’s outlet and the hose’s inlet for any signs of damage, such as cracks, rust, or debris, which could compromise the connection. Clean any dirt or debris with a clean cloth.
Proper preparation ensures a secure and leak-free connection. Any damage to the components can lead to air loss and reduced tool performance. A clean connection point is essential for creating a tight seal. Verify the compressor’s outlet and the hose’s inlet are compatible in terms of fitting type and size.
Check the hose’s inner diameter (ID) and length to ensure they match the requirements of your pneumatic tools. Smaller IDs and longer hoses can result in significant pressure drops. Select a hose that can handle the compressor’s maximum pressure and deliver sufficient airflow (CFM) to your tools. Confirm that the hose fittings are compatible with both the compressor and the tools you intend to use.
Step 2: Connecting the Hose Fittings
If both the compressor and hose have quick-connect fittings, align the hose’s male plug with the compressor’s female coupler. Push the male plug firmly into the female coupler until you hear a click, indicating a secure connection. Some quick-connect fittings feature a locking mechanism; ensure it engages properly to prevent accidental disconnection. For threaded fittings, wrap Teflon tape clockwise around the male threads to create a leak-free seal.
A secure quick-connect fitting is essential for preventing leaks. Ensure the fitting is fully engaged and locked to prevent accidental disconnections during operation. Teflon tape on threaded fittings ensures an airtight seal, preventing air loss and maintaining consistent pressure.
Thread the hose fitting onto the compressor’s outlet, turning it clockwise until it’s hand-tight. Avoid over-tightening, as this can damage the threads. If necessary, use a wrench to tighten the connection, but be careful not to overtighten. For barb fittings, slide a clamp or ferrule onto the hose end before inserting the barb. Push the barb fitting into the hose end and secure it with the clamp or ferrule, ensuring a tight fit to prevent leaks.
Step 3: Testing the Connection and Airflow
After connecting the hose, turn on the air compressor and allow it to build pressure. Listen for any hissing sounds or feel for air leaks around the connection points. If you detect any leaks, turn off the compressor, unplug it, and re-tighten the connections or inspect for damage. Apply a soapy water solution to the connection points to check for leaks; bubbles will form if there’s a leak.
Testing the connection ensures a leak-free seal and prevents air loss. Any leaks must be addressed before using the air compressor to ensure efficient operation. A soapy water solution is an effective way to detect even small leaks.
Test the airflow by attaching a pneumatic tool to the hose and operating it. Ensure the tool receives adequate pressure and airflow for proper operation. If there are any issues with airflow or pressure, check the hose’s ID and length, as well as the compressor’s output (CFM). You can then determine if the connections are the problem, or if it is another part of the system.
Testing with a tool ensures proper airflow and pressure delivery. Any issues with the tool’s performance may indicate a problem with the connection or the hose itself. Proper airflow is essential for the efficient operation of pneumatic tools.
How to Connect Hose to Air Compressor
Connecting a hose to an air compressor correctly is vital for maintaining consistent airflow and pressure, ensuring your pneumatic tools operate efficiently and safely. A proper connection prevents leaks and maximizes tool performance. Here’s a detailed guide on how to connect a hose to an air compressor.
Step 1: Inspecting and Preparing Components
Before you connect anything, ensure the air compressor is powered off and unplugged. This safety measure is crucial to prevent accidental activation during the connection process. Carefully examine the compressor’s outlet and the hose’s inlet for any signs of damage, such as cracks, rust, or debris, which could impede a proper seal. Clean any dirt or debris with a lint-free cloth, ensuring both connection points are free from obstructions.
Proper preparation is the foundation of a successful connection. Any damage or debris can compromise the seal, leading to air leaks and reduced performance. Ensuring cleanliness and integrity of the components is essential for a reliable connection. Verify the compressor’s outlet and the hose’s inlet are compatible in terms of fitting type and size.
Furthermore, assess the hose’s inner diameter (ID) and length against the requirements of your pneumatic tools. Choosing the correct hose size is paramount to avoid pressure drops and ensure adequate airflow. A hose that’s too narrow or too long can significantly reduce tool performance. Confirm that the hose fittings are compatible with both the compressor and the tools you plan to use, as mismatched fittings can lead to leaks and operational inefficiencies.
Step 2: Securing the Hose to the Compressor
If both the compressor and hose feature quick-connect fittings, align the hose’s male plug with the compressor’s female coupler. Firmly push the male plug into the female coupler until you hear a distinct click, indicating a secure connection. Some quick-connect fittings incorporate a locking mechanism; ensure it’s engaged to prevent accidental disconnections. For threaded fittings, apply Teflon tape clockwise around the male threads to create an airtight seal.
A secure quick-connect fitting is essential for preventing air leaks. Ensure the fitting is fully engaged and locked to avoid disconnections during operation. Teflon tape on threaded fittings is crucial for creating an airtight seal, preventing air loss and maintaining consistent pressure.
Carefully thread the hose fitting onto the compressor’s outlet, turning it clockwise until it’s hand-tight. Avoid over-tightening, as this can damage the threads. If necessary, use a wrench to tighten the connection further, but exercise caution to prevent damage. For barb fittings, slide a clamp or ferrule onto the hose end before inserting the barb. Push the barb fitting into the hose end and secure it with the clamp or ferrule, ensuring a tight fit to prevent leaks.
Step 3: Testing the Connection for Leaks and Airflow
After connecting the hose, turn on the air compressor and allow it to build pressure. Carefully listen for any hissing sounds or feel for air leaks around the connection points. If you detect any leaks, immediately turn off the compressor, unplug it, and re-tighten the connections or inspect for damage. Apply a soapy water solution to the connection points to check for leaks; bubbles will form if there’s a leak.
Testing the connection is crucial to ensure an airtight seal and prevent air loss. Any leaks must be addressed before using the air compressor to ensure efficient and safe operation. A soapy water solution is an effective way to detect even small leaks.
Test the airflow by attaching a pneumatic tool to the hose and operating it. Ensure the tool receives adequate pressure and airflow for proper operation. If there are any issues with airflow or pressure, check the hose’s ID and length, as well as the compressor’s output (CFM). This will help you determine if the connections are the problem, or if it is another part of the system.
Testing with a tool ensures proper airflow and pressure delivery. Any issues with the tool’s performance may indicate a problem with the connection or the hose itself. Proper airflow is essential for the efficient operation of pneumatic tools.
Conclusion
In conclusion, correctly hooking up an air compressor hose is essential for safe and efficient pneumatic tool operation. Proper connection ensures a leak-free seal, maintaining consistent pressure and airflow. Understanding the different connection types and following the correct steps prevents air loss and potential hazards. Regular inspections and maintenance ensure longevity and reliability.
Choosing the right hose length and diameter, along with compatible fittings, is crucial for optimal performance. Using quality components and following manufacturer guidelines guarantees a secure and efficient connection. Testing the setup after installation confirms proper function and prevents unexpected issues during operation.
For a wide range of durable and reliable air compressor hoses, choose Kingdaflex. We offer wholesale options with diverse sizes and materials to meet your specific needs. Contact us today to explore our product offerings and ensure your air compressor systems operate at peak performance.


