If you’re an avid gardener, a well-functioning garden hose is essential for maintaining your plants and keeping your garden flourishing. However, over time, wear and tear can cause leaks or damage to your garden hose.
Instead of replacing the entire hose, which can be costly and wasteful, learning how to repair it yourself can save you money and reduce your environmental footprint.
In this article, we will guide you how to repair a garden hose, step by step.
Garden hoses are susceptible to leaks and damage due to exposure to the elements, rough handling, and other factors. Repairing a garden hose can be a straightforward process if you have the right tools and materials on hand.
Tools and Materials You’ll Need

Before you start the repair process, gather the necessary tools and materials:
- Adjustable wrench
- Utility knife
- Hose mender kit (if applicable)
- Replacement washers and O-rings
- Waterproof tape or hose repair tape
- Scissors
Identifying the Leak
The leaking is the most popular garden hose problems. The first step in repairing your garden hose is identifying the location of the leak. Carefully inspect the entire length of the hose, looking for visible cracks, holes, or water spraying out.
Preparation and Safety Measures
Before you begin the repair, ensure your safety by turning off the water source and releasing any pressure within the hose. This will prevent accidental spraying and make the repair process smoother.
Repair Methods
Fixing Small Leaks with Tape
For small leaks, waterproof tape can be a quick and effective solution. Clean and dry the area around the leak, then wrap the tape tightly around the damaged area, slightly overlapping the tape as you go.
Replacing Washers and O-Rings
Washers and O-rings are common sources of leaks near the hose’s connections. Use an adjustable wrench to carefully disassemble the fittings, replace the old washers and O-rings, and reassemble the fittings.
Cutting and Splicing
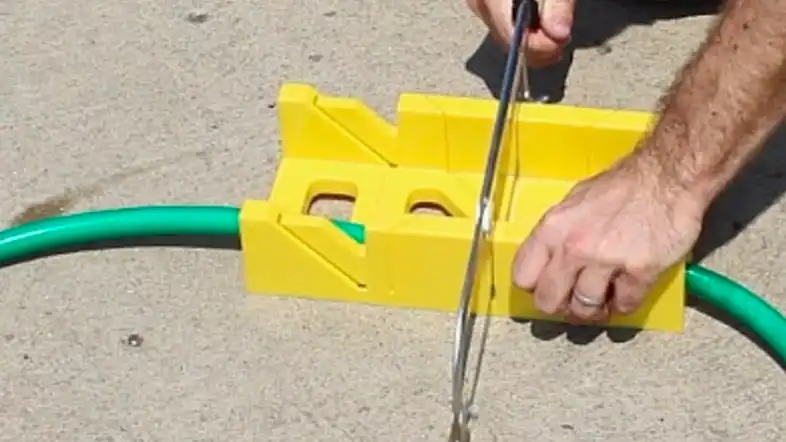
If the leak is extensive or located in the middle of the hose, cutting and splicing may be necessary. Measure and mark the damaged section, then use a utility knife to make clean cuts on either side of the damaged area. Insert a hose mender and secure both ends with clamps.
Using a Hose Mender Kit
Hose mender kits are available at garden supply stores and provide an easy solution for larger leaks. Follow the kit’s instructions to cut out the damaged section, insert the mender, and secure with clamps.
Step-by-Step Repair Guide
Tape Repair Method
- Clean and dry the leak area.
- Wrap waterproof tape tightly around the leak, overlapping as you go.
- Smooth out any air bubbles for a secure seal.
Washer and O-Ring Replacement
- Turn off the water source and relieve hose pressure.
- Use an adjustable wrench to disconnect the fittings.
- Replace old washers and O-rings.
- Reassemble fittings, ensuring a tight connection.
Cutting and Splicing the Hose
- Measure and mark the damaged section.
- Carefully cut the hose on both sides of the damage.
- Insert a hose mender into the hose ends.
- Secure both ends with clamps using a screwdriver.
Hose Mender Kit Application
- Cut out the damaged section following the kit’s instructions.
- Insert the hose mender into the cut ends of the hose.
- Use clamps to secure the mender and hose in place.
Tips for Preventing Future Leaks
- Store Properly: Coil and store your hose in a cool, shaded area when not in use to prevent exposure to the sun’s UV rays.
- Avoid Kinks: Do not kink the hose tightly, as this can weaken the material and lead to leaks.
- Regular Inspections: Periodically check your hose for signs of wear, cracks, or leaks to address issues early.
Conclusion
Repairing a garden hose is a practical skill that can save you money and reduce waste. By following the outlined repair methods and tips for prevention, you can keep your garden hose in excellent working condition for years to come.
FAQs
How long will a repaired hose last?
A repaired hose can last for a considerable time if the repair is done properly. Regular maintenance and proper storage also contribute to its longevity.
Can I repair a kinked hose?
Unfortunately, kinks can weaken the hose’s structure, often leading to multiple leaks. It’s best to replace a kinked hose instead of attempting a repair.
Is it better to repair or replace a garden hose?
Repairing is a cost-effective option for minor issues like leaks. However, extensively damaged hoses or those with multiple leaks are better off being replaced.
Can I use any type of tape for repairs?
While waterproof tape designed for hose repairs is recommended, other types of tape may not provide a secure and lasting seal.
Where can I buy hose mender kits?
Hose mender kits are available at most garden supply stores or hardware stores. You can also find them online for convenience.

