Crimping hydraulic hose fittings is a crucial skill for anyone who works with machinery that relies on hydraulic systems. A secure and properly crimped hose ensures the safe and efficient operation of equipment. However, it’s important to note that crimping can be complex and requires specific tools and knowledge.
What Are Hydraulic Hose Fittings

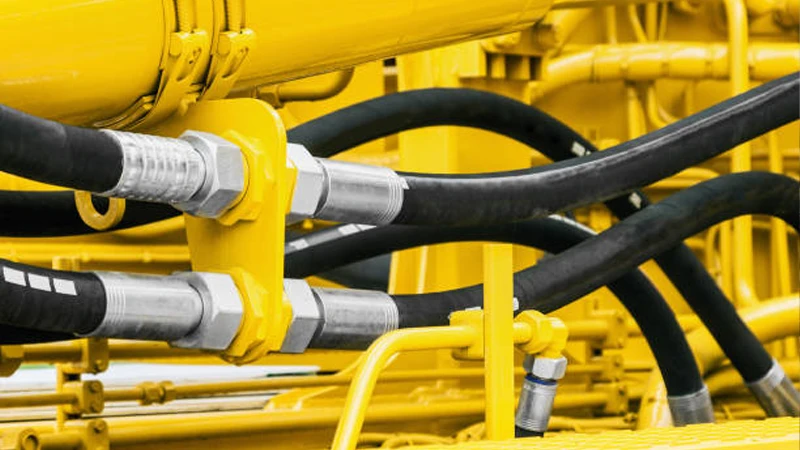
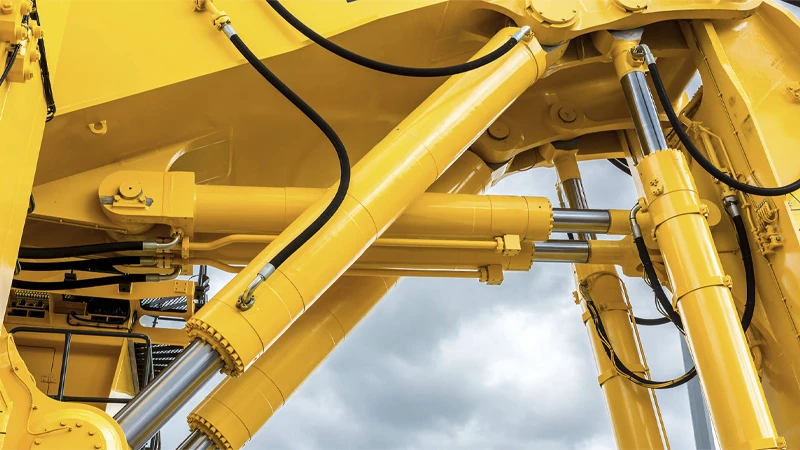
Hydraulic hose fittings are the essential connectors that form the link between hydraulic hoses and other components in a hydraulic system. They perform two critical functions:
- Connection: They establish a secure and leak-proof joint between the flexible hydraulic hose and rigid components like pumps, valves, cylinders, or other hoses.
- Fluid Transfer: They facilitate the flow of pressurized hydraulic fluid within the system, directing it where it’s needed to power machinery or equipment.
Here’s a deeper dive into key aspects of hydraulic hose fittings:
- Types: There are various types of hydraulic hose fittings, each designed for specific applications and pressure ratings. Common types include crimp fittings (permanent), reusable fittings, and flange fittings.
- Materials: They are typically made from durable materials like steel, stainless steel, or brass to withstand high pressures and harsh environments.
- Selection Factors: Choosing the right fitting depends on several factors, including the hose size and type, pressure requirements, operating temperature, and compatibility with the fluid being used.
- Importance: Secure and properly chosen hydraulic hose fittings are vital for a safe and efficient hydraulic system. They prevent leaks, ensure proper fluid flow, and contribute to the overall reliability of the system.
What Is Hydraulic Hose Crimping

Hydraulic hose fitting crimping is the process of attaching a metal fitting to the end of a hydraulic hose using a specialized crimping tool. This creates a secure and permanent connection that can withstand the high pressures of hydraulic systems.
Here’s a breakdown of the importance of crimping:
- Safety: A properly crimped hose ensures the safe operation of hydraulic equipment. A faulty crimp can lead to leaks, hose ruptures, and potential injuries.
- Performance: A secure crimp guarantees a leak-free connection, which is crucial for maintaining the efficiency of the hydraulic system.
- Reliability: Crimping strengthens the hose-fitting assembly, making it resistant to high pressure and fluid flow.
Crimping requires specific tools and expertise. If you’re not comfortable doing it yourself, it’s always best to seek help from a qualified professional.
How to Crimp Hydraulic Hose Fittings
While seeking professional help is always an option, here’s a breakdown of how to crimp hydraulic hose fittings yourself, assuming you have the necessary tools and are comfortable following safety protocols (covered later). Remember, precision is key, so follow each step carefully.
Materials:
- Hydraulic hose (ensure it’s compatible with your system’s pressure and fluid)
- Hydraulic fitting (correct size and type for your hose)
- Hose cutter (ideally a hose saw for clean cuts)
- Deburring tool (optional, but recommended to remove any burrs left from cutting)
- Hydraulic crimping machine (ensure it has the appropriate die set for your hose and fitting combination)
- Calipers (for accurate measurements)
- Lubricant compatible with your hose material
- Safety glasses and gloves
Crimping hydraulic fittings correctly is a vital process that ensures the integrity and longevity of hydraulic hose assemblies. It’s about creating a permanent, leak-proof bond between the hose and the fitting, allowing high-pressure fluid transfer without failure.
This guide will walk you through the essential steps, from preparing your materials to verifying the crimp, ensuring a safe and reliable hose assembly.
Step 1: Measure Hydraulic Hose
The initial step in creating a proper hydraulic hose assembly is accurately measuring the hose. This involves determining the precise length required for your specific application, taking into account any bends, routing complexities, and the overall dimensions of the equipment. Using a reliable measuring tape or a specialized hose length calculator is essential to ensure the hose is neither too long (leading to kinks or interference) nor too short (creating tension or not reaching connections).
When measuring, remember to account for the length contributed by the fittings themselves, as these will add to the overall assembly length. It’s often recommended to measure twice and cut once, as an incorrectly measured hose cannot be easily rectified. This attention to detail at the measuring stage prevents material waste and ensures the final assembly fits perfectly within the hydraulic system.
Step 2: Cut Hydraulic Hose
Once the precise length has been determined, the next crucial step is to cut the hydraulic hose. This must be done using a specialized hydraulic hose cutter, designed to provide a clean, perpendicular cut without fraying or deforming the hose ends. Using an improper cutting tool, like a hacksaw or utility knife, can create uneven edges, leave behind abrasive particles, or damage the hose’s internal structure, all of which can compromise the integrity of the crimp.
After cutting, it’s equally important to thoroughly clean the interior of the hose. The cutting process often generates rubber particles and debris that, if left inside, will contaminate the delicate hydraulic system, potentially leading to component damage and system failure. Techniques such as using a foam projectile (often called a “pig”) propelled by compressed air, or flushing the hose with a compatible cleaning fluid, are recommended to ensure all contaminants are removed, leaving a pristine interior.
Step 3: Select the Correct Fitting and Die
Choosing the right hydraulic fitting is paramount for a successful and safe hose assembly. You must ensure that the fitting’s type (e.g., JIC, ORFS, NPT), size, and material are fully compatible with the specific hydraulic hose being used, the type of hydraulic fluid, and the operating pressure and temperature requirements of the system. Mismatched components are a primary cause of premature hose assembly failure, leading to leaks and potential safety hazards. Always refer to the hose and fitting manufacturer’s official specifications and detailed crimping charts to confirm compatibility.
Once the correct fitting is selected, you must then choose the appropriate crimping die set for your crimping machine. Each unique hose and fitting combination has a precise crimp specification, which dictates the exact die size and the final crimp diameter required for a secure connection. Using an incorrect die size will result in either an under-crimped connection (where the fitting is too loose on the hose, leading to leaks) or an over-crimped connection (where the hose or fitting is damaged by excessive compression), both of which are highly prone to failure.
Step 4: Mark Insertion Depth and Insert Fitting
Before proceeding with the crimping process, it is essential to accurately mark the hydraulic hose to indicate the proper insertion depth of the fitting. This mark serves as a critical visual guide, ensuring that the fitting’s stem is fully seated onto the hose before crimping occurs. Proper insertion depth is fundamental for creating a secure and leak-proof connection, as it ensures adequate contact between the fitting’s internal structure and the hose’s inner tube. Many manufacturers provide specific insertion depth measurements or even dedicated tools like insertion depth blocks to aid in this precise marking.
With the hose accurately marked for insertion, carefully and firmly insert the fitting into the hose. For some types of hoses or fittings, applying a light, compatible lubricant (such as a small amount of the system’s hydraulic fluid) to the inside of the hose or the outside of the fitting’s stem can significantly ease the insertion process. Push the fitting steadily and evenly until the pre-determined insertion depth mark on the hose aligns perfectly with the end of the fitting’s ferrule. During insertion, it is crucial to ensure that there are no twists, kinks, or misalignments between the hose and the fitting, as these can compromise the integrity of the final crimp.
Step 5: Set Up the Crimping Machine and Crimp
With the fitting correctly inserted into the hose, the next step is to prepare and operate the crimping machine. Begin by installing the previously selected and appropriate die set into the crimping machine, ensuring they are properly seated and aligned according to the machine’s instructions. Then, input the precise crimp diameter settings into the machine, which are typically found in the hose and fitting manufacturer’s detailed crimping charts. These settings are absolutely crucial for achieving the correct compression and a reliable, leak-free connection.
Carefully position the hydraulic hose and fitting assembly into the crimping machine, ensuring that the fitting’s ferrule is centered correctly within the crimping dies. Once positioned, activate the crimping machine. The machine will then apply immense hydraulic pressure to compress the dies around the fitting’s ferrule, permanently deforming it onto the hose. During this process, it’s important to monitor the crimp, ensuring a smooth, even compression around the entire circumference of the ferrule. The machine will typically stop automatically once it reaches the pre-set crimp diameter, indicating the completion of the crimping cycle.
Step 6: Verify Crimp Diameter and Inspect
The final and arguably most critical step in ensuring a reliable hydraulic hose assembly is to meticulously verify the crimp diameter. Immediately after crimping, use a precision measuring tool such as a caliper or micrometer to measure the outside diameter of the crimped ferrule at several different points around its circumference. Compare these measurements rigorously to the specific crimp diameter range provided by the hose and fitting manufacturer. Any measurement that falls outside this specified range, whether too large or too small, indicates an improper crimp that will almost certainly fail under pressure.
Beyond dimensional checks, conduct a thorough visual inspection of the newly crimped connection. Look for an even, consistent crimp pattern around the entire circumference of the ferrule, ensuring there are no visible cracks, uneven compression marks, or signs of the hose material being excessively extruded or pinched. A perfectly crimped fitting should show uniform compression. If the crimp diameter is incorrect, or if any visual defects are present, the hose assembly is compromised and unsafe for use. It should be immediately cut and re-crimped using new hose and fitting components to ensure safety and reliability.
Hydraulic Hose Fitting Crimping Machine
A hydraulic hose fitting crimping machine is a specialized tool used to attach a metal fitting to the end of a hydraulic hose by creating a permanent crimp. This crimp creates a secure and leak-proof connection that can withstand the high pressures of hydraulic systems.
There are two main types of hydraulic hose fitting crimping machines:
- Manual hydraulic hose crimping machines: These machines are operated by hand and are typically used for lower-volume applications or in workshops.
- Electric hydraulic hose crimping machines: These machines are powered by an electric motor and are faster and more powerful than manual machines. They are typically used for higher-volume applications or in production environments.
What’s the Difference Between Swaging and Crimping?
While both swaging and crimping are methods used to create permanent, leak-proof connections between a hose and its fitting in hydraulic systems, they achieve this through distinct mechanical processes. The core difference lies in how the material of the fitting’s ferrule is deformed and how it grips the hose.
- Crimping: This process involves compressing a metal ferrule (or sleeve) around the hose and the fitting’s stem using a series of segmented dies that close radially. The dies typically compress the ferrule from multiple points around its circumference, uniformly reducing its outer diameter and forcing the hose material to conform to the fitting’s internal barbs or serrations. This creates a tight, mechanical interlock.
- Swaging: In contrast, swaging typically involves pushing the hose and fitting assembly through a fixed, tapered die (or sometimes using rotary dies). The die reduces the diameter of the fitting’s ferrule by a continuous, circumferential compression. This process often deforms the ferrule progressively from one end to the other, making the metal flow and conform tightly to the hose. Swaging is often considered to create a very strong, often more “seamless” looking connection due to the continuous flow of the metal.
What Happens if You Over Crimp Hydraulic Fittings?

Over-crimping a hydraulic fitting is a serious issue that can compromise the entire hose assembly and lead to severe consequences for the hydraulic system and its operators. Instead of creating a secure seal, excessive crimping force deforms the hose and/or the fitting beyond their intended design limits, leading to several failure modes.
- Weakened Hose Structure: When over-crimped, the internal reinforcement layers (like wire braids or spirals) within the hydraulic hose can be crushed, cut, or otherwise damaged. This significantly weakens the hose’s ability to withstand internal pressure, making it prone to premature bursting, especially under dynamic pressure cycles or sudden pressure spikes.
- Restricted Fluid Flow: Excessive compression of the ferrule can severely constrict the inner diameter of the hose, particularly near the fitting. This creates a bottleneck that restricts hydraulic fluid flow, leading to increased pressure drops, reduced system efficiency, overheating of the fluid, and increased strain on the pump and other hydraulic components.
- Damaged Sealing Surfaces: Over-crimping can deform the sealing surfaces of the fitting itself or crush any internal O-rings or seals that the fitting relies on. This damage prevents a proper seal from forming, resulting in leaks even after assembly.
- Premature Fatigue and Failure: The stresses induced by over-crimping can lead to localized stress concentrations at the crimped area. This makes the fitting and hose assembly highly susceptible to fatigue failure, where repeated pressure cycles cause cracks or breaks to propagate over time, leading to sudden and often catastrophic failure.
- Reduced Service Life: Even if an over-crimped assembly doesn’t fail immediately, its service life will be drastically shortened. The compromised integrity means it won’t perform to its rated specifications and will require replacement much sooner than a properly crimped assembly, leading to increased downtime and maintenance costs.
Conclusion
Correctly crimping hydraulic hose fittings is an essential skill for creating safe and durable hydraulic assemblies. By following precise steps—from accurate hose measurement and selection of compatible components to proper machine setup and meticulous crimp verification—you ensure a strong, leak-free connection. This diligent process prevents premature failures and extends the life of your hydraulic systems.
Ignoring the manufacturer’s specifications for crimp diameter or using incompatible tools can lead to critical weaknesses in the hose assembly. A properly crimped fitting withstands high pressures and vibrations, ensuring reliable performance in demanding applications and safeguarding operational integrity.
For all your hydraulic hose and fitting needs, look no further. You can get wholesale hydraulic fittings directly from our Kingdaflex, ensuring you have the reliable components required for expert hose assembly.