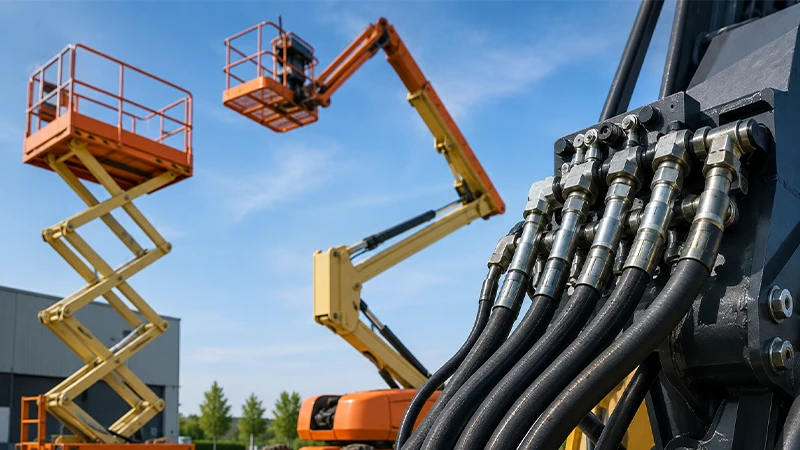
Hydraulic hoses are essential components used in various machinery and equipment. Understanding how to make high-quality hydraulic hoses is crucial to ensuring the proper functioning of mechanical systems.
In this article, we will provide you with detailed steps and tips on how to make hydraulic hoses, reliable, and high-performance hydraulic hoses.
You can know more about hydraulic hose manufacturing process, and then determine what hydraulic hoses you are needing for your project.
Here we go to know more details about How to make a hydraulic hose assembly.
Step 1: Select the Right Hose Material

Before making hydraulic hoses, it is important to choose the appropriate hose material.
Common materials used for hydraulic hoses include rubber, polyester, polyurethane, and steel. Each material has its own advantages and limitations, so consider the specific requirements of your application before making a decision.
Ensure that the chosen material is compatible with the hydraulic fluids and operating conditions of your system.
GET IN TOUCH
Quote Hydraulic Hose Now
Step 2: Measure and Cut the Hydraulic Hose

Accurate hydraulic hose measurement is crucial when making hydraulic hoses. Start by measuring the desired length of the hose using a tape measure or ruler. Mark the measurement on the hose using a pen or marker. To ensure a clean and precise cut, use a hose cutter specifically designed for cutting hydraulic hoses. Make sure to wear protective gloves and goggles during this process to prevent injury.
GET IN TOUCH
Quote Hydraulic Hose Now
Step 3: Attach Fittings to the Hose

Once the hose is cut to the desired length, it’s time to attach fittings to both ends. Hydraulic hose fittings come in various types, including crimped, reusable, and push-on fittings. Choose the appropriate fitting based on your specific needs and preferences.
Follow the hydraulic hose manufacturer’s instructions to properly install the fittings onto the hose ends. Ensure that the fittings are securely attached to prevent leaks and maintain optimal performance.
Step 4: Crimp the Hose Assembly

If you are using crimped fittings, the next step is to crimp the hose assembly. Crimping is the process of permanently attaching the fittings to the hose using a hydraulic crimper. The crimper applies high pressure to compress the fitting onto the hose, creating a secure and leak-free connection. Make sure to use the correct crimping specifications provided by the fitting manufacturer to ensure proper assembly.
Step 5: Test the Hose Assembly

After crimping the hose assembly, it is essential to test its integrity before putting it into service. Hydraulic hose assemblies must be able to withstand the pressure and fluid flow of the hydraulic system without any leaks or failures. Conduct a thorough pressure test using a hydraulic test bench or similar equipment to verify the hose’s performance. Check for any signs of leakage or abnormalities and make any necessary adjustments or repairs.
Step 6: Install Hydraulic Hose

Once the hose assembly passes the pressure test, it is ready to be installed in the hydraulic system. Follow the manufacturer’s guidelines and ensure that the hose is properly routed, secured, and protected from any potential hazards.
Pay attention to factors such as minimum bend radius, temperature limitations, and compatibility with other system components. Proper hydraulic hose installation is crucial for the efficient and reliable operation of the hydraulic system.
How to Make Your Own Hydraulic Hoses

Making your own hydraulic hoses requires specialized equipment and knowledge of hydraulic systems. It is crucial to follow proper safety procedures and adhere to industry standards. Please note that working with hydraulic systems can be dangerous, and it is recommended to consult with a professional or a hydraulic hose manufacturer before attempting to make your own hoses. However, if you still wish to proceed, here is a general overview of the process:
- Gather the necessary materials and tools:
- Hydraulic hose
- Hydraulic fittings (including male and female connectors, adapters, and couplers)
- Hydraulic hose crimper
- Hose cutting tool (e.g., a hacksaw or hose cutting machine)
- Hose cleaning equipment (e.g., a brush or compressed air)
- Lubricant suitable for hydraulic systems
- Measure and cut the hose:
- Determine the required length for your hydraulic hose based on the application.
- Use a hose cutting tool to make a clean, straight cut. Ensure that the ends are perpendicular to the hose axis.
- Prepare the hose ends:
- Clean the hose ends thoroughly to remove any dirt, debris, or contaminants.
- Inspect the hose ends for any damage or signs of wear. If the ends are damaged, they may need to be recut or replaced.
- Select and install the fittings:
- Choose the appropriate hydraulic fittings for your application, considering factors such as pressure rating, connection type, and compatibility with the hose.
- Apply an appropriate lubricant to the threads and the inner surface of the hose.
- Attach the fittings to each end of the hose, ensuring they are securely tightened. Follow the manufacturer’s recommendations for torque values.
- Crimp the fittings:
- Place the hose with the attached fittings into the hydraulic hose crimper.
- Adjust the crimper to the appropriate crimp diameter for the fittings being used.
- Activate the crimper to compress and secure the fittings onto the hose. Follow the manufacturer’s instructions for the specific crimper you are using.
- Inspect and test the assembled hose:
- Visually inspect the crimped connections for any signs of leaks, misalignment, or improper crimping.
- Conduct a pressure test to verify the integrity of the hose assembly. Use a hydraulic test bench or consult a professional to perform this test safely.
GET IN TOUCH
Quote Hydraulic Hose Now
It is essential to keep in mind that the process of making hydraulic hoses requires precision and expertise. If you are unsure about any step or lack experience in hydraulic systems, it is strongly recommended to consult a professional or a reputable hydraulic hose manufacturer. They can provide guidance, ensure the correct assembly, and guarantee the safety and reliability of your hydraulic hoses.
Conclusion
In conclusion, knowing how to make hydraulic hoses is a valuable skill for anyone working with hydraulic systems.
By selecting the right hose material, accurately measuring and cutting the hose, attaching fittings properly, crimping the assembly, testing for integrity, and installing the hose correctly, you can ensure the production of high-quality hydraulic hoses. Remember to follow safety precautions and consult professional advice when necessary.
Finally, please feel free to contact us at any time if you are interested in our hydraulic hose.