When you’re out in the field and a hydraulic hose suddenly springs a leak, it can bring your operation to a grinding halt. While a permanent repair requires proper tools and parts, sometimes you just need a quick fix to get back to work.
That’s where a temporary hydraulic hose repair with tape comes in. It’s not a long-term solution, but knowing how to properly apply tape can buy you valuable time and prevent further damage until you can perform a complete repair.
Can You Fix a Hydraulic Hose With Tape?

While you can attempt a temporary repair on a hydraulic hose with tape in an absolute emergency to get out of a bind, it is not recommended as a permanent or even reliable solution. Hydraulic systems operate under incredibly high pressure, and most common tapes (like duct tape) are simply not designed to withstand such forces.
Using tape can lead to:
- Failure and Bursting: The tape will likely give way under pressure, potentially causing the hose to burst, which can lead to rapid fluid loss, equipment damage, and severe personal injury from high-pressure fluid injection.
- System Contamination: A compromised hose, even with a temporary tape repair, can allow contaminants into the hydraulic system, leading to further damage to pumps, valves, and cylinders.
- Reduced Efficiency: A leaking hose, even with a taped “fix,” will reduce the efficiency of your hydraulic system and waste expensive hydraulic fluid.
- Safety Hazards: Operating equipment with a temporarily taped hydraulic hose is a significant safety risk.
For any hydraulic hose damage, the only safe and recommended course of action is to depressurize the system and replace the damaged hose with a new, properly rated hydraulic hose. Specialized self-fusing silicone tapes are available and may offer a slightly better temporary seal than standard tape, but they are still intended only for short-term, emergency use until a proper replacement can be installed.
How to Repair Hydraulic Hoses

Repairing the hydraulic hoses involves more than just a quick patch; it requires proper tools and techniques to ensure safety and system integrity. This guide focuses on the correct procedure for a lasting repair or replacement, emphasizing the importance of precision and material compatibility for optimal performance.
Step 1: Identify the Problem and Depressurize
Begin by accurately identifying the source and type of damage to the hydraulic hose, whether it’s a leak, a cut, or an abrasion. Once the problem is located, the most critical safety step is to completely depressurize the hydraulic system before any repair attempt.
Ensure all pressure is relieved from the system by shutting down the machinery and cycling controls or opening relief valves. Failure to depressurize can lead to severe injury from high-pressure fluid injection and extensive damage to the equipment during the repair process.
Step 2: Remove the Damaged Hose Section
Carefully use appropriate tools, such as wrenches or a hydraulic hose cutter, to detach the damaged hose from its fittings. If only a section is damaged, you might cut out the compromised part. Be prepared for some residual fluid to drain, so have containment ready.
When removing, note the orientation and routing of the hose to ensure the new or repaired section is installed correctly. Proper alignment is vital for avoiding twists and strains that could lead to premature failure of the new repair or replacement.
Step 3: Prepare the New Hydraulic Hose or Repair Area
If replacing the entire hydraulic hose, measure the old hose precisely to ensure the new one has the correct length. If a specific section is being repaired (e.g., re-fitting a new end), clean the hose end thoroughly, removing any contaminants or rough edges.
For re-fitting, prepare the hose ends according to the fitting manufacturer’s specifications, which may involve skiving (removing outer or inner layers) or simply cutting cleanly. Precision in this step is crucial for a secure and leak-free connection.
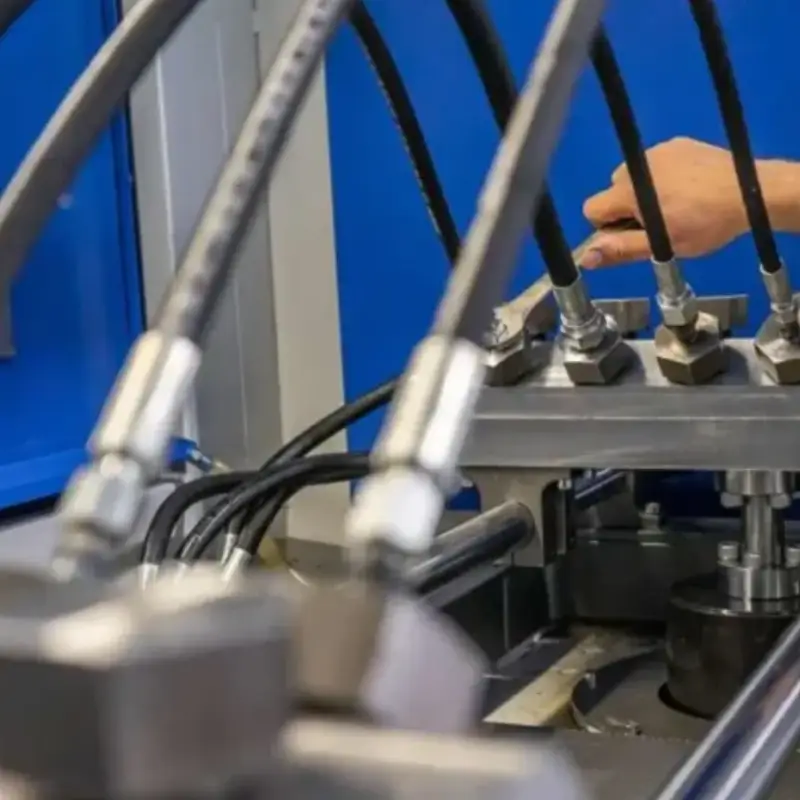
Step 4: Install New Fittings or Hose
Attach new fittings to the prepared hydraulic hose ends using the correct crimping tools or methods as specified by the fitting manufacturer. Ensure the fittings are securely and properly crimped to withstand the high operating pressures of the hydraulic system.
If replacing the entire hose, carefully route the new hose, ensuring it doesn’t rub against moving parts or sharp edges. Connect the new hose to the system, tightening all connections to the manufacturer’s recommended torque specifications for a secure, leak-proof seal.
Step 5: Test the System and Inspect
After the new hydraulic hose or repaired section is installed, slowly repressurize the hydraulic system while carefully monitoring for any leaks at the connections or along the hydraulic hose length. Start the equipment at low pressure and gradually increase it.
Visually inspect all connections and the hose itself for any signs of weeping, bubbling, or improper routing. Address any leaks immediately by re-tightening connections or, if necessary, repeating the installation process. A thorough test ensures safety and system integrity.
How to Use the Quick Fix Hydraulic Hose Repair Kit

A quick fix hydraulic hose repair kit can be a lifesaver for unexpected leaks, offering a temporary but effective solution to get your machinery operational again. These kits are designed for rapid deployment, allowing you to mend a damaged hose in the field when a full replacement isn’t immediately possible.
Understanding the correct procedure is key to a successful temporary repair that holds until you can get to a permanent solution.
Step 1: Prepare the Damaged Area
Begin by carefully cleaning the area around the leak on the hydraulic hose. Remove any dirt, grease, or fluid to ensure proper adhesion of the repair materials. A clean surface is essential for the kit’s components to create an effective seal and temporarily halt the leak.
Once clean, use a suitable abrasive, like sandpaper or an emery cloth often provided in kits, to lightly roughen the hose surface. This creates a better texture for the adhesive or self-fusing tape to bond securely, enhancing the temporary repair’s integrity against pressure.
Step 2: Apply the Repair Material
Following the kit’s specific instructions, apply the repair material, typically a specialized epoxy, self-fusing tape, or wrap. For epoxy, mix the components thoroughly and apply a generous, even layer over the damaged section, extending beyond the leak itself to ensure full coverage.
If using self-fusing tape or a wrap, begin winding it tightly around the damaged area, overlapping each turn by at least half the width of the tape. Continue wrapping for several layers to build up sufficient strength and create a robust, temporary seal against the internal hydraulic pressure.
Step 3: Allow for Curing/Setting
After applying the repair material, allow ample time for it to cure or set according to the kit’s instructions. This crucial step ensures the material achieves maximum strength and sealing capability before the hydraulic system is repressurized. Rushing this process can lead to immediate failure of the temporary repair.
During the curing period, avoid any stress or movement on the repaired hose. Once fully set, carefully repressurize the hydraulic system and visually inspect the repaired area for any signs of continued leakage, confirming the temporary fix is holding adequately.
Tips for Effective Hydraulic Hose Fix
For an effective hydraulic hose fix, prioritize safety and temporary measures only. Never consider these a permanent solution; always plan for a proper replacement soon.
- Clean the area thoroughly: Before any temporary repair, ensure the hose and surrounding area are free of dirt, grease, and fluid. A clean surface is crucial for any repair material to adhere properly and create a temporary seal.
- Use the right temporary material: Not all tapes or sealants are equal for high-pressure hydraulics. Opt for specialized self-fusing silicone tape or a dedicated emergency repair kit designed for hydraulic applications, if available.
- Apply under no pressure: Always depressurize the hydraulic system completely before attempting any repair. Working on a pressurized hose is extremely dangerous and can lead to severe injury or further equipment damage.
- Plan for a permanent replacement: A temporary fix only buys you time. Order a new, correctly specified hydraulic hose immediately. Operating with a compromised hose, even temporarily, risks system failure and safety hazards.
Can You Use a Quick Hydraulic Hose Repair Kit on Any Type of Hydraulic Hose?
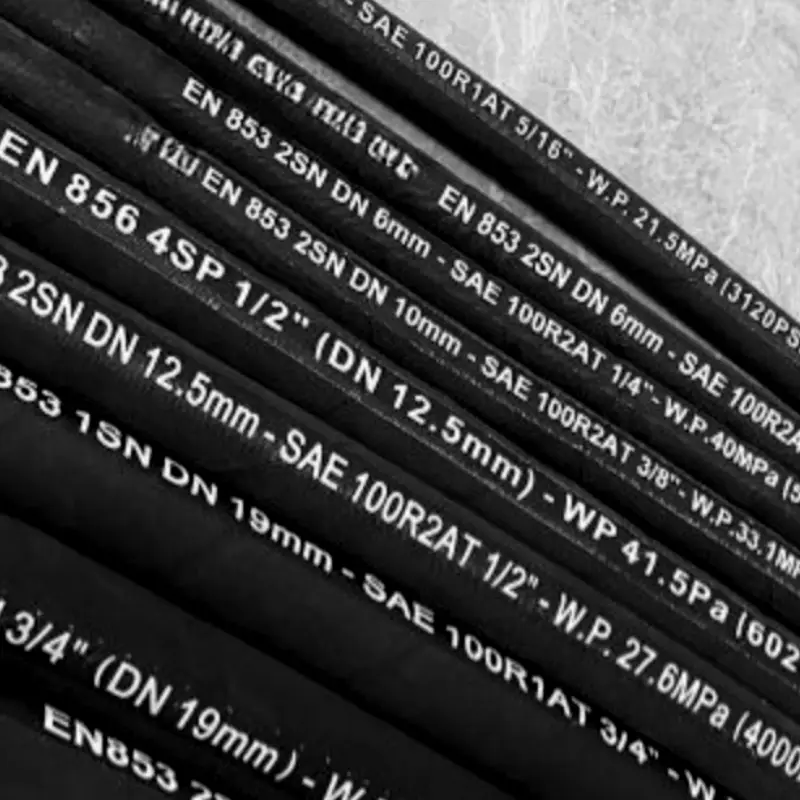
No, you generally cannot use a quick hydraulic hose repair kit on any type of hydraulic hose. These kits are typically designed for specific hose constructions, most commonly SAE 100R1 (1-wire) and SAE 100R2 (2-wire) braided hoses, and certain pressure ratings. They are not suitable for super high-pressure skive hoses, multi-spiral hoses, or hoses made of specialized materials like PTFE, which require specific crimping and fittings. Always check the kit’s compatibility with your hose’s specifications (ID, OD, pressure rating, and construction type) before attempting a repair.
How Often Should You Inspect Your Hydraulic Hoses?
You should inspect your hydraulic hoses regularly, as often as daily for critical equipment or those in harsh environments. For most applications, a visual inspection every three months or every 400-600 hours of use is recommended. Always refer to your equipment’s manufacturer guidelines for specific inspection frequencies.
Conclusion
In conclusion, while repairing a hydraulic hose with tape is a valuable skill for emergency situations, remember it’s always a temporary solution. Prioritizing safety and proper maintenance is crucial to prevent these unexpected leaks from happening in the first place.
For long-term reliability and to avoid costly downtime, it’s essential to replace a taped hose with a new, high-quality one as soon as possible. Don’t compromise on the integrity of your hydraulic systems.
When it’s time for a permanent fix or a system overhaul, you can get wholesale hydraulic hoses premium from Kingdaflex. Ensure your machinery runs smoothly and safely with durable, reliable components.