Gardening can be a rewarding and therapeutic activity, but it’s frustrating when your garden hose starts leaking unexpectedly. A leaking garden hose not only wastes water but can also make your gardening tasks less efficient.
In this article, we’ll explore the various reasons behind garden hose leaks and provide practical solutions to help you fix them.
What Causes Garden Hose Leaks?
Garden hose leaks can stem from various factors, including wear and tear, improper storage, and exposure to harsh elements. Identifying the underlying cause of the leak is essential to determine the most effective solution.
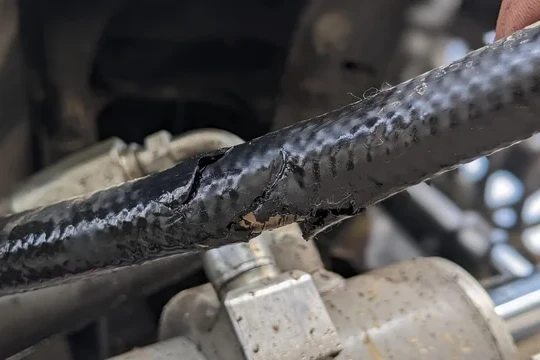
Garden hoses are often subjected to a range of conditions that can lead to leaks. Over time, the rubber or plastic material of the hose can degrade, leading to tiny cracks or holes. These imperfections allow water to escape, resulting in leaks.
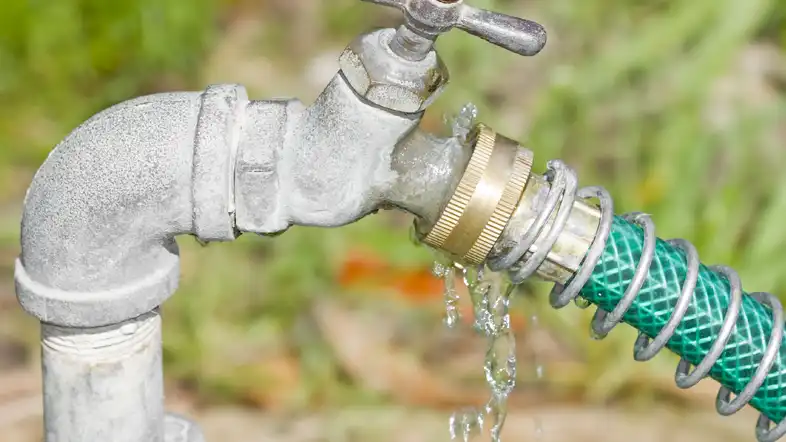
Additionally, the junction between the hose and connectors, such as the faucet or nozzle, can become loose or damaged, causing water to seep out. In some cases, freezing temperatures can also be a culprit, as water trapped inside the hose can expand and cause it to crack.
Common Causes of Garden Hose Leaks
Worn Out Washer
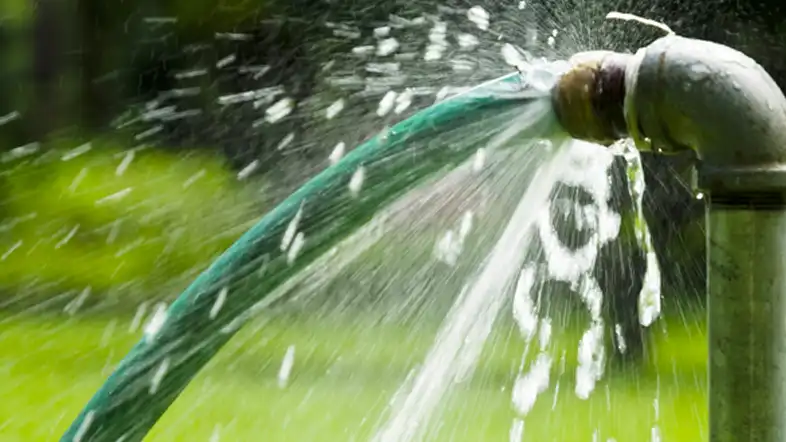
One of the most common causes of a leaking garden hose is a worn-out washer. The washer, located in the hose’s female connector, can degrade over time, leading to water leakage. Replacing the washer is a simple yet effective solution.
The washer, often made of rubber or another flexible material, acts as a seal between the hose and the faucet. It prevents water from escaping through the connection point. However, with regular use and exposure to water and weather, the washer can become worn, flattened, or even torn. This deterioration compromises its ability to create a watertight seal, resulting in leaks. Thankfully, replacing the washer is a quick fix that requires minimal effort and cost.
Kinks and Twists
Kinks and twists in the hose can disrupt water flow and eventually lead to leaks. These occur when the hose is bent at sharp angles. Ensuring a straight and untangled hose can prevent this issue.
Imagine water flowing through a hose as a smooth and consistent stream. When a kink or twist occurs, it creates an obstruction that interrupts the flow. The pressure builds up behind the kink, causing the hose to bulge and potentially develop weak spots. Over time, these weak spots can lead to leaks. Kinks are often caused by improper handling or storage of the hose. Leaving the hose in direct sunlight or coiling it too tightly can contribute to kinking. To prevent this, always uncoil the hose fully before use and store it properly to maintain a straight path for water flow.
How to Fix a Leaking Garden Hose
Replacing the Washer
To fix a leaking hose due to a worn-out washer, simply unscrew the hose from the faucet, remove the old washer, replace it with a new one, and reattach the hose.
The washer, a small but crucial component, is responsible for creating a water-tight seal between the hose and the faucet. If this washer becomes worn or damaged, it can lead to water leakage at the connection point. To replace the washer, start by turning off the water supply and unscrewing the hose from the faucet. Then, locate the washer inside the female connector of the hose.
Gently remove the old washer, taking note of its size and shape. Head to your local hardware store to purchase a replacement washer that matches the specifications. Insert the new washer into the connector, making sure it’s properly seated. Finally, reattach the hose to the faucet and tighten it securely. This simple fix can often eliminate leaks and restore proper water flow.
Straightening Out Kinks and Twists
Carefully straighten any kinks or twists in the hose to restore proper water flow. Avoid bending the hose at sharp angles.
Kinks and twists are a common cause of reduced water flow and leaks in garden hoses. When the hose is bent at sharp angles, it disrupts the smooth path of water, leading to pressure build-up and potential weak points in the hose material. To address this issue, carefully examine the hose for any kinks or twists. Gently straighten the hose along its length, working out any bends that could obstruct water flow. Be cautious not to create new kinks in the process.
To prevent future kinking, store the hose properly by coiling it loosely in a wide loop, or use a hose reel for organized storage. By ensuring a straight and unobstructed path for water, you can prevent leaks and maintain efficient water delivery for your gardening needs.
Patch Up Cracks and Holes
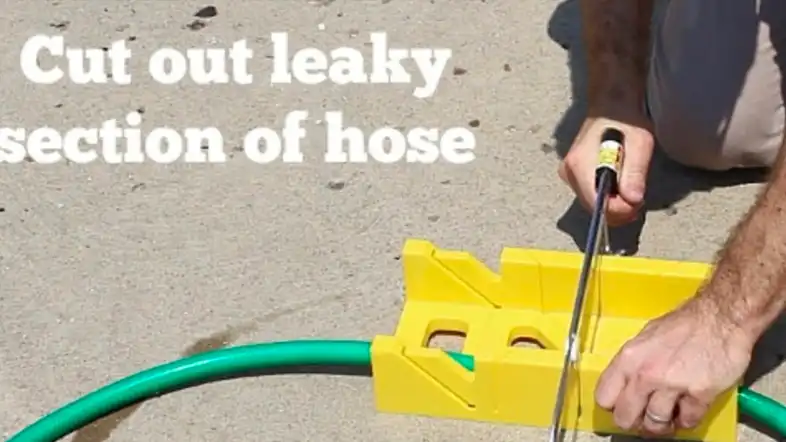
For small cracks or holes, use a hose repair kit to patch up the damaged area. For larger damage, consider cutting out the section and connecting the hose ends with couplings.
Physical damage, such as cracks and holes, can compromise the integrity of your garden hose, leading to leaks. These issues can result from accidental punctures, exposure to sharp objects, or even the hose being run over by vehicles. If the damage is minimal and confined to a small area, you can often repair it using a hose repair kit. These kits typically include adhesive patches or tapes designed to seal cracks and holes in the hose material.
Clean and dry the damaged area thoroughly, then apply the patch according to the manufacturer’s instructions. Press down firmly to ensure a secure bond. For larger damage that cannot be effectively repaired, you might need to consider cutting out the damaged section of the hose. Once removed, you can use hose couplings to connect the two ends of the hose, creating a seamless connection that eliminates leaks.
Regularly inspecting your hose for signs of damage and addressing issues promptly can help extend its lifespan and prevent leaks from worsening.
Tightening Connections
Regularly inspect and tighten hose connections to prevent water leakage. Use a wrench to ensure a snug fit.
Hose connections, such as those between the hose and the faucet or nozzle, can become loose over time due to repeated use, movement, and exposure to the elements. Loose connections can result in water seeping out at the joints, leading to leaks.
To prevent this, make it a habit to regularly inspect the connections and give them a gentle twist by hand to check for any play. If you notice any looseness, use an adjustable wrench to tighten the fittings securely. Be careful not to overtighten, as this can lead to damage or stripped threads. A snug and secure connection will ensure proper water flow and minimize the risk of leaks.
Protecting from Freezing Temperatures
Before winter, drain the hose completely to prevent freezing. Store it indoors or in a warm area to avoid cracking due to freezing temperatures.
If you live in an area with cold winters, freezing temperatures can wreak havoc on your garden hose. When water inside the hose freezes, it expands, putting pressure on the hose material and potentially causing cracks or ruptures.
To prevent this, it’s essential to winterize your hose before the frost sets in. Start by disconnecting the hose from the faucet and draining all the water from it. Holding one end higher than the other can help gravity assist in draining. Once the hose is empty, you can coil it loosely and store it in a garage, shed, or other sheltered area where it will be protected from freezing temperatures.
If you’re concerned about space, hose reels with storage compartments can help keep your hose organized and protected during the winter months. By taking these precautions, you can ensure that your hose remains intact and leak-free when spring arrives.
Using Pressure Regulators
Attach a pressure regulator to your faucet to control water pressure. This helps prevent excessive pressure from causing leaks.
Water pressure that’s too high can strain your garden hose and increase the risk of leaks and bursts. To mitigate this issue, consider using a pressure regulator. This device attaches to your outdoor faucet and helps control the water pressure coming into the hose.
Pressure regulators work by adjusting the flow of water to a safe and manageable level, preventing excessive force from building up inside the hose. Excessive water pressure can weaken the hose material over time, leading to leaks. By using a pressure regulator, you can prolong the lifespan of your hose and ensure a consistent and controlled flow of water for your gardening needs.
Shielding from UV Exposure
Store your hose in a shaded area when not in use, or invest in UV-resistant hoses to prevent damage from sun exposure.
Sunlight, especially the harsh UV rays, can degrade the material of your garden hose over time. Prolonged exposure to sunlight can cause the hose material to become brittle, leading to cracks and leaks. To protect your hose from UV damage, store it in a shaded area when not in use. If finding shade is challenging, you can also opt for UV-resistant hoses.
These hoses are specifically designed to withstand the effects of sunlight and are less likely to develop leaks due to sun exposure. When selecting a hose, look for those labeled as UV-resistant or designed for outdoor use. By taking steps to shield your hose from the sun, you can maintain its durability and ensure it remains leak-free for seasons to come.
Preventive Measures to Avoid Garden Hose Leaks
Regular Maintenance
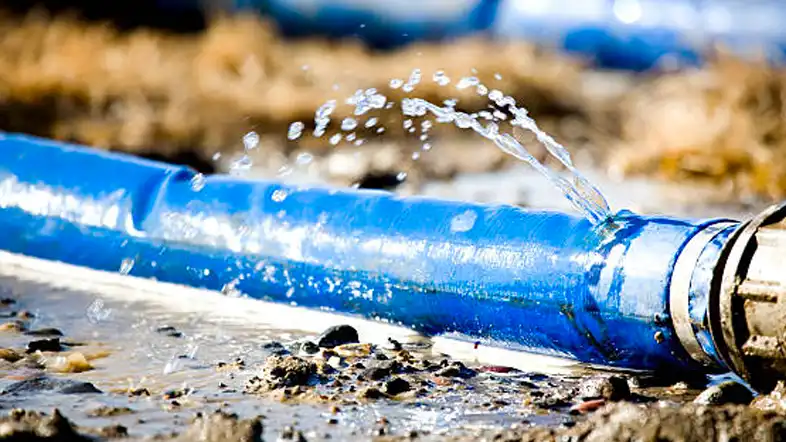
Inspect your hose regularly for signs of wear, tear, or damage. Addressing issues early can prevent leaks from occurring.
Regular maintenance is key to preventing garden hose leaks. Set aside time to inspect your hose for any visible cracks, holes, or wear. Run your hand along the length of the hose to feel for any soft spots, which could indicate weakened areas. Check the connections for tightness and ensure that the washer in the female connector is in good condition.
If you notice any issues, address them promptly to prevent leaks from worsening. Additionally, keep an eye out for kinks or twists, and straighten them out as needed. By dedicating a few minutes to routine checks, you can catch potential problems early and take action to keep your hose in top condition.
Proper Storage
After use, coil the hose neatly and store it away from direct sunlight and harsh weather conditions.
Proper storage plays a crucial role in maintaining the integrity of your garden hose. After each use, take the time to coil the hose neatly in wide loops, avoiding tight bends that could lead to kinks. Coiling the hose also helps prevent tripping hazards and reduces wear and tear. Once coiled, store the hose in a cool and dry place, away from direct sunlight and extreme weather conditions.
Exposure to sunlight and harsh elements can accelerate the aging of the hose material, making it more susceptible to leaks. If possible, consider using hose reels or hangers to keep your hose organized and off the ground. By storing your hose correctly, you can extend its lifespan and minimize the risk of leaks.
Choosing the Right Hose
Invest in a high-quality hose that suits your gardening needs. A durable hose is less likely to develop leaks.
The quality of your garden hose plays a significant role in its durability and resistance to leaks. When choosing a hose, prioritize those made from high-quality materials that are designed to withstand the rigors of outdoor use. Hoses made from durable rubber or reinforced with multiple layers of material are more likely to resist cracks and punctures.
Additionally, consider the length of the hose—opt for a length that meets your gardening needs without unnecessary excess. Longer hoses are more prone to kinking and tangling, which can lead to leaks over time. While high-quality hoses may come with a higher upfront cost, the investment can pay off in the long run by reducing the frequency of leaks and the need for replacements.
Using Hose Reels
Hose reels can prevent kinks and prolong the life of your hose by providing a tangle-free storage solution.
Hose reels offer a convenient and effective way to store your garden hose while minimizing the risk of kinks and tangles. Kinks and twists in the hose can weaken the material and lead to leaks, so preventing these issues is essential for hose longevity. Hose reels are designed to guide the hose smoothly onto the reel, creating wide and even loops that minimize stress on the hose.
This organized storage solution helps keep the hose in optimal condition and reduces the chances of damage. Choose a hose reel that suits your space and gardening needs, whether it’s a wall-mounted option, a freestanding reel, or a portable cart. By using a hose reel, you can extend the lifespan of your hose and ensure it remains free of leaks for seasons to come.
DIY vs. Professional Help
When Can You DIY?
Simple issues like worn-out washers, minor kinks, and small cracks can often be fixed using DIY methods.
Many garden hose issues can be resolved through DIY methods, especially if the problem is minor and easily identifiable. For instance, replacing a worn-out washer, straightening out kinks, or patching up small cracks can be accomplished with basic tools and materials. T
hese tasks don’t usually require specialized skills and can save you time and money compared to seeking professional help. By learning how to address common hose problems on your own, you can maintain your hose’s performance and prevent leaks without the need for outside assistance.
When to Seek Professional Assistance?
If you’re dealing with major damage, extensive leaks, or are unsure about the issue, it’s best to seek help from a professional plumber or gardening expert.
While many hose issues can be resolved through DIY methods, there are situations where seeking professional assistance is the best course of action. If your hose has significant damage, such as large cracks, multiple leaks, or structural issues, it may require specialized tools and expertise to address.
Additionally, if you’re unsure about the cause of the leak or if DIY attempts haven’t been successful, consulting a professional plumber or a gardening expert can provide you with accurate diagnosis and effective solutions. Professionals can assess the condition of your hose and provide tailored recommendations to fix the issue and prevent future leaks.
Investing in professional assistance when needed can ensure that complex problems are resolved correctly and your hose is restored to optimal functionality.
Why Does My Garden Hose Leak at the Faucet?
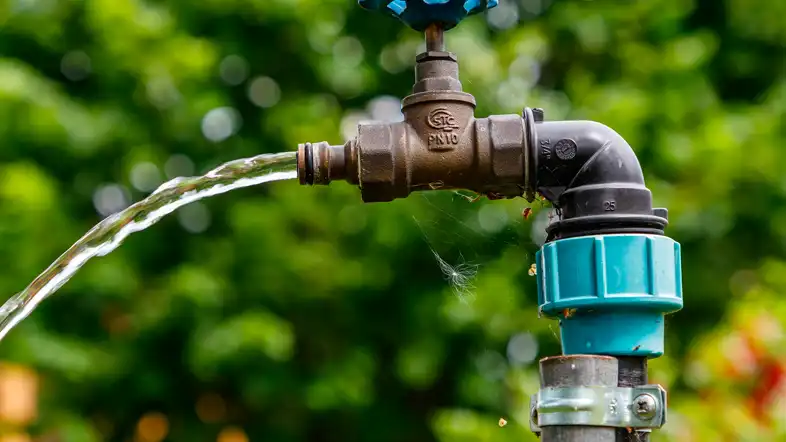
A garden hose can leak at the faucet for several reasons. Here are some common causes:
- Loose Connection: The most common reason for a hose leaking at the faucet is a loose connection. Make sure the hose is properly screwed onto the faucet and that it’s securely tightened. Over time, connections can become loose due to regular use.
- Worn Washer: Inside the hose coupling, there is usually a rubber washer that creates a watertight seal. If this washer is old, damaged, or misaligned, it can cause leaks. Replace the washer if it’s worn out or cracked.
- Thread Damage: If the threads on either the faucet or the hose coupling are damaged, it can prevent a proper seal and lead to leaks. Inspect both the hose and faucet threads for any signs of wear or damage.
- Incorrect Size or Type of Hose: Using the wrong size or type of hose for your faucet can also cause leaks. Make sure you’re using a hose that fits the faucet properly and is designed for the water pressure you’re using.
- Excessive Water Pressure: High water pressure can put strain on the hose and cause it to leak, especially at the point where it’s connected to the faucet. Consider using a pressure regulator to reduce water pressure if it’s too high.
- Freezing Temperatures: If your hose has been exposed to freezing temperatures, it might develop cracks or weaken the material, leading to leaks. Make sure to drain the hose and store it indoors during the colder months.
- Age and Wear: Over time, hoses can deteriorate due to exposure to the elements, sunlight, and general wear and tear. If your hose is old and showing signs of degradation, it might be time to replace it.
- Faucet Issues: Sometimes the problem might not be with the hose itself but with the faucet. If the faucet is damaged or has a faulty seal, it can cause leaks even if the hose is properly connected.
To fix the issue, start by checking the connection, inspecting the washer, and examining the threads for damage. If needed, replace any worn-out parts or consider upgrading to a higher-quality hose. If you’ve tried these steps and the problem persists, it might be a good idea to consult a professional plumber for further assistance.
Why Does My Garden Hose Leak at the Connection?
If your garden hose is leaking at the connection where it’s attached to the faucet or another hose, there are several potential reasons for this issue:
- Worn or Damaged Washer: The washer inside the hose coupling is designed to create a watertight seal. Over time, this washer can become worn, cracked, or misaligned, causing leaks. Inspect the washer and replace it if necessary.
- Loose Connection: If the hose is not securely attached to the faucet or another hose, it can lead to leaks. Make sure the connection is tightened properly to prevent any gaps that could allow water to escape.
- Cross-Threaded Connection: If the threads on the hose coupling and the faucet are misaligned or cross-threaded during attachment, it can result in a faulty seal and subsequent leaks. Ensure that the threads are aligned properly before tightening.
- Damaged Threads: If the threads on the hose coupling or faucet are damaged or worn, they may not provide a proper seal, leading to leaks. Inspect both the hose coupling and the faucet for any signs of thread damage.
- Incompatible Couplings: Using couplings or connectors that don’t fit properly can lead to leaks. Make sure you’re using compatible parts that create a snug and secure connection.
- High Water Pressure: Excessive water pressure can put strain on the connection points, causing leaks to occur. Consider using a pressure regulator to manage the water pressure and prevent leaks.
- Age and Wear: Hoses and connectors can degrade over time due to exposure to the elements, UV radiation, and normal wear. If your hose or connectors are old and deteriorating, they may not provide a reliable seal.
- Temperature Extremes: Exposure to extreme temperatures, especially freezing conditions, can cause hoses and connectors to contract, expand, and develop cracks, leading to leaks.
To address the issue of a leaking connection, follow these steps:
- Inspect the Washer: Check the washer inside the hose coupling for signs of wear or damage. If it’s worn out, replace it with a new washer of the appropriate size.
- Check Threads: Examine the threads on both the hose coupling and the faucet. Make sure they are in good condition and properly aligned.
- Tighten Properly: Ensure that the hose is securely attached to the faucet or other hoses. Avoid over-tightening, as this can damage the threads.
- Replace Damaged Parts: If you find damaged threads, connectors, or hoses, consider replacing the affected parts to establish a proper seal.
- Regulate Water Pressure: If high water pressure is a concern, consider using a pressure regulator to prevent excessive strain on the connections.
- Proper Storage: Store your hose in a cool, dry place when not in use, and protect it from extreme temperatures to extend its lifespan.
By identifying and addressing the specific cause of the leak, you can effectively prevent water from escaping at the connection points of your garden hose.
Conclusion
A leaking garden hose can put a damper on your gardening experience, but with the right knowledge, you can easily identify the cause and implement effective solutions. Regular maintenance, proper storage, and choosing the right hose can go a long way in preventing leaks.
By addressing the issue promptly, you can enjoy a hassle-free and efficient gardening routine.
FAQs
Can I repair a garden hose with duct tape?
Duct tape might provide a temporary fix, but it’s not a long-term solution. It’s better to use a hose repair kit for more effective results.
How often should I inspect my garden hose for leaks?
It’s a good idea to inspect your hose at least once a month, especially during the gardening season.
Are all garden hoses the same?
No, garden hoses vary in terms of material, length, and quality. Invest in a hose that suits your needs and is made of durable materials.
Can I leave my garden hose outside during winter?
It’s best to store your hose indoors during winter to prevent freezing and damage.
What should I do if my hose has a major leak that I can’t fix?
If you’re unable to fix a major leak on your own, consider seeking help from a professional plumber or a gardening expert.


