Disconnecting hydraulic hoses is a routine task in maintenance and repair, but it demands careful attention to safety and procedure. Improper disconnection can lead to fluid spills, equipment damage, and even personal injury due to high-pressure fluid release.
This guide provides a comprehensive, step-by-step approach to safely disconnect hydraulic hoses. It emphasizes pressure relief, cleanliness, and proper tool usage, ensuring a smooth and hazard-free process. Whether you’re a seasoned mechanic or a DIY enthusiast, understanding these techniques is essential for maintaining hydraulic systems.
What Are Hydraulic Hoses
-
 SAE 100R14 / Teflon Hose(Inner Corrugated Tube)
 -
 SAE 100R6 | Hydraulic Hose
 -
 SAE 100R15 | Hydraulic Hose
 -
SAE 100R13 | Hydraulic Hose
-
 SAE 100R12 | 4 Wire Spiral Hydraulic Hose
 -
 SAE 100R4 | Hydraulic Suction Hose
 -
 SAE 100R3 Textile Fiber Reinforced Hydraulic Hose
 -
 SAE 100 R14 / Teflon Hose (Inner Smooth Tube)
 -
 SAE 100R17 | Hydraulic Hose
 -
 SAE 100R16 | Hydraulic Hose
 -
SAE 100R2A / DIN EN853 2ST
-
SAE 100R1A/DIN EN853 1ST
-
 SAE 100R2AT / DIN EN853 2SN
 -
 SAE 100R1AT/ DIN EN853 1SN
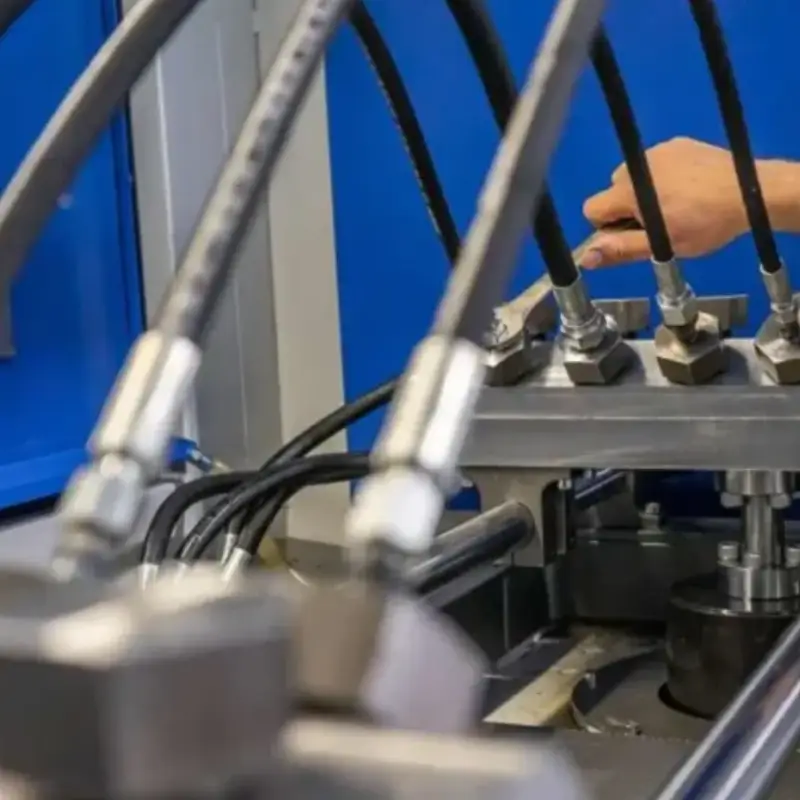
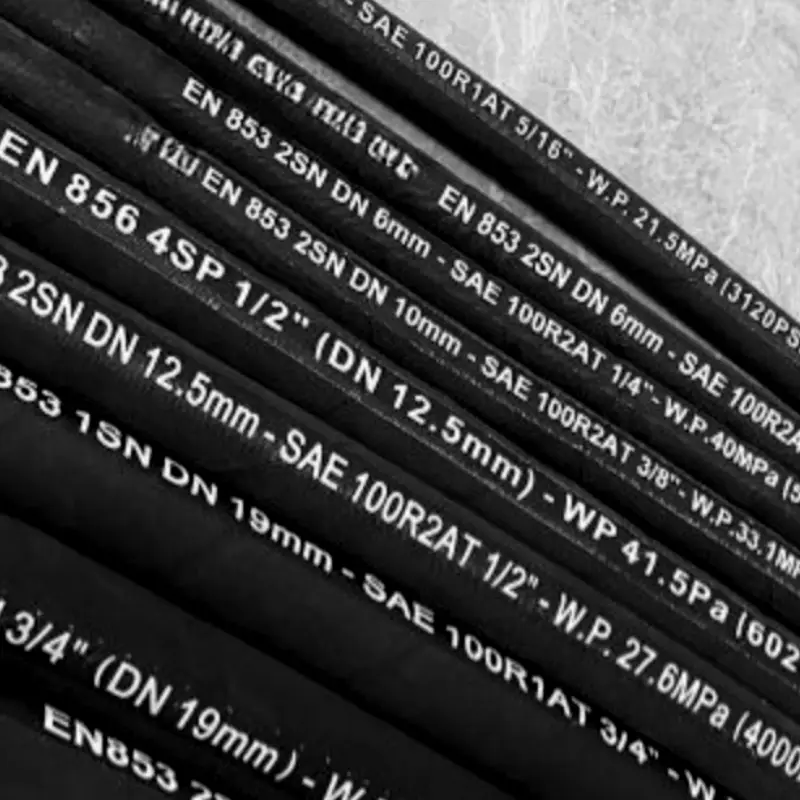
Hydraulic hoses are flexible, high-pressure conduits designed to transport hydraulic fluid between various components within a hydraulic system. These hoses play a critical role in transferring fluid power, enabling machinery to perform heavy-duty tasks across diverse industries. They are engineered to withstand extreme pressures, temperatures, and environmental conditions, ensuring reliable fluid transfer for optimal system performance.
The construction of a hydraulic hose typically involves multiple layers, including an inner tube for fluid conveyance, reinforcement layers for strength, and an outer cover for protection.
The inner tube is made of materials compatible with hydraulic fluids, while the reinforcement layers, often made of braided or spiraled steel wire, provide the necessary pressure resistance. The outer cover shields the reinforcement from abrasion, weather, and chemical exposure, extending the hose’s lifespan and ensuring safe operation.
How to Disconnect Hydraulic Hoses

Disconnecting hydraulic hoses requires precision and safety. This guide outlines the essential steps to properly disconnect hydraulic hoses, minimizing risks of injury and system contamination. Adhering to these steps ensures a clean and efficient process.
Tools for Disconnecting Hydraulic Hoses
Disconnecting hydraulic hoses safely and efficiently requires specific tools. Essential tools include:
- Wrenches: Properly sized open-end, box-end, or flare nut wrenches are crucial for loosening fittings without damage.
- Pressure Gauge: To verify the system is depressurized before disconnection.
- Caps and Plugs: To seal open hose ends and ports, preventing contamination.
- Cleaning Rags/Towels: To wipe down hoses and fittings, preventing debris from entering the system.
- Penetrating Oil: To loosen stubborn or corroded fittings.
- Catch Pan/Container: To collect any residual hydraulic fluid.
Step 1: Relieve System Pressure
Before disconnecting any hydraulic hose, it’s absolutely crucial to relieve the system’s pressure. This prevents dangerous fluid discharge and minimizes the risk of injury. Identify the pressure relief valve or procedure specific to your equipment, as it can vary. Refer to your machine’s manual for precise instructions.
- Ensure the equipment is powered off and secured.
- Locate the pressure relief valve, which may be a lever, button, or screw.
- Activate the valve according to the manufacturer‘s guidelines, allowing pressure to dissipate.
Releasing the pressure is the most critical safety measure. Residual pressure can cause hoses to whip or fittings to eject when disconnected, leading to serious harm. If your machine doesn’t have a dedicated relief valve, you might need to cycle control levers with the engine off to bleed down pressure. Always exercise caution and double-check that the system is fully depressurized before proceeding.
Step 2: Clean the Hydraulic Hose and Fittings
Contamination is a major enemy of hydraulic systems. Before disconnecting, thoroughly clean the area around the fittings. Use a clean rag or shop towel to wipe away dirt, grease, and debris. Pay close attention to the fitting connections, as these are prime areas for contaminant buildup.
- Wipe down the hose surface to remove visible dirt.
- Clean the fitting connections, ensuring no debris is present.
- Consider using a specialized cleaning solution for stubborn grime.
Keeping the connection points clean prevents contaminants from entering the hydraulic system when the hose is disconnected. Even small particles can cause significant damage to pumps, valves, and other components. A clean environment ensures a clean disconnection and a reliable reconnection.
Step 3: Disconnect the Fittings
With the pressure relieved and the fittings clean, you can now proceed with disconnecting the hose. Select the appropriate wrenches for the fitting sizes to avoid damaging the hex. Loosen the fittings carefully, turning counterclockwise. Be prepared for a small amount of residual fluid to escape, even after pressure relief.
- Use properly sized wrenches to prevent rounding the fitting hex.
- Loosen fittings by turning counterclockwise.
- Have a container or rag ready to catch any fluid drips.
Avoid forcing the fittings, as this can damage the threads or sealing surfaces. If a fitting is particularly stubborn, consider using penetrating oil and allowing it to soak for a few minutes. Once loosened, gently separate the fittings, ensuring they are disconnected straight to prevent damage.
Step 4: Cap or Plug the Hose and Ports
Immediately after disconnecting the hose, cap or plug the open ends of the hose and the ports on the equipment. This prevents contaminants from entering the hydraulic system and prevents fluid loss. Use appropriate caps or plugs designed for hydraulic fittings.
- Cap the hose ends with compatible plugs or caps.
- Plug the ports on the equipment to seal them.
- Ensure caps and plugs are clean and free of debris.
Capping and plugging is crucial for maintaining the cleanliness and integrity of your hydraulic system. Contamination can lead to premature wear and tear on components, causing leaks and system failures. By sealing the open connections, you are protecting your system from potential damage.
Step 5: Inspect the Hydraulic Hose and Fittings
After disconnection, take a moment to inspect the hydraulic hose and fittings for any signs of damage or wear. Look for cracks, abrasions, corrosion, or damaged threads. Damaged components should be replaced to prevent future failures.
- Inspect the hose for cracks, abrasions, or cuts.
- Check the fittings for damaged threads or corrosion.
- Replace any damaged components before reconnecting.
Regular inspection of hydraulic hoses and fittings is an essential part of preventative maintenance. Identifying and replacing damaged components before they fail can save you time and money in the long run. A thorough inspection ensures the continued reliability and safety of your hydraulic system.
How to Disconnect Hydraulic Hose From Tractor

Disconnecting hydraulic hoses safely is paramount for preventing injuries and system damage. This guide provides a clear, step-by-step approach to properly disconnect hydraulic hoses, ensuring a clean and efficient process. By following these instructions, you minimize risks and maintain hydraulic system integrity.
Step 1: Depressurize the Hydraulic System
Before any disconnection, ensure the hydraulic system is fully depressurized. Locate and activate the pressure relief valve, or follow the manufacturer‘s specified procedure. This prevents sudden fluid release and potential injury.
Step 2: Clean the Hose and Fittings
Thoroughly clean the hose and fittings around the connection points using a clean rag or shop towel. Removing dirt and debris minimizes the risk of contamination entering the hydraulic system during disconnection.
Step 3: Loosen the Fittings
Using the appropriate wrenches, carefully loosen the hydraulic fittings. Avoid using adjustable wrenches, which can damage the fittings. Turn the fittings counterclockwise to loosen them, and be prepared for a small amount of residual fluid.
Step 4: Disconnect the Hose
Once the fittings are loosened, gently disconnect the hose from the equipment. Avoid pulling or twisting the hose excessively, and ensure a straight and smooth disconnection to prevent damage to the fittings or threads.
Step 5: Cap or Plug the Open Connections
Immediately cap or plug the open ends of the disconnected hose and the corresponding ports on the equipment. This prevents contamination and fluid loss, ensuring the longevity and proper function of the hydraulic system.
How to Disconnect Hydraulic Hose From New Holland Tractor
Disconnecting hydraulic hoses on a New Holland tractor requires careful steps to ensure safety and prevent system contamination. This guide will walk you through the process, ensuring a smooth and efficient disconnection.
Step 1: Park and Secure the Tractor
Park the New Holland tractor on a level surface, engage the parking brake, and lower any attached implements to the ground. Turn off the engine and remove the ignition key. This prevents accidental movement during the disconnection process.
Step 2: Relieve Hydraulic System Pressure
Locate the hydraulic system pressure relief valve or lever, typically found near the hydraulic control levers. Activate it according to the operator’s manual to release any trapped pressure. This is essential for safe disconnection and preventing fluid spray.
Step 3: Clean the Hose and Fittings
Thoroughly clean the hydraulic hose fittings and the surrounding area using a clean cloth or rag. Remove any dirt, grease, or debris to prevent contamination of the hydraulic fluid and system during the disconnection process.
Step 4: Disconnect the Hydraulic Fittings
Using the appropriate wrenches, carefully loosen and disconnect the hydraulic hose fittings. Be prepared for a small amount of hydraulic fluid to drip. Avoid twisting or pulling excessively on the hose to prevent damage to the fittings or threads.
Step 5: Cap or Plug Open Connections
Immediately place clean, compatible caps or plugs on the disconnected hydraulic hose ends and the corresponding ports on the tractor. This step is crucial to prevent contamination and fluid loss, ensuring the longevity and proper function of the hydraulic system.
Why Hydraulic Hose Won’t Disconnect
Hydraulic hoses often resist disconnection due to trapped pressure or physical binding. Even after attempting to release pressure, residual fluid can remain, creating a hydraulic lock. This occurs from:
- Incomplete Pressure Release: The relief valve might not have fully functioned.
- Check Valves: Internal check valves can trap pressure in specific lines.
- Thermal Expansion: Heat-induced fluid expansion can increase pressure.
Physical binding also hinders disconnection. Corrosion, debris, or damage can seize fittings. This is caused by:
- Rust or Corrosion: These can fuse fittings together.
- Dirt and Debris: Particles can lodge in threads, preventing movement.
- Damaged Threads: Cross-threading or impact can deform fitting threads.
Conclusion
Mastering the art of safely disconnecting hydraulic hoses is essential for efficient maintenance and preventing costly downtime. Prioritizing pressure relief, meticulous cleaning, and proper tool usage ensures a smooth and secure disconnection process, minimizing the risk of contamination and injury.
Understanding the nuances of different fitting types and adhering to best practices significantly extends the lifespan of your hydraulic system. By following these guidelines, you can maintain a safe and productive work environment while safeguarding your equipment from potential damage.
For premium-quality hydraulic hoses tailored to your specific needs, explore the extensive range offered by Kingdaflex. Contact Kingdaflex today to secure reliable and durable hydraulic hoses for your operations.