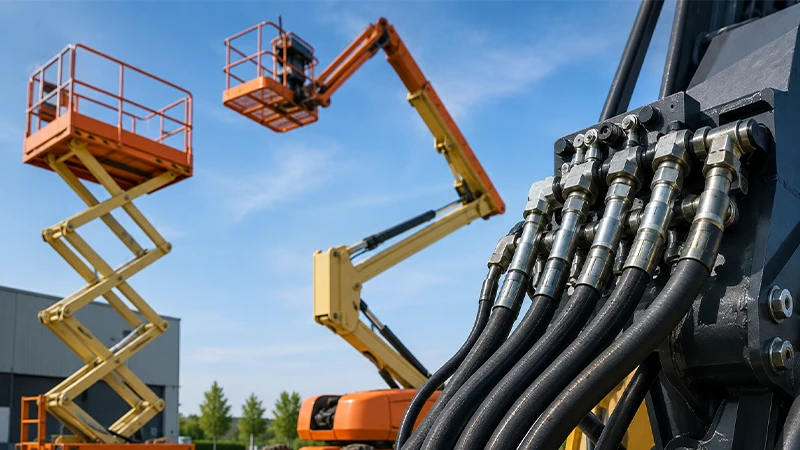
Hydraulic hoses are an important component in hydraulic systems as they transport hydraulic fluid between components. A properly installed hydraulic hose can increase the efficiency and lifespan of the hydraulic system.
Connecting hydraulic hoses is a process that involves attaching hoses to hydraulic hose fittings in a hydraulic system to transport hydraulic fluid between components. The following steps outline the process of connecting hydraulic hoses
In this blog, we will provide a step-by-step guide on how to hook up hydraulic hoses. How to Attach Hydraulic Hose Fittings
How to Hook Up Hydraulic Hoses
Step 1: Prepare Tools
Preparation Before starting the process, make sure you have all the necessary tools and materials ready. You will need:
- Hydraulic hoses
- Hydraulic fittings
- Wrenches
- Rags
- Thread sealing tape
- Hydraulic fluid
Step 2: Identifying the Type of Hose and Fitting


It is important to ensure that the hose and fitting you have match in terms of size, shape, and thread type. This information can be found on the hose and fitting specifications.
It’s basically important for you to identify the type of hydraulic hoses before hooking them to the hydraulic system.
- Pressure rating: The pressure rating is the maximum pressure the hose and fitting can safely handle. Make sure to choose hoses and fittings with a pressure rating that is appropriate for your tractor or skid steer.
- Temperature range: The temperature range is the range of temperatures the hose and fitting can safely operate in. Choose hoses and fittings that can handle the temperature range of your hydraulic fluid.
- Compatibility: The hoses and fittings must be compatible with the type of hydraulic fluid you are using. Different hydraulic fluids have different chemical properties and can cause hoses and fittings to degrade over time.
- Size and diameter: The size and diameter of the hose and fitting must match the size and diameter of the hydraulic pump and control valve. Using the wrong size hose or fitting can cause leaks and damage to the hydraulic system.
- Connector type: There are several types of connectors for hydraulic hoses, including crimp fittings, JIC fittings, ORFS fittings, and more. Make sure to choose the right type of connector that matches the fittings on your tractor or skid steer.
Once you have considered these factors, you can refer to the owner’s manual or contact the manufacturer to determine the correct type of hose and fitting for your tractor or skid steer.
Step 3: Clean the Connection Points
Make sure the connection points on both the hose and the fitting are clean and free of debris. Use a rag to remove any dirt, rust, or other materials that may interfere with the connection.
Cleaning the hydraulic hose connection points is an important step in ensuring a tight and leak-free connection between the hoses and the fittings. Dirt, debris, and rust can accumulate on the fittings over time and prevent a proper seal between the hoses and the fittings.
To clean the connection points, you should first remove the old hoses, if you are replacing them. Then, use a clean rag or a wire brush to remove any dirt, debris, or rust from the fittings. Clean the end of the hoses with a clean rag to remove any dirt, debris, or residue that may have accumulated on the hoses.
Inspect the fittings for any signs of damage, such as cracks or deformities. If the fittings are damaged, replace them before installing the new hoses. It’s important to ensure that the fittings are in good condition to prevent leaks in the hydraulic system.
Step 4: Apply Thread Sealing Tape
Wrap the threads of the fitting with thread-sealing tape. This will help to prevent any leaks and ensure a tight seal. Thread sealing tape, also known as PTFE tape or Teflon tape, is a thin, white tape used to seal the threads of fittings in plumbing and hydraulic systems. The tape is made of a flexible material that can conform to the threads, filling in any gaps or imperfections and preventing leaks.
Step 5: Attach the Fitting to the Hose
Screw the fitting onto the hose using a wrench. Make sure the fitting is tightly secured, but be careful not to over-tighten and damage the hose or the fitting.
Step 6: Check for Hydraulic Hose Leaks
Once the fitting has been attached, check for hydraulic hose leaks by applying a small amount of hydraulic fluid to the connection point. If there are no leaks, proceed to the next step. If there are leaks, remove the fitting and check for any damaged threads or incorrect attachments.
Step 7: Repeat the Operation
Repeat Steps 3-6 for Additional Hoses and Fittings Repeat the steps for all the hoses and fittings in your hydraulic system.
Step 8: Fill the Hydraulic System with Fluid
Finally, fill the hydraulic system with a hydraulic fluid according to the manufacturer’s instructions. Make sure the fluid level is correct and check for any leaks.
How to Hook Up Hydraulic Hoses on Skid Steer?

To hook up hydraulic hoses on a skid steer, you need to follow these steps:
- Locate the hydraulic pump and control valve: The hydraulic pump is typically located on the rear of the skid steer and the control valve is located in the operator’s station.
- Identify the hydraulic hose connections: The hydraulic hoses connect the pump to the control valve and the control valve to the hydraulic motors or cylinders.
- Prepare the hoses: Clean the hose fittings and the end of the hoses before connecting them to ensure a tight and leak-free connection.
- Connect the hoses: Attach one end of the hose to the pump and the other end to the control valve. Repeat the process for all the hoses.
- Secure the hoses: Use hose clamps or crimp fittings to secure the hoses in place and prevent them from coming loose.
- Check for leaks: Turn on the skid steer and run it for a few minutes to check for leaks. If there are any leaks, tighten the fittings or replace the hoses.
- Test the system: Test the hydraulic system to make sure it’s working properly. Check the flow of the hydraulic fluid, the pressure, and the operation of the hydraulic motors or cylinders.
It’s important to follow the manufacturer’s instructions and use the correct type of hoses, fittings, and clamps when hooking up hydraulic hoses on a skid steer. Improper installation can cause leaks, damage to the hoses or the hydraulic system, and even serious injury.
How to Hook Up Hydraulic Hoses on a Tractor?

No matter what machinery, you can follow the same way to hook up the hydraulic hose, such as skid steer, tractor, john deere, etc.
- Identify the type of hose and fitting: Determine the type of hydraulic hose and fitting that is compatible with your tractor and the hydraulic fluid you are using. Make sure to choose hoses and fittings with the appropriate pressure rating and temperature range.
- Clean the fittings: Clean the fittings and the end of the hoses to remove any dirt, debris, or residue that may have accumulated. This will help ensure a tight and leak-free connection.
- Apply thread sealing tape: Wrap the thread sealing tape around the threads of the fittings to prevent leaks. Make sure to wrap the tape in the correct direction and apply enough tape to cover the threads completely.
- Connect the fittings: Connect the fittings to the hoses by inserting the fitting into the end of the hose and tightening it with a wrench. Make sure to tighten the fittings firmly, but not so tight that you damage the hoses or fittings.
- Check for leaks: Turn on the tractor’s hydraulic system and inspect the connections for leaks. If you find any leaks, tighten the fittings or check for damage to the hoses or fittings.
How to Hook Up Hydraulic Hoses on John Deere?

To hook up hydraulic hoses on a John Deere tractor, you’ll need to follow a series of steps. Please note that the exact process may vary depending on the specific model and hydraulic system configuration of your John Deere tractor. The following instructions provide a general guideline:
- Familiarize yourself with the hydraulic system: Before you begin, it’s essential to understand the different hydraulic components and their functions. Locate the hydraulic ports and fittings on your John Deere tractor. Typically, these ports are color-coded, with the hydraulic lines and fittings matching the same color.
- Gather the necessary tools and equipment: You’ll need a set of appropriate hydraulic hoses that match the specifications of your tractor’s hydraulic system. Additionally, have a clean cloth or rag on hand to wipe any dirt or debris from the connections.
- Identify the input and output ports: Determine which ports on your tractor are the input and output ports for the hydraulic system. The input port is where hydraulic fluid enters the system, and the output port is where the fluid exits.
- Prepare the hydraulic hoses: Ensure that the hydraulic hoses you are using are the correct length and have the appropriate fittings. If needed, attach the fittings to the ends of the hoses according to the manufacturer’s instructions. Be sure to tighten the fittings securely, but avoid over-tightening to prevent damage.
- Connect the hydraulic hoses: Start by identifying the input port on your tractor. Take the hydraulic hose that corresponds to the input port and connect one end of it to the port. Ensure that the connection is tight and secure.
- Connect the other end of the hydraulic hose: Identify the output port on your tractor, and connect the other end of the hydraulic hose to that port. Again, make sure the connection is tight and secure.
- Repeat for additional hydraulic hoses: If you have more than one hydraulic hose to connect, repeat the process by connecting the appropriate hoses to their corresponding ports. Ensure that each connection is properly tightened.
- Check for leaks: Once all the hydraulic hoses are connected, visually inspect all the connections for any signs of leakage. Additionally, you can run the hydraulic system briefly and check for any fluid leaks. If you notice any leaks, tighten the connections as necessary or replace any faulty fittings or hoses.
It’s worth mentioning that it’s always recommended to consult the specific operator’s manual for your John Deere tractor model to ensure you are following the correct procedures and specifications for your particular machine.
How to Hook Up Hydraulic Hoses on Bobcat
Here’s a guide on how to hook up hydraulic hoses on a Bobcat:
Safety Precautions:
- Turn off the engine and relieve pressure. Lower the implement to the ground and shut off the engine. Then, use the relief valve on the hydraulic control lever to release pressure from the hoses.
- Wear safety glasses and gloves. Protect your eyes and hands from potential leaks or debris.
Connecting the Hoses:
- Identify the matching couplers. Hydraulic couplers are designed to fit together specifically. Ensure the male and female couplers on the hose and the Bobcat’s hydraulic ports match.
- Clean the connection points. Use a clean cloth to remove any dirt or debris from the couplers and ports. This will help ensure a secure connection.
- Connect the hose to the port. Align the male coupler with the female port and push them together firmly. You should hear a click when they connect properly.
- Check for leaks. After connecting the hose, inspect the connection for any leaks. If you see any leaks, disconnect the hose and clean the connection points before reconnecting.
- Repeat for all hoses. Connect all the remaining hydraulic hoses to their corresponding ports on the Bobcat.
Additional Tips:
- If you’re having trouble connecting the hoses, try using a lubricant like hydraulic fluid on the couplers.
- If the hoses are difficult to reach, you may need to use a wrench or socket to turn the couplers.
- Always refer to the specific instructions in your Bobcat’s owner’s manual for any additional steps or precautions.
FAQ
How to connect a hydraulic hose?
Here’s a comprehensive guide on how to connect hydraulic hoses:
Safety Precautions:
Turn off the engine and relieve pressure. If working on a machine with a hydraulic system, always shut down the engine and relieve pressure from the hoses before disconnecting or connecting them. This helps prevent injuries and damage to the system.
Wear safety glasses and gloves. Hydraulic fluid can be under high pressure and can cause serious injuries if it comes into contact with your eyes or skin. Safety glasses and gloves provide protection.
Connecting the Hoses:
Identify the matching couplers. Hydraulic couplers are designed to fit together specifically. Ensure the male and female couplers on the hose and the equipment’s port match.
Clean the connection points. Use a clean cloth or degreaser to remove any dirt or debris from the couplers and ports. This will help ensure a secure connection.
Connect the hose to the port. Align the male coupler with the female port and push them together firmly. You should hear a click when they connect properly.
Check for leaks. After connecting the hose, inspect the connection for any leaks. If you see any leaks, disconnect the hose and clean the connection points before reconnecting.
Repeat for all hoses. Connect all the remaining hydraulic hoses to their corresponding ports on the equipment.
Additional Tips:
If you’re having trouble connecting the hoses, try using a lubricant like hydraulic fluid on the couplers.
If the hoses are difficult to reach, you may need to use a wrench or socket to turn the couplers.
Always refer to the specific instructions in the equipment’s owner’s manual for any additional steps or precautions.
How do you join hydraulic hoses together?
Here’s a comprehensive guide on how to join hydraulic hoses:
Safety Precautions:
Turn off the engine and relieve pressure. If working on a machine with a hydraulic system, always shut down the engine and relieve pressure from the hoses before disconnecting or connecting them. This helps prevent injuries and damage to the system.
Wear safety glasses and gloves. Hydraulic fluid can be under high pressure and can cause serious injuries if it comes into contact with your eyes or skin. Safety glasses and gloves provide protection.
Connecting the Hoses:
Identify the matching couplers. Hydraulic couplers are designed to fit together specifically. Ensure the male and female couplers on the hose and the equipment’s port match.
Clean the connection points. Use a clean cloth or degreaser to remove any dirt or debris from the couplers and ports. This will help ensure a secure connection.
Connect the hose to the port. Align the male coupler with the female port and push them together firmly. You should hear a click when they connect properly.
Check for leaks. After connecting the hose, inspect the connection for any leaks. If you see any leaks, disconnect the hose and clean the connection points before reconnecting.
Repeat for all hoses. Connect all the remaining hydraulic hoses to their corresponding ports on the equipment.
Why Won’t My Hydraulic Hoses Connect?
There could be several reasons why hydraulic hoses won’t connect properly. Here are a few common issues and their potential causes:
- Mismatched fittings: Hydraulic hoses and fittings come in various sizes, types, and thread configurations. It is crucial to ensure that the hydraulic hose fittings you are trying to connect are compatible and properly matched. Verify that the fittings have the correct thread size, pitch, and type (such as NPT, JIC, ORB, etc.). Using mismatched fittings can result in leaks or improper connections.
- Contamination or damage: Hydraulic hoses and fittings should be free from dirt, debris, or damage. Even a small particle or debris can prevent a proper connection. Inspect the hose ends and fittings for any signs of contamination, such as dirt, rust, or damaged threads. Clean or replace the components as necessary.
- Improper assembly: Proper hydraulic hose assembly is crucial for a secure hydraulic hose connection. Make sure that the hose has been cut squarely and cleanly, without any frayed or uneven edges. Ensure that the hose is inserted fully into the fitting until it reaches the end of the fitting’s collar or shoulder. Use the correct tools and follow the manufacturer’s instructions for tightening the fittings to the recommended torque value.
- Seal failure: Hydraulic connections rely on seals to prevent leaks. If the seals are damaged, worn out, or not installed correctly, it can result in poor connections. Inspect the seals within the fittings and replace them if necessary. Ensure that the seals are properly lubricated with a compatible hydraulic fluid or sealant.
- High pressure or residual pressure: Hydraulic systems can experience high pressure or residual pressure even when the system is shut off. Attempting to connect or disconnect hoses under pressure can be difficult or even dangerous. Make sure to relieve any pressure in the hydraulic system before attempting to connect or disconnect hoses.
- Incorrect hose type or rating: Hydraulic systems operate at different pressures and temperatures, and it is essential to use hoses that are suitable for the specific application. Ensure that the hydraulic hose you are using has the appropriate pressure rating, temperature range, and compatibility with the fluid being used in the system.
If you are experiencing difficulty in connecting hydraulic hoses, it is recommended to consult with a professional or experienced hydraulic technician. They can inspect the components, identify the specific issue, and provide guidance on how to resolve the problem safely and effectively.
Conclusion
In conclusion, hooking up hydraulic hoses is a straightforward process as long as you have the right tools and materials, and follow the steps correctly. Remember to always follow the manufacturer’s instructions and safety precautions when working with hydraulic systems.