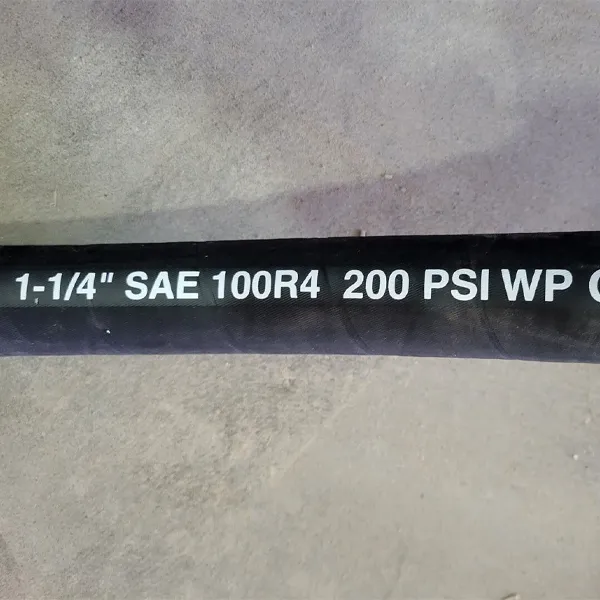
Hydraulic systems are the backbone of countless industries, from construction and agriculture to manufacturing and transportation. At the heart of these powerful systems are hydraulic hose assemblies, the critical conduits that transmit fluid power. A single hydraulic hose failure can bring an entire operation to a standstill, leading to costly downtime and potential safety hazards. This guide is your definitive resource for understanding, selecting, and maintaining these vital components.
Navigating the world of hydraulic hoses can be complex, with a wide range of materials, fittings, and assembly techniques. Whether you’re a seasoned professional or just starting out, this guide provides the knowledge you need to ensure reliable and efficient performance. We will walk you through the essential steps, from choosing the right hose to mastering proper assembly and maintenance practices for 2025 and beyond.
What Is a Hydraulic Hose Assembly?
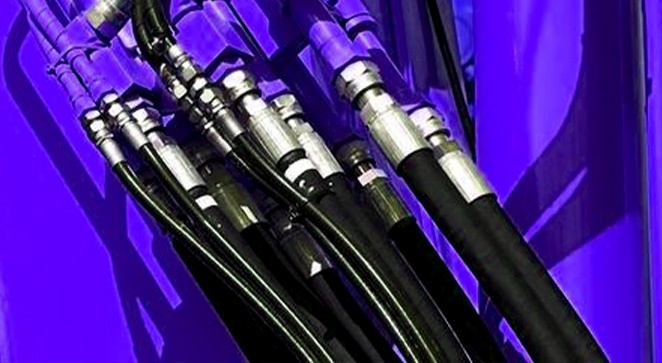
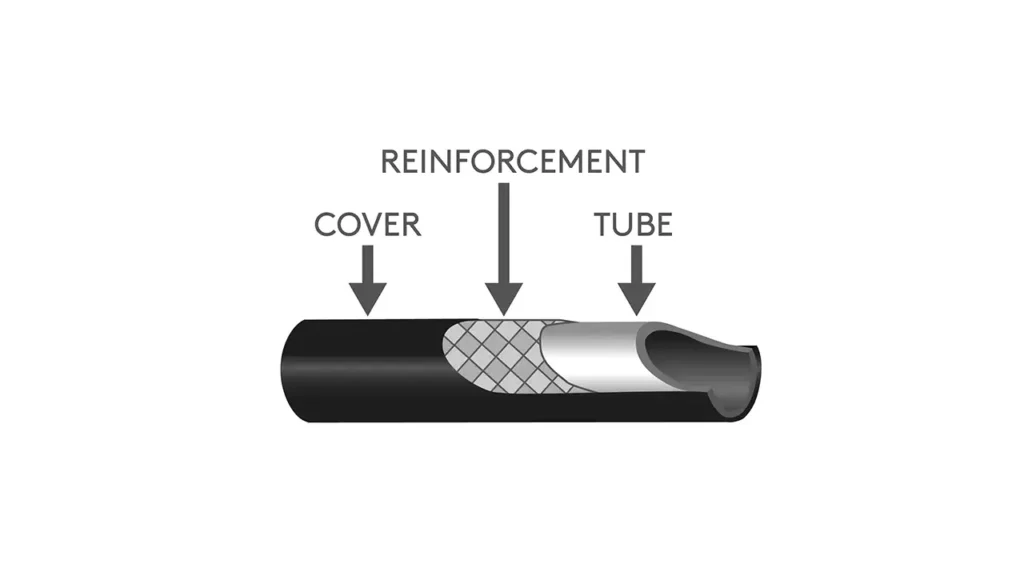
A hydraulic hose assembly is a complete unit designed to transmit fluid power within a hydraulic system. It consists of a hydraulic hose, which is a flexible conduit made of an inner tube, reinforcement layers, and an outer cover, along with fittings securely attached to each end.
These hydraulic fittings, which may include ferrules, adapters, or clamps, create leak-proof connections to other components like pumps, cylinders, and valves. The assembly is engineered to withstand the high pressures, temperatures, and specific fluid types required for its application, making it a critical component for the safe and efficient operation of machinery in various industries.
What Are the Parts of a Hydraulic Hose?
What are the layers that make up a hydraulic hose assembly?
Before the hydraulic hose assemblies, it is necessary for you to know the hydraulic hose structure. Here are 3 components for a hydraulic hose.
- Tube: The inner tube of the hydraulic hose is the basically important part, and we use the top-rated synthetic rubber to create the hydraulic hose tube during the hydraulic hose manufacturing process. The quality of the inner tube can determine the whole hydraulic hose, because the inner tube is used to convey the hydraulic fluids, and contact with the fluids directly. So the inner tube must be oil-resistant, corrosion-resistant.
- Reinforcement: Regularly, the reinforcement of the hydraulic hose is made of stainless steel wire, and there are two types of hydraulic hoses, spiral hydraulic hose, and braided hydraulic hose. And you can get the differences between spiral vs braided hydraulic hoses. (PS: The reinforcement can be designed with different layers, including 1 wire hydraulic hose, 2 wire hydraulic hose, 4 hydraulic hose, and 6 hydraulic hose)
- Cover: The hydraulic hose outer cover is also made of synthetic rubber materials, used to protect the inside hose body, and here you can also use the hydraulic hose protector, including a spiral hose guard, and fire sleeve for hydraulic hose protection, to expand its service life.
Hydraulic Hose Assembly
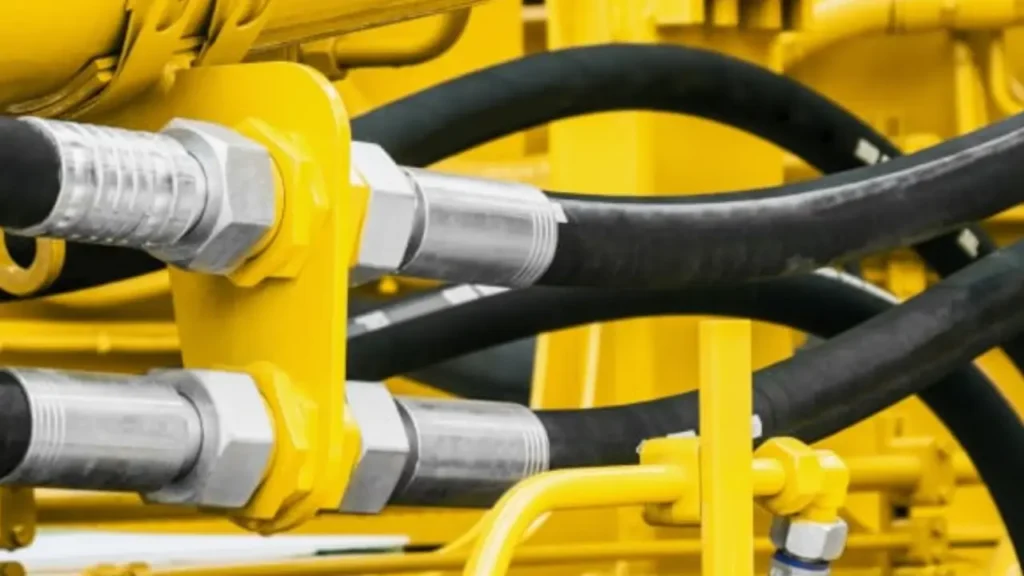
Mastering hydraulic hose assembly is essential for creating safe and efficient fluid power systems. From a simple replacement to a complex custom build, following a meticulous step-by-step process ensures a reliable, leak-free connection. This guide walks you through the seven critical stages to build a perfect hydraulic hose assembly.
Step 1: Gather Tools and Materials
Before you start, you need to have all the right tools and components ready. This includes the hydraulic hose itself, the correct end fittings, a hose cutting saw, and a crimping machine with the right dies. Having everything prepared ensures the process is efficient and accurate, reducing the chance of mistakes.
Having the correct components is critical for safety and performance. Using fittings and hoses that are not compatible can lead to assembly failure, leaks, or even a system blowout under high pressure. Verifying that all parts match the specifications of your hydraulic system is a non-negotiable step before you begin.
Step 2: Measure and Cut the Hose
The first physical action is to measure and cut the hydraulic hose to the precise length you need. It’s important to account for the “cut-off factor,” which is the length the fittings add to the overall assembly. A specialized hose saw should be used to make a clean, square cut that prevents the reinforcement layers from unraveling.
A clean cut is crucial because a jagged or uneven cut can compromise the integrity of the finished assembly. It can also make it difficult to properly insert the fitting or cause internal debris that will contaminate the hydraulic fluid. Precision at this stage saves a lot of headaches later on.
Step 3: Skive the Hydraulic Hose
Skiving is the process of carefully removing the outer cover of the hose to expose the reinforcement layer underneath. This is a vital step for many types of fittings that require direct contact with the reinforcement for a secure grip. The amount of skiving needed is specified by the fitting manufacturer and must be precise.
If you don’t skive the hose properly, the fitting will not seat correctly, which can lead to a weak connection that leaks or fails under pressure. Skiving too much can also weaken the assembly, so using a skiving tool with the correct setting is essential to ensure a reliable and safe connection.
Step 4: Clean the Hydraulic Hose
After cutting and skiving, the hose must be thoroughly cleaned. These processes create small pieces of rubber and metal that can contaminate your hydraulic system. Contamination is a leading cause of premature component failure, as it can block filters, damage pumps, and wear down seals.
Specialized cleaning methods, such as shooting a foam projectile through the hose with compressed air, are used to remove all internal debris. This final cleaning step before assembly ensures that the hydraulic fluid remains clean and that the entire system operates smoothly and efficiently without any risk from internal contaminants.
Step 5: Push on the Fittings
With the hose prepped, the next step is to push the fittings onto each end. You should mark the hose to ensure the fitting is pushed on to the correct depth, as specified by the manufacturer. Lubricating the hose can make this process easier and ensures the fitting is fully seated and ready for crimping.
A fully seated fitting is critical for a secure and leak-proof crimp. If the fitting isn’t pushed on all the way, the crimp will not be applied to the correct part of the fitting, and the connection will be weak and unreliable. Taking the time to seat the fittings properly is a key part of building a safe assembly.
Step 6: Crimp the Fittings
This is the core mechanical step of the assembly process. The hose and its fittings are placed into a crimping machine, which applies a precise amount of pressure to permanently join the components together. The crimping die and machine settings must match the specific hose and fitting combination.
The final crimp diameter is a crucial measurement. It must be within the manufacturer’s specified tolerance to ensure a permanent and reliable connection that can handle the operating pressure of the hydraulic system. An improper crimp can result in a catastrophic failure, which is why this step requires precision.
Step 7: Verify Crimp and Clean Assembly
After crimping, it’s vital to inspect the assembly to verify that the crimp diameter is correct. You should use a caliper to measure the crimped area to ensure it meets the required specifications. This is a final quality control check to confirm the assembly will be strong enough to withstand high pressure.
Finally, the completed hose assembly should be cleaned and capped. Cleaning any residual oil or dirt from the outside of the assembly ensures it’s ready for installation. Capping the ends prevents any new contaminants from entering the hose before it’s connected to the hydraulic system.
Which Layer Provides a Hydraulic Hose With Strength?
The reinforcement layer provides a hydraulic hose with its strength. This layer, situated between the inner tube and the outer cover, is the main component that allows the hose to withstand the high pressures of a hydraulic system.
It is typically made from braided or spiraled materials, such as high-tensile steel wire or synthetic fibers. The type and number of reinforcement layers determine the hose’s pressure rating, with multiple layers of spiral-wound steel wire offering the highest strength for extreme-pressure applications.
Hydraulic Hose Assembly Length
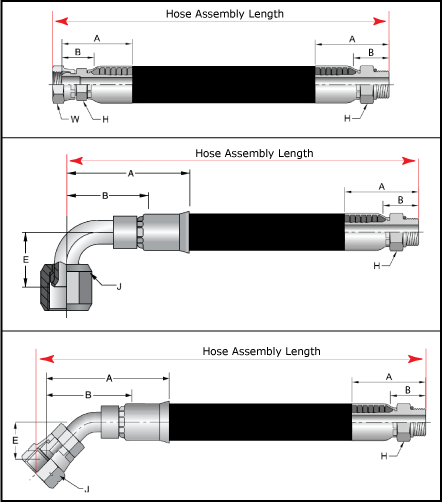
The length of a hydraulic hose assembly is a critical measurement that dictates how the hose will fit and function within a hydraulic system. It is defined as the overall distance from one end of the completed assembly to the other, including both the hose and the attached fittings. Accurately determining this length is crucial to prevent common problems such as kinking, abrasion from rubbing against other components, or a lack of slack that could cause the hose to be pulled out of its fittings under pressure.
- Straight Fittings: The total length is measured from the very end of one fitting to the very end of the other, following a straight line.
- Bent Fittings (90° or 45°): When one or both fittings have a bend, the measurement is taken from the end of the straight fitting to the center of the bend on the angled fitting, as shown by the ‘E’ dimension in the image.
- Total Length: The assembly’s final length is the sum of the required hose length plus the specific “cut-off” lengths of the fittings, which varies by fitting type and manufacturer.
Hydraulic Hose Assembly Tips
Achieving a reliable hydraulic hose assembly goes beyond simply connecting the parts; it requires careful attention to detail to ensure safety and longevity. From the initial selection of components to the final installation, adhering to best practices can prevent common failures like leaks, bursts, and abrasion. By following these tips, you can significantly extend the lifespan of your hydraulic hoses and maintain the efficiency of your system.
- Match Components: Always use a “matched system” where the hose and fittings are from the same manufacturer and are designed to work together. Mixing brands can lead to crimp failure and leaks.
- Prevent Twisting: Never twist a hydraulic hose during installation. A single twist can reduce its service life by over 70%. Use the layline (the line of text on the hose) as a guide to ensure the hose is installed without any twisting.
- Mind the Bend Radius: Avoid bending the hose tighter than the minimum bend radius specified by the manufacturer. Exceeding this limit puts immense stress on the reinforcement layers and can lead to a premature rupture. Use angled fittings to navigate tight corners if necessary.
- Allow for Length Changes: Hoses can shorten or lengthen slightly under pressure. Ensure there is enough slack in the assembly to accommodate this movement, which prevents the hose from pulling out of its fittings or experiencing excessive tension.
- Protect from Abrasion: Properly route the hose to prevent it from rubbing against other components or surfaces. Use clamps, protective sleeves, or spiral wraps to shield the hose in areas where contact is unavoidable.
Clean Hydraulic Hose Assemblies
After the assembly process is complete, cleaning the hydraulic hose is a critical final step to prevent system contamination. Manufacturing and assembly can leave behind debris such as metal shavings, rubber particles, and dirt that, if not removed, can enter the hydraulic system. This contamination can cause premature wear on expensive components like pumps, valves, and cylinders, leading to system inefficiency and failure.
- Flushing: Use a specialized flushing gun or a low-pressure fluid to push a cleaning fluid through the hose. This method is effective for removing loose particles and residue.
- Projectile Cleaning: The most common and effective method involves using a hose cleaning gun to shoot a foam or rubber projectile through the hose with compressed air. The projectile’s tight fit scrapes the interior walls, forcing out all contaminants.
- Capping: Immediately after cleaning, cap both ends of the hose with protective caps. This prevents any new contaminants from entering the assembly during storage or transport before installation.
Replacing Hydraulic Hose Assemblies
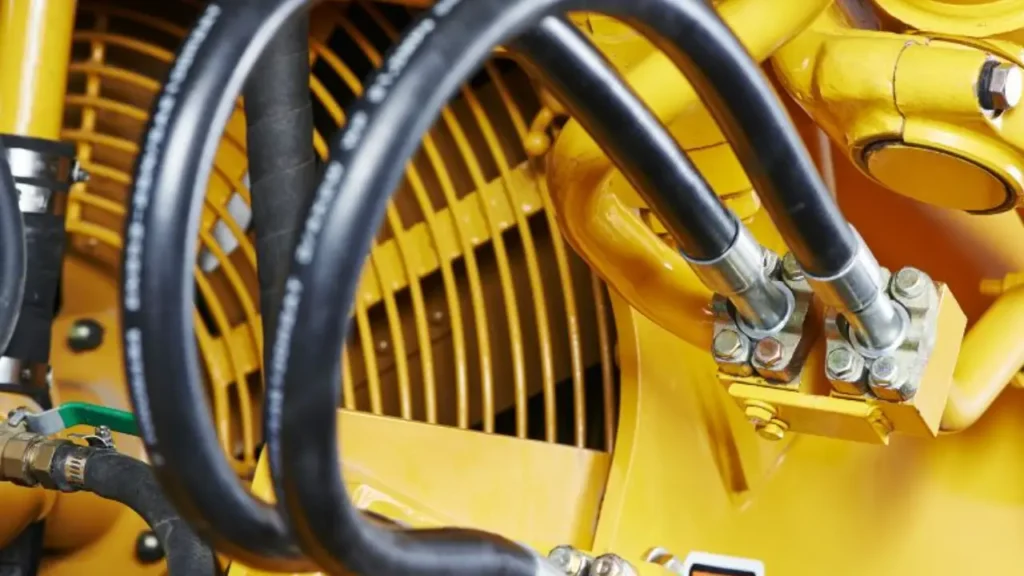
When it’s time to replace a hydraulic hose, you’ll need to follow a careful process to ensure the new assembly fits and functions correctly. A replacement is necessary when a hose shows signs of wear, damage, or simply reaches the end of its service life. The main steps involve safely removing the old hose and then correctly installing the new one.
Removing the Old Hydraulic Hose
- Depressurize the System: Before you do anything, you must relieve all pressure from the hydraulic system. This is a critical safety step to prevent the high-pressure fluid from causing serious injury.
- Drain the Fluid: Place a catch pan under the hose to collect any residual fluid that will escape when the fittings are loosened.
- Disconnect the Fittings: Use the correct wrenches to unscrew the fittings from their ports. Be mindful not to damage the threads on the hose’s fittings or the equipment’s ports.
- Note the Routing: As you remove the old hose, pay close attention to how it was routed. Note any clamps or protective sleeves used. This will help you install the new hose correctly to avoid future abrasion or kinking.
Installing the New Hydraulic Hose
- Verify the New Assembly: Before installation, double-check that the new hose assembly is the correct length and has the right fittings. A common mistake is not accounting for the length of the new fittings, so measure carefully.
- Clean the Connections: Clean the ports on your equipment to ensure no dirt or debris is present. Contamination is a leading cause of hydraulic system failure.
- Route the New Hose: Install the new hose following the exact same path as the old one. Be sure not to twist the hose as you tighten the fittings. Use the hose’s layline (the line of text) as a guide to ensure it’s not twisted.
- Tighten the Fittings: Screw the new fittings into the ports by hand first to prevent cross-threading. Then, use wrenches to tighten them to the specified torque. Over-tightening can damage the fittings and seals, while under-tightening can cause leaks.
- Test the System: After installation, slowly and carefully re-pressurize the system and check for any leaks around the fittings. Run the machine for a few minutes and re-check for leaks to ensure a successful replacement.
Hydraulic Hose Assembling Safety Guidelines
High-pressure hydraulic systems pose a significant safety risk, and proper hydraulic hose assembly is paramount to preventing catastrophic failures and severe injuries. A single mistake during the process, from failing to de-pressurize the system to using incorrect components, can lead to a hose burst or a high-pressure fluid injection injury, which is a medical emergency. Therefore, following strict safety guidelines and using the correct procedures is not an option—it is a mandatory practice for anyone working with hydraulic systems.
- Depressurize the System: Always ensure the hydraulic system is fully depressurized before disconnecting any hoses. High-pressure fluid can be forcefully ejected, causing severe injuries.
- Wear Personal Protective Equipment (PPE): Safety glasses or a face shield, heavy-duty gloves, and long-sleeved clothing are essential to protect against fluid splashes, hot surfaces, and sharp metal edges.
- Use Proper Tools: Always use the correct, well-maintained tools for cutting, skiving, and crimping. Using makeshift or incorrect tools can damage components and lead to assembly failure.
- Inspect Components: Before assembly, thoroughly inspect the hose and fittings for any defects or damage. A single flaw can lead to a burst under pressure.
- Avoid Fluid Injection: Never check for leaks with your hands or any body part. Use a piece of cardboard or paper to check for pinhole leaks, as high-pressure fluid can pierce the skin and cause serious internal tissue damage.
- Follow Manufacturer Specifications: Adhere strictly to the manufacturer’s guidelines for crimp diameter, torque settings, and component compatibility. Never mix components from different manufacturers unless specified.
Conclusion
Mastering the art of hydraulic hose assembly and maintenance is crucial for ensuring the longevity and efficiency of your hydraulic systems. By understanding the key principles outlined in this guide—from proper hose selection and crimping techniques to routine inspections—you can significantly reduce the risk of unexpected failures and costly downtime. Your investment in knowledge will translate directly into improved operational reliability and safety.
The insights and best practices shared here are designed to empower you with the expertise needed to tackle any hydraulic challenge. Implementing these strategies will not only extend the life of your equipment but also enhance overall productivity. Remember, a well-maintained hydraulic system is a high-performing one, and it all starts with the quality of your hose assemblies.
For all your hydraulic hose needs, trust a reliable supplier to provide top-quality products that meet the highest standards. Kingdaflex offers a wide range of wholesale hydraulic hoses designed for durability and performance, ensuring you have the right components to build and maintain robust hydraulic systems. Partner with us for quality you can depend on.


